Everything You Need To Know Before You Get Hair Extensions
- Posted on 27 January, 2022
- Hot Topic
- By HB Team

Source: Jon Kopaloff/FilmMagic/Getty Images
If you’ve ever drooled over celebrities full AF, never-ending locks, chances are you’re getting hair envy over fake hair – well, hair extensions. They’re THE secret weapon in every hair stylist’s kit because you can transform a bob into mermaid hair in minutes. And let’s be real, the more hair on your head, the more fun you have to play around with different styles. So, to get all the deets on everything to do with hair extensions, we spoke to founder and SHE-O of one of our fav hair brands, Leyla Milani, for how to get the best, most natural hair transformation. Don’t worry, even if you’re a complete newbie to the world of hair extensions, after reading this, you’ll be able to have a hair as full as Gretchen Weeners, but your only secret will be your clip-ins! Here’s everything you need to know.
There Are Permanent And Non-Permanent Extensions
Okay, so first things first, there are SO many different types of hair extensions to choose from. The right ones for you will depend on your hair, the final look you’re trying to achieve, and of course, your budget (they can get pretty pricey). But the most obvious difference is that some are permanent and have to be fitted by a stylist, whereas others you can style and fit yourself whenever the mood hits. Here’s a quick breakdown of each type of extension:
Permanent extensions
Weave: A hair stylist will tightly braid your hair in small cornrow strips, and then wefts (small pieces of hair) are woven into your hair using thread or they can be sewn onto a hair net, which is then glued to your scalp. Weaves usually take three hours to be fitted, and can cost anywhere between $200-$400, and should last up to four weeks.

via Giphy
Tapes: Leyla explained that tape-ins “attach to thick sections of your hair with double-sided tape and adhere to small sections of your hair close to the scalp.” Tape extensions need to be fitted by a stylist, and stylists suggest getting them refitted (the tape will be moved up nearer to the scalp) every eight weeks and replaced every six months. The first fitting can cost anywhere between $200-$600, and will take around three hours, depending on how many tape extensions you buy – the more pieces you buy, the fuller your mane will look but the longer the appointment will be.
Bonds: Bonds are similar to tape extensions, but instead of small strips of hair, they’re small circular strands that bond to your hair with keratin attachments. New bonds will typically last six months and will cost between $300-600 and they’ll need to be tightened every six to eight weeks. Depending on how many bonds you get fitted, the appointment can take anywhere between three to five hours, so make sure you have full battery on your phone!
Non-Permanent Extensions
Clip-ins: Leyla’s go-to extensions are clips-ins, as you can “not only add length and volume with clip-ins but you can add color by selecting a lighter color than your own hair to get that ombre/balayage look, which is perfect for summer.” The lifespan for clip-in extensions depends on how well you maintain them, but they should last you, at the very least, six months. Leyla told us that typically, hair extensions (when cared for properly) should last “way beyond one year.” Depending on the quality and the weight of the hair, their price point can range from $80-$200.
You can get fake or real hair:
Hair extensions are either made from human hair or synthetic hair. Leyla Milani would always suggest buying real human hair because “as much as synthetic hair has come a long way, the real deal will always look the most natural.” She added that “being able to color, cut, and heat-style your hair extensions is super important” which is something you can’t do with synthetic hair as you’ll damage and discolor it – you can even melt the hair if you add heat – eek! And we totally agree with Leyla, “you don’t want to be limited – after all, you purchased extensions so that you can have the most fabulous hair of your life.” Preach.
How To Fit Clip-in Extensions Like A Pro
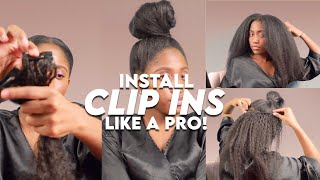
The name “clip-in” makes it sound super easy, but fitting your extensions can get pretty complicated, and there’s nothing worse than visible clips messing up your do. But don’t worry if there’s anyone who knows how to do it, it’s Leyla. Leyla told us that you “want to place the widest weft (piece) on the widest part of your head, which is typically from ear to ear, but everyone’s head shape and hair type are different.” Generally, the three biggest wefts clip onto the back of your head and the four smaller wefts clip on to the side of your head. Once you’ve familiarized yourself with the clips and have figured out your head shape, it should only take minutes to clip-in.
Pro Tip: If you have thin hair, we suggest starting low, and then work your way up; this way, you have a good amount of hair left at the top of your head to hide your extensions. If you have thick hair, you can start a little higher.
Top Tips For Easy Application
- A good tease comb and some hair grips will make your clip-in process as easy and stress-free as possible. When applying the clip-ins, Leyla told us that you need to “section your hair, so make sure you get some hair clips to be your extra set of hands.”
- Leyla told us that “wherever you’re attaching the clip too, you should backcomb the hair, so the clips have a “platform” to grasp onto securely. This is especially essential for those with fine/silky hair. Although if you don’t like the idea of “teasing” your hair, you can apply hairspray or a volumizing powder, which will add thickness and texture for your clips to sink into.”
How you care for your extensions is EVERYTHING…

Source: Matt Winkelmeyer/Getty Images
Leyla explained to us that the bottom line is “the better you take care of your extensions, the longer their lifespan will be.” And since you’re spending your hard-earned dollar on them, we’re sure you want to keep them in the best shape possible, so here’s how:
Wash them weekly: We recommend that you use a gentle shampoo & conditioner when washing your extensions and use a brush that won’t yank out the hair, especially when wet, like the Leyla Milani MIRACLE BRUSH, $25. The rule that Leyla lives by is “if you can seamlessly brush through them and they still have bounce, no need for a wash.” Also, when you do wash them, only apply conditioners and serums from mid-length to the ends as otherwise, the root would get too oily, and they’ll slip out of your hair.
Do a weekly hair mask: Use a restorative mask that replenishes and adds moisture back into the hair shaft. Many of us heat-style our extensions, and since they’re not attached to your scalp, they don’t get the necessary restoration from your own natural oils. So an intense hydrating hair treatment is a must, like the Ouai Treatment Mask, $25.
Store them safely: Last but not least, Leyla insists that you should “never, ever just toss your precious locks anywhere. Instead, keep them tangle and dust free by stowing them safely away in a shoe box, ziplock bag or hair extension bag.
Get them styled by a pro: The easiest way to style your extensions is to get them cut by your hairdresser when you’re getting your real tresses cut. This way they’ll blend into your hair so you won’t be able to tell the difference between your hair and the extensions, it’s a total game changer.
Check out this post to find out the quickest way to get permanent hair extensions.


