Valentine’S Day Beat Using Beauty Supply Store Makeup | Ft. Julia Hair
Instagram post (@)tag @juliahair-no.1
Dear here is the hair info ,please add it to the top of the description box
Up To 46% Off For New Year
Use Special Code get Extra $10 OFF: y3tb
●▬▬▬▬▬▬▬▬▬♛Julia Hair♛ ▬▬▬▬▬▬▬▬▬ ●
I am wearing in the video http://bit.ly/38FUHiE
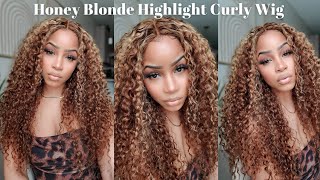
Hair detail: Hand-Tied brown lace part straight wig 24 inches
☛Hand-Tied Pre Plucked lace part wigs http://bit.ly/3aWTean
https://www.juliahair.com/ ➤Hot-Selling wigs http://bit.ly/3nZo71r
Top-selling bundles with closure& frontal ➤ http://bit.ly/37Zu2hD
☛No Glue & No Sew In headband wigs http://bit.ly/3hoZFUY
☛ Affordable Lace frontal wigs http://bit.ly/2WRvIDA
☛Best HD lace wigs http://bit.ly/35bsxeD
☛Glueless u-part wigs http://bit.ly/3hu41df
AliexpressJuliaHairstore : https://bit.ly/3igMX9m
Amazon Julia Hair: https://amzn.to/3j8FpXC
Subscribe #JuliaHair monthly giveaway on YouTube: https://goo.gl/6z9tvz
Follow IG @juliahair_no1: https://www.instagram.com/juliahair_no...
Inquire Now: WhatsApp number: +8615038958671
Products used:
Nicka K. Black eyebrow pencil
Nicka K. Concealer( #10 & #8)
L.a. girl pro concealer (porcelain)
Nicka K. Blue Moon palette
Nicka K. Cupcake palette
Nicka K. Black liquid liner
Cherry blossom 25mm lashes
Ruby kisses foundation (Chestnut)
Rk by Kiss contour palette
L.a. colors dark brown eyebrow pencil
Clear lipgloss
Ruby kisses liquid lipstick (
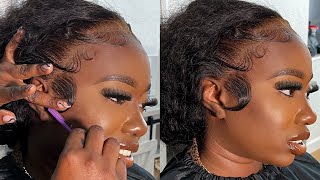
Hello, kitty, queens and kitty beauty t's. Today i will be bringing y'all this beauty supply store sleigh. So if you would like to see how i achieved this look just keep watching. Of course, i'm going to be starting this tutorial off by doing my hair and today's hair came from julia hair. This is what the box looks like and inside they sent me a wig cap, a christmas pen and an ombre purple and pink silk scarf. This is how the wig is self-care package. As you can see, it comes in this plastic bag and she is long honey. She is long. This is their 24 inch brazilian straight wig, and i received this wig in the color number four. So this is what the color looks like it's very even throughout, and i really love this color. The only negative thing i have to say about this wig is that when i first received it, it felt like it was a blend of human and synthetic hair, and it had a lot of split ends. As you can see, this wig does come with a silk base attached to the closure and on the inside it has an adjustable strap as well as three combs to keep you nice and secure, and i also want to let y'all know that this wig does shed As you can see, i ended up cutting the silk base portion of the closure off just because me personally, i don't really like that, and i apply some makeup to the lace just so it can mesh together with my skin, and i ended up plucking. My part off camera now we're going to be going straight into the wig application, as you can see, i'm all headed with a wig cap on and now i'm just taking some of my foundation and i'm applying it to my cap in the shape of a tee. I'M applying it in the shape of a tee just because that's how much parking space they give you on the wig, so i feel it would be purposeless just to go all over my cap with my foundation. Now, as you can see, i'm just popping the wig on my head, the wig itself fit very snug. I really did not have to secure it down, but for the purpose of this video i decided to so i'm taking my got to be glue gel and i'm only taking a small amount of this gel and i'm applying it around my hairline and once i have It all applied, i'm going to go over it with my fan, once i have the glue almost all the way dry, i'm just going to be applying my lace directly onto it. Don'T worry about my cap, peeking out, underneath my wig we'll fix that toward the end. I'M going to take my black silk scarf and tie it tight around that lace just so it can mesh into my skin as best as possible. Now that my silk scarf is applied, i'm taking my wig brush and just running it through my hair, making sure i get all the tangles and everything out once my hair is all brushed out. I decided to go over it with my straightener and i'm doing the chase method. Just so i can get it as straight as possible. This hair flat ironed, so good y'all. It got so sleek and it's so thick i feel like it probably wouldn't hold a curl, but i'm happy that i decided to go in and flat iron it because once i did it took away that synthetic look once i've completely straightened the wig, i'm just going To stand up so y'all can see where the hair comes on me. As i told you in the beginning, this is a 24 inch and, as you can see, it's thick from root to end this hair almost hit. My waist y'all like to me this felt like a 26 inch, but it says it's a 24, so i'm gon na take the word. It'S a 24. Now i'm just taking my wax stick and i'm applying it to the closure and i'm taking a generous amount just because i want my wig to be as flat as it possibly can be. So i'm making sure i apply this heavy. Now i'm going to take my hot comb girl, my good old present comb and i'm just going to run it through my closure. Just so i can get it as flat as i possibly can once i'm finished hot combing. My hair, i'm going to section off the pieces that i would like to be baby hairs. As you can see, i only took a thin amount because, since this is a tea part wig, if you take too much, your tracks will begin to show, and i did not want that to happen now, i'm taking my scissors and i'm just cutting my baby hair At an angle to slick my baby hairs down, i'm going to be using foam and i'm applying it to my baby hairs using my fingers once the baby hairs are fully coated, i'm just going to be swooping them in place using my purple edge, brush and y'all. I'M not a professional at doing baby hairs and i really kind of just started doing baby hairs. So please do not critique me in the comments. I'M just doing this, how i would like to do it please do not give me any advice. If i did not ask for any advice, that means i don't want it so just watch me swoop this baby hair uh. So once i'm finished swooping my baby hair, i'm going to be applying my silk scarf around them just so they can be set in stone and, after that's finished, we're just going to begin the makeup process. Hey girl, hey, as you can see, i'm brushing out my brows using the spoolie end of my pencil and the pencil i will be using to fill them in is my nikka k. Eyebrow pencil y'all should already know this, but it's in the color black to clean up my eyebrows, i'm going to be using this new nikka k, concealer, along with my arcade by kids matte foundation. First, i'm going in with the concealer, and this is what the applicator looks like. I took a small amount on my flat brush and i'm going to be using this shade to clean up underneath my eyebrows. Since my eyebrows are very grown out, i decided to go in with a lighter concealer just to cover up my ingrown hairs, better me now, i'm taking that rk by kiss foundation and i'm using it to clean up the top of my brows. I like to use a darker shade at the top just to make it easier to blend out once the foundation routine has come up, and since this is my actual foundation, that'll just make it that much easier. So after my brows have been cleaned, this is what they're looking like real nice real, perfect real sleek. If i do take some myself period now, i'm taking my la girl pro concealer, it's in the shade porcelain and i'm going to be using it as an eyeshadow base. So, as you can see, i'm just applying it straight onto my eyes. Now i'm buffing it out using that same buffing brush that i used to buff out my eyebrows and y'all. I went in with a little bit too much of this concealer. I forgot that with this concealer, a little of it does go a long way. So after i went in with the brush, i had to go over it once more with my real techniques: sponge just to take off all of the extra product for today's glam, i'm going to be using my nikka k, blue moon palette. This is like my favorite beauty's pasta palette and i'm starting off with that dark brown shade and i'm just going to be packing this on the outer edge of my eye. First, i'm packing it on using tapping motions. Then i like to swear my brush around the edges just to blend them out before i add the second shade. The next shade that i will be taking is this beautiful orchid color at the top, and i'm going to be taking it on this fluffy blending brush and just tapping it on top of that brown shade at first, then, i'm going to lightly swirl around the edges. Just to blend it out now i'm going back in with that darker brown shade and i'm making sure i applied to my lash line as well. I wanted this look to be real, dramatic and blown out. So i made sure i applied every color to my lash line. Now i'm going back in with some of that la girl, pro concealer and cleaning up my lids, then i'm going to take this nikka k, poison, apple palette and i'm going to be taking that beige. Shade at the top - and i'm going to be applying this all over my lids. I like this shade because it was white, but it also had like a pink undertone which made it perfect for this look i feel like this is a very pretty valentine's day. Type of beets, you know giving me very much chocolate covered strawberry. Now, i'm going back in with the orchid shade and i'm just using it to blend out the edges of the beige eyeshadow. This is what my eyeshadow is looking like up close nice and blended, real cute for beauty supply store, if i do say some myself, giving me very much soft glam. Now i'm going to take my nikka k, black liquid liner and i'm going to use it to do a straight line across my eye. Y'All know i love doing my straight lines. I feel like. Sometimes, when i do a wing it covers up my blend a little bit too much and i worked hard for this blend. So y'all gon na see it okay for lashes, i'm going to be going in with my cherry blossom, 25 millimeter lashes and it's in the style 624. These lashes y'all these lashes first of all, y'all about to see. So you know what, let's just let's get into it: okay, let's get into it! Look how pretty this lash is like. This literally took my look up a whole new step, i'm thinking about going back to the beauty, supply, store and buying the whole rack, because these lashes were just too pretty not too y'all see the look period now we're about to go right into the foundation routine. For my foundation, i'm going to be using that rk by kids foundation that i showed y'all in the beginning. The shade name will be in the description box down below but, as you can see, i'm just applying it. To my face where i feel like, i need to focus it the most, then i'm going to go ahead and blend it out using my real techniques: sponge y'all. This foundation was supposed to be a matte foundation, but it was giving me very much oily very much greasy, but i kind of liked it because i don't really like for my skin to look dry. But this foundation was also very sheer and for it to be so sheer, it was very heavy like it felt like. I had a brick on my face or something, but i had to go back in with another coat just because you could still see some of the areas that i was trying to disguise. So i'm going to be reapplying it and then i'm just going to go ahead and blend it out using that same real techniques. Sponge to highlight i'm going to be using these two shades of the nikka k, concealers, i'm taking the lightest shade and, as you can see, i'm just working it onto my nose under my eyes, and i apply some to my chin as well. I'M really only going to be taking the darker shade on my forehead and i also took it down the bridge of my nose now, i'm just blending it out using my real techniques, sponge to set everything in place. I'M going to be using this banana shade from my old kiss contour palette and i'm just pressing it into my skin, using that same real techniques. Sponge me to set the perimeter of my face, i'm going to be mixing those two darker shades together and just pressing them into my skin, using this powder brush. Now i'm taking my she black gel liner and i'm using it to line my waterline as you can see, i'm taking it on this lip applicator one just because it makes it easier for me to apply when i use this or when i use a q-tip. It'S just so quick and so fast once that's finished, i'm going to be taking a little bit more of that brown eyeshadow and applying it to my lower lash line. Just because i feel like i covered it up with my concealer now, i'm going directly under it with that orchid shade, i'm taking this tan shade from the blue moon palette and i'm using it to highlight the tip and the bridge of my nose. Y'All know i only like to highlight my nose for some reason. I just hate applying highlighter to my face. If i do it, it has to be like a special occasion like it just has to be i'm taking some of that nikka k, concealer and applying it to my part, just to make it a little bit more visible. I'M going on top of that concealer with that beige shade that i used on my eyes just to tone it down a little bit. Now i'm going to be brushing through my hair one more time getting all the tangles and everything out and then i'm gon na go over it again with my flat iron just to get all the crimps out of my hair. Yes, so this is the final result of what my hair is looking like. I wanted to go ahead and finish my hair before i started my lips, so my hair wouldn't be sticking to my lipstick, but moving on, i purchased all these liquid lipsticks from the beauty supply store, y'all and they are bomb. I decided to go in with this shade since it's the darkest one i will have the name in the description box down below, but, as you can see, i'm just lining my lips. First, i have to line my lips for every look, but i'm lining them using my l.a colors dark brown eyebrow pencil. This, unfortunately, is not from the beauty supply store, but you can find it in your local dollar store. Once i have my lips, lined, i'm just going to be going in the center of my lips with a liquid lipstick. This shade was so much lighter than what i thought it would be, so i did have to build this color up just to get it. How i wanted it to be once i have it all built up, i'm going to go back in with that lip liner and once that's been applied. That'S basically the finished look for the matte, as you can probably tell by the thumbnail. I did decide to go in with the clear gloss, so this is what the final look is looking like and tell me in the comments which one y'all, like better did: y'all like the matte look, or did you like the glossy look, i don't know which one I, like it's hard for me to choose honestly: that's why i'm asking y'all, but this is the finished. Look. I love everything about this look. I think this is the perfect beat for valentine's day. I hope you all enjoyed this tutorial, please like comment and subscribe and stay tuned for my next one. Bye,

Comments
Latundra Oliver: I love that gloss lip
Julia Hair: this is our new color its very beautiful dear hope your fans can like it
BeatDownByCIARA: Like how you are very detailed with the eyeshadow
Bargain Beauty: The whole look? On point! ♀️
Nora Ovat: Beautiful makeup
Nonny Yves: Plz make a tutorial of a cut crease on hooded eye
tombraider4mel: Well, I liked both lips. Cheers
Alicia Williams-Julien: Gorgeous
tiffany mcdonald: My makeup never looks this smooth and my skin is smooth, maybe I'm using too much product
Sharon Davis: Yesssss Queen ♥️♥️
Glitter Plug: I am here for the lip
Angelina thee Starr: Lit video
Bad Bbvbb: