8 Tips To Ensure That You Get The Same Texlaxed Texture Every Time

Texlaxing is one of those newfangled words/techniques that came about as part of the healthy hair revolution a few years back and is both accepted and dismissed with haughty derision by stylists in equal measure.
If you didn’t already know, texlaxing is simply texturizing your hair with a weak relaxer or adding oils*, conditioner, protein or a combination of these to the relaxer in order to slow down and weaken it’s effect on your hair.
In other words, it is deliberately under-processing your hair which leaves it with more texture, thickness and innate strength as compared to relaxed hair.
Back in the day we just called it under-processed hair which was a condition that was feared and considered a failed relaxer. It’s odd how quickly things change and now texlaxing is seen as one of the best ways to continue enjoying relaxed hair without the negative results of bone straight processing.
Short of going natural, texlaxing for many of us may be the first step to real length retention.
Of course some women have been able to make bone straight relaxed hair work for them growing their hair to BSL and beyond and I say more power to them. But because of the fragility of black hair as a whole, if you feel unable to go natural, I generally recommend texlaxing as the best alternative. The thickness of texlaxed hair is also a big reason why many women prefer it to relaxing.
A common concern that we get about texlaxing however is that some women worry that they won’t be able to get the same texture every single time. You may have come across horror stories of women who have been texlaxing for years then suddenly get bone straight roots following a touch up. Perish the thought! Yet texlaxing does not have to be a huge worry and can be done successfully and with consistent results if a few rules are followed.
Here are my top tips for getting the same texlaxed texture every time.
1. Be Aware Of Your Multiple textures And Do Strand Tests
Many of us find that we have multiple textures through our heads. Commonly many of us tend to have looser, softer textures at the nape and front with coarser, tighter curls at the crown and sides. This is the reason that a lot of us have breakage at the nape even after processing a relaxer for the ‘recommended’ period of time.
Being aware of your mix of textures is the first step to successful texlaxing. Test small inconspicuous strands of hair near your nape, crown and sides processing the hair in 5 minute increments.
You may be surprised to see that some areas of your head may only require 5 minutes to achieve the right texture while other areas may need up to 10 minutes. Strand tests only need to be done once but once you know your magic number, note it down somewhere where you can refer to it for future touch ups.
As a general rule of thumb, for successful texlaxing your hair should not be processed for longer than 10-12 minutes.
 2. Always Use The same Brand Of Chemical Don’t Mix And Match Them
I know that in the beginning of your hair journey you are excitedly discovering new products and enjoying finding out how well they work on your hair. This is great except when it comes to your relaxer. I would highly suggest that you do extensive research on relaxer brands, make a choice and stick with it.
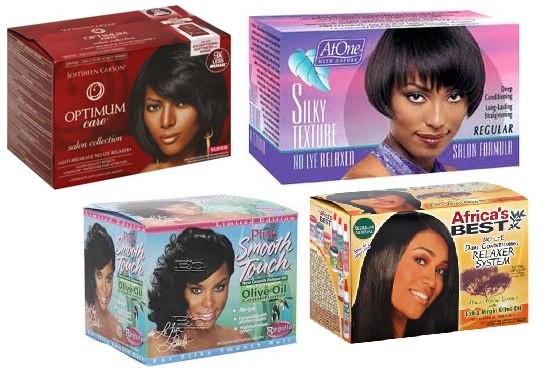
If you like the fact that Optimum relaxer contains ceramides to strengthen hair, then use the same one with every touch up. If on the other hand you prefer the more expensive hydroxide free strengthening offering from Phytospecific, then again make sure that you use the same product with each touch up.
Stylists generally don’t mind if you turn up at the salon with your own relaxer so if you can’t be sure that your stylist always uses the same brand, then be proactive by bringing your own.
3. Use The Same Strength Chemical
This is a no-brainer really. You will find that depending on your hair type, for texlaxing you will likely only need either a mild or a normal strength relaxer. Super strength ones should be left on the shelf.
4. Use The Same Method Of Slowing Down The Relaxer Every Time
You will have to do a bit of research before you begin your texlaxing adventure because there are various ways to achieve your goal of straight but textured hair.
You could add oil/protein or conditioner to the relaxer to weaken it’s action on your hair. Otherwise you can just pick a relaxer that is mild enough on it’s own to leave your hair texlaxed. This is the easiest method and also speaks to why strand testing beforehand is so important.
You may also opt to coat your new growth with petroleum jelly* aka vaseline as you base your scalp. This is a popular method because in addition to using a weak chemical it will absolutely ensure that your new growth is left with some texture.
5. Be Militant With Your Stylist, It’s Your Hair!
We’ve all been there, you leave your hair in the ‘capable’ hands of your stylist year after year only to notice that your length remains the same. Rectify this injustice by asking your stylist to texlax your hair explaining what the process is if necessary.
If she unable or unwilling to help you, find someone who will. Believe me there are stylists out there who know of and regularly use these new hair care techniques for better health of their clients’ hair. You only have to find them.

When it comes to your own hair, an unfortunate truth is that your stylist may not know what’s best and if she doesn’t want to attempt a particular service on your hair, let your dollars do the talking as you take your custom to another stylist who will.
Trust that a stylist will give you the best advice in her professional knowledge but she should also be willing to help you achieve success via a different method if you explain succinctly what the benefits of texlaxing are.
You never know, based on your success as time goes on, she may start offering the same service to other clients!
6. Always Protect Your Previously Texlaxed Hair
Preventing relaxer run off is the reason that I believe that stretching your relaxer for at least 12 weeks is vital to your success in your relaxed hair journey.
To ensure that your previously processed hair is protected and remains just texlaxed instead of gradually becoming bone straight due to run-off it is important to protect the hair prior to beginning the relaxing process.
You may choose to use conditioner/ Vaseline or a combination thereof to coat your relaxed hair before beginning the texlaxing process. Always remember this important prep step and use the same protection technique every time.
7. Minimize Smoothing
Yes for texlaxing you can forget the small tooth comb* method of smoothing relaxer into hair. All you need is your fingers to smooth the chemical in after applying. But even then it would be ideal to smooth through just once before rinsing and neutralizing.
8. Use A Timer
Don’t rely on glancing at a clock as an ideal way to process your hair for the correct time. Use a timer starting it when you begin applying the chemical and as soon as the timer goes off, rinse and neutralize the relaxer, apply your protein conditioner before you begin working on the next section.
Most of us, even stylists will be unlikely to be able to work fast enough to get your entire head complete and smoothed in the 10-12 minutes that it takes to texlax hair so be prepared to apply the relaxer in two or even three sessions for first timers.
In this video Jeni of Just Grow Already shows how she texlaxes her hair:


