3 Styles To Blend Your Hair Textures While Transitioning
 A couple of months ago, we had head shots scheduled for work. I haven’t taken any professional photos since my junior year of college, so I was overdue for a new set. Even though it’d been a rainy, humid summer and I was almost 8 months post relaxer, I decided to go with a straight look.
Instead of enduring the process of flat ironing my whole head, I chose to rock a straight u-part wig*. If you haven’t heard of a u-part wig, it’s very similar to a sew-in or half wig*; you simply blend your leave out with the extension hair. Should have been an easy, cute style right?
Ha! After struggling to straighten my leave out (specifically the new growth) for 20 minutes, I was able to blend my hair flawlessly with the wig. But alas, as soon as I walked out my front door, I knew all that time, energy, and heat had been wasted. The air was hot and damp and I swear I could feel my hair reverting on the 30 minute train ride to work.
Suffice it to say, those head shots have not seen the light of day.
My biggest mistake? Attempting to blend my transitioning hair with the straight hair of the wig. In July! Hot temperatures = sweat = reversion. I’m not saying that you can’t enjoy straight hair while transitioning, but flat ironing might not be the best use of your time in the summer.
Even when it’s not sweltering outside, a bit of sweat can send your new growth running back to its kinky*, curly or coily state. And this state, ruined hairstyle or not, is actually what your new growth prefers. So instead of attempting to straighten your new growth to match your relaxed ends, try blending your relaxed ends and your new growth with curls instead.
With that in mind, here are 3 hairstyles that not only blend your two textures, but are also heat optional.
Note: While it is best to start on freshly washed and deep conditioned hair, you can certainly create these styles on hair that is a few days old too.
Twist out
The go-to style for many current and budding naturalistas, a twist out allows your new growth to stretch while adding curl to your relaxed ends. An excellent way to blend your two textures.
1. Part your hair into four sections.
2. Moisturize and seal each section using your favorite moisturizer and oil.
3. Starting from the back, separate about a 1 inch section of hair.
4. Optional – For a stronger hold, apply your favorite curl cream, gel, or wrapping lotion.
5. Split that section into 2 pieces and begin to twist your hair
6. Use a small roller to both curl the relaxed ends and to prevent unraveling.
7. Repeat all over your head. Use smaller sections for tighter curls.
8. Dry your hair completely. You have the option to either air dry or sit under the hooded dryer*.
9. Apply a light oil to your fingers and unravel, being careful not to cause too much frizz.
10. Gently fluff and go!
Pros:
► Stretches new growth
► Easy to maintain with the pineapple method
► Less tangling at the roots
Cons:
► Twists can be time intensive if your hair is shorter and you have to do more twists
► Hard to detangle
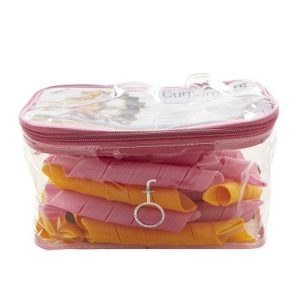
Curlformers Set
Curlformers have been touted by many as a great tool for all hair textures, whether pin straight, relaxed, natural or transitioning.
Once you have worn the style to death, a curlformers* set can be used as the base to other stretched hairstyles. You can moisturize and gently comb the curls through to wear a blow out look or even just braid or twist your hair in sections for an ultra stretched braid/ twist out.
No doubt, curlformers* are an excellent addition to any natural’s hair tool arsenal. For maximum curl, apply to freshly washed wet hair and detangle each section thoroughly before applying the curlformer*.
1. Apply light curl cream or setting lotion.
2. Starting at the nape, section off 1 inch of hair.
3. Use provided hook to pull hair through roller.
4. Repeat until all hair is set.
5. Dry hair completely.
6. Remove rollers by squeezing the top of the Curlformer* to release the curls.
7. Spray oil or oil sheen to give your hair shine without disturbing the curls.
8. Style as desired.
Pros:
► Great way to stretch the roots
► Can be used with or without heat
► Provides uniform curls
Cons:
► Difficult to to sleep in (but aren’t all rollers?)
► Hair may snag on the hook during install
► Curls don’t last as long
► More expensive than traditional rollers
Braid Out
Similar to the twist out, the braid out is a great way to mimic the texture of natural hair. Although your relaxed ends won’t have nearly the same volume as your natural hair, it
1. Part your hair into four sections.
2. Moisturize and seal each section using your favorite moisturizer and oil.
3. Starting from the back, separate about a 1 inch section of hair.
4. Optional – For a stronger hold, apply your favorite curl cream, gel, or wrapping lotion.
5. Split that section into 3 pieces and begin to braid your hair
6. Use a small roller to both curl the relaxed ends and prevent unraveling.
7. Repeat all over your head. Use smaller sections for tighter curls.
8. Dry hair completely. You have the option to either air dry or sit under the hooded dryer*.
9. Apply a light oil to fingers and unravel, being careful not to cause too much frizz.
10. Gently fluff and go!
Pros:
► Stretches new growth
► Easy to maintain with the pineapple method
Cons:
► Ends may look thin in comparisons to natural roots
► Time consuming to install braids/plaits
► Hard to detangle
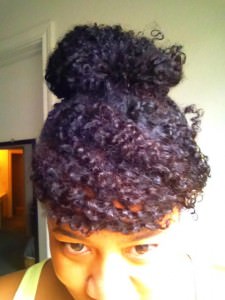 Bonus Style: A Bun
After your styles have run their course or if you’re just feeling lazy with your hair, a bun never goes out of style and can be dressed up or down. Plus, it’s a great way to blend your textures without having to do much manipulation.
1. Moisturize and seal your hair, concentrating on your ends.
2. Place your hair into a neat ponytail.
3. Bun it, using your prefered method:
► Ballerina bun: donut or sock (soaked in oil to prevent dry ends) to achieve that perfect look
► Tuck and roll: roll ends under and bobby pin
► Lazy bun: pull ends halfway through ponytail holder
4. Tie a scarf on your head to smooth your edges and tame flyaways.
5. Accessorize as needed.
As I stated before, it’s okay if you want to straighten every now and then. But your natural hair is growing in and you want to work with your texture, not against it. You’ll probably try at least one of these styles when you’re fully natural, so why not get acquainted with them now?
What styles do you use to blend your textures? Have you had to change your styles as you continue your transition?