The Oil Cleansing Method And It’s Benefits For Your Skin
 It’s no secret I have always had problematic skin. Teenage acne made its way into adult acne and let’s not forget the monthly hormonal acne.
With that being said, I’ve tried just about every cleansing product on the market (including Proactiv Solution*) to try to keep my face acne free and flawless. Everything has failed.
Once I had gone natural with my hair, I started embracing more natural ways of living in general and stumbled upon the Oil Cleansing Method (OCM) as a way to cleanse your face. I was instantly intrigued.
I tried the OCM two years ago but with not much success but after hearing even more positive things about it everywhere I decided to give it one more try. It was truly a great decision.
The Oil Cleansing Method
The Oil Cleansing Method (OCM) is cleansing your face with oils or a mixture of oils. Like dissolves like. That just means you are using clean oils to remove the dirty oils from your face.
The skincare industry has taught us that oil is bad but that isn’t strictly true. Our bodies and faces need oil and all those over the counter and prescription cleansers are stripping too much oil from of our skin which we then we have to replace it with moisturizers.
The Mechanics Behind The Method
Oil and water don’t mix but oil can dissolve other oils*. It may sound like it is doing just the opposite but, I promise, you don’t end up with an oily mess. The dirty oils will be removed by the hot/warm washcloth, which warms the oils and removes them.
This method is keeps you from using harsh chemicals found in many cleansing agents. Many of these cleansing agents strip your skin of the oils* you need to keep it supple. This OCM removes dirt, makeup and impurities without stripping the necessary oils from your face.
 The “How To” Of The OCM
You need:
► Your oil or oil mixture
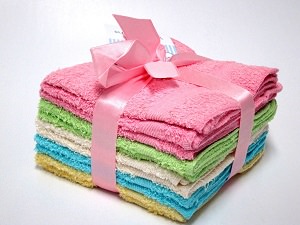
► One or two clean washcloths
► Warm/hot running water.
Start with clean hands. Place about a quarter size of your oil or oil mixture in your hands and rub them together. Now, massage the oil all over your face and neck in an upward motion.
This needs to be done for at least two minutes so close your eyes and really treat this as a massage. Massage the oil mixture into your face and neck and if that seems like forever try doing while it while watching TV or just relaxing.
Wash your hands to remove all oil before placing a clean washcloth in the clean sink or bowl with hot running water. Now we are going to slightly steam the skin. Warm or hot water but not too hot as you do not want to scald your face!
The hot water is opening up your pores. Lay the hot washcloth on your face and keep it there until it cools. Once cooled wipe the oil from your face and neck gently.
I have found that if I am wearing makeup I need to do this step twice with clean washcloths each time to make sure I’ve removed all traces of the makeup and dirt.
You may not need to follow with a moisturizer since some of the lovely oil will be left on your face. It’s really up to you. If you choose to use a moisturizer, a great one is rose hip seed oil* or even jojoba oil* or olive oil*.
What Oil Or Oil Mixture To Use?
It really depends on you and your skin. You do require carrier oil, like olive oil* or castor oil* with castor oil* being the favorite of many. Your skin type should also factor into your decision.
Whether you are oily, dry, normal or a combination skin type, there is an oil or mixture that will work for you. Here is a breakdown of each oil that can be used and their benefits:
 Jojoba oil – this oil is closest to our body’s natural oil sebum, which makes it great for all skin types, but especially acne prone skin. A little pricier than the rest but well worth it.
Grapeseed oil* – excellent for all skin types, especially oily skin.
Avocado oil* – really good for dry and aging skin.
Olive oil – excellent for all skin types.
Apricot kernel oil* – wonderful for dry and aging skin.
Argan oil – good for all skin types, and even better for aging skin. This is tons pricier than the other oils, but wonderful all the same.
Castor oil* – is a great antibacterial and is the best for cleaning skin.
Almond oil – great for oily skin.
Some people add a few drops an essential oil to their carrier oil and actually I add lavender to my Jojoba oil for my OCM routine and I find that it really helps with my adult acne.
Lavender oil* is also wonderful as a disinfectant and to kill bacteria but remember that essential oils* are very potent so only a few drops are necessary if you choose to add one.
Tips
Pick up extra washcloths. You will be going through a lot and it’s best to only use a clean one for each application. I picked up some cheap ones since I use two when I wear makeup.
You do not want to do this too often. Trial and error may be a good guide but once a day is usually enough. I do OCM at night and merely splash lavender water from my spray bottle on my face in the morning. Some of you may find that even every other day may be enough.
Not every oil works for everybody. That was my mistake two years ago. I followed the crowd and used castor oil* but it was not the best oil for my skin and should have switched up before giving up. I now use Jojoba oil with a few drops of lavender oil* which work wonders for my acne. The list above is a great guide on which oils to start with.
This method will save you money. We all know store bought cleansers, toners and moisturizers can be extremely expensive. If you are on the natural ingredients bandwagon then this method is a huge plus. Oils and water will be your only ingredients. I love that my skin is actually doing much better and I have been using this method faithfully since spring. I say try it. I love it, my skin loves it and my POCKET loves it too. There are simply too many valid reasons to pass this method up!
Keep your skin naturally beautiful ladies!