How To Get Your Natural Hair Bun Laid
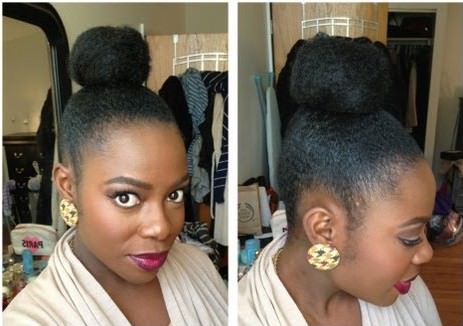
Do you need a simple bun tutorial for 4C natural hair? This one might just be the one for you to watch. I love a simple tutorial, just a girl in front of her mirror slaying a style for the gods before she goes to work.
When you want to get your natural hair laid, you need some help from a gel or pudding that can tame those fly-a-ways and get your edges in order.
To create a sleek bun you need the following:
1. Gel
2. A stretched out hair band (these seem to work the best when creating the initial puff for thick natural hair)
3. bobby pins*
4. A boar bristle brush
When you are creating your bun, apply the gel all around your edges first to get your hair sleek, I like to flip my hair over and hold the bulk of it with one hand while I fix the edges.
Use enough gel for your hair texture, be very generous because the thicker your hair is the more you will need to keep your hair in place.
One of the things we tend to worry about a lot is the sheen from the gel on our hair, but once the gel dries, that shiny look goes away.
The one thing we must warn you about is the use of the brush on your edges especially if you do a bun very often. While the brush is super effective in laying down the flyaways, it can be harsh on your edges so angle the brush so that you apply less pressure on your edges.
To form the bun you can use bobby pins* to keep your hair in place, or you can use another elastic band as seen in the video.
Everyone is different, I prefer pins but elastic bands are much faster. Check out the video as the gorgeous BlakIzbeautiful shows us how she styles her bun: