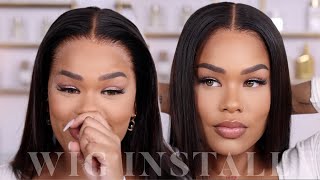
Frontal Series | How To Install 360 Lace Frontal Hot Beauty Hair (Part 1)
- Posted on 28 January, 2017
- 360 Lace Wig
- By Anonymous
Part 1 of my lace frontal Series. Secrets revealed to a natural frontal install with baby hairs.
Part 2 : How to make a 360 frontal wig.
https://youtu.be/L7w3vmidkQU?list=PLP6...
Part 3: How to slay your 360 frontal wig
https://youtu.be/u0-FlYTbjNU?list=PLP6...
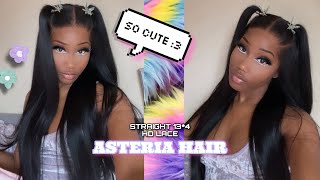
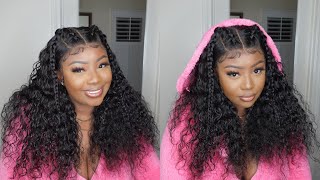
The Best Malaysian Deep Curly & Lace Frontal Hair? | How to Define your Curls Ft. Ali Julia
Perfect eyebrows
Baddie on a budget
LIKE...COMMENT...SUBSCRIBE...It's FREE! :)
♡ ♡ ♡ ♡ ♡ ♡ ♡ ♡ ♡ ♡ ♡ ♡ ♡ ♡ ♡ ♡
Let's be friends
I N S T A G R A M : @faithfully_asia -- https://www.instagram.com/faithfully_a...
LACE FRONTAL:
Aliexpress You May Official Store
DO NOT RECOMMEND - While this frontal looks good, it is very temporary. It turned into a matted, tangled mess in less than a month. Money is better spent elsewhere.
HAIR - HOT BEAUTY HAIR
PERUVIAN BODY WAVE: 2 1/2 bundles -
https://www.aliexpress.com/item/7-Days...
---------------------------------------------------------------------------------------------------
B U S I N E S S I N Q U I R I E S
For product review or business opportunities, please email → [email protected] FaithfullyAsiaFrontalSeries
Hey dolls. Welcome back to my channel. This is your girl aja. This is the first video of my three-part photo series. This video I'll show you how to install a natural-looking frontal without using group. The first thing we're going to do is apply a pea-sized amount of God to be glue to the perimeter of the hairline. I want to point out that, although this is cool got to be glue, this is not a glue but a very strong holding gel for maximum hold clean the skin with alcohol and ensure that your hands are clean. To avoid the glue from turning points, it is also recommended to braid your hair down and cover it with a wig cap to protect your hair. Underneath you don't want the glue to be too thin because it won't stick, but you don't want it to be too thick because it will turn 1. Then I applied some got to be glue free spray. On top of the gel to make the hole stronger, then you want to blow-dry the gel until it becomes tacky to touch, but you don't want it to dry fully now it's time to apply the frontal eye. So three combs to the back of the wig cap and an elastic band to the side. This is going to help the wig lay as flat as possible and not just be sitting on top of your head. The best way to apply the wig is from the back to the front. You want to slowly place the lace slightly in front of the glue. Take your time when doing this, because the more that you label face down and pick it up, the weak of the glue will become in case you're wondering why I'm using a blending brush I apologize. I could not find a comb when it was trying to film this video, so I'm using the bold like alternative right now, but if you made it this far into this video we're practically family. So it's all good. However, if you have a rat tail comb, that will be a better option. In any event, you want to take the back of the comb or blending brush or whatever you have at your disposal and blend the edges of the wig, with the lace and the gel. Like I said before, you want to make sure you're, taking your time when you're doing it, because the placement of the lace is going to determine how natural your frontal looks. This was my first time making a wig using a 360 frontal, and I made this wig exact to my head size in the future. I would make it slightly bigger because it was challenging pulling the wig to the front on both sides without the other side. Lifting up so be sure to watch the next video in the series where I'll show you how I created and customized this frontal I'll also include tips and tricks from lessons learned while making this wig. Let'S see if I could get this video to 100 likes so that I could go ahead and upload that video mix - and you want to just repeat this process on both sides down to the sideburns until the glue and the lace adhere to each other. Like I said before, don't rush this process take your time and make sure that you apply it correctly. Once you're satisfied with the placement, then you can finish blow-drying the gel until it is completely dry. I recommend tying down the edges with the scarf for at least 20 minutes. This will allow the gel in the hair to completely blend into each other and create a natural scalp. Look here, I'm just securing the wig down by attaching the combs to the cap. In the back last, but certainly not least, will want to customize some baby hairs. Now, ladies or gentlemen, baby Eisley is that a personal preference? So, however, you like to wear your baby hairs go for it. Do you, I always say if you like it, I love it or for me, I personally don't like too much baby here is because it's not realistic for me. So what I'm doing is I'm taking this fooling and I'm using my eco styler gel and I'm sparingly, bringing some of the here along the perimeter of the lace to the front and swooping it back into the hairline. You want to strategically place baby hairs along the edges of the frontal and I'm going to keep laying some baby hairs on both sides of my head until I'm satisfied with the weight of those. The purpose of the baby here is that it helps camouflage the leaves of the front end and it gives the hairline a more realistic look. So you want to make sure you take your time when you do this and continue to customize the baby here until you achieve the desired look now I didn't really tend to the back, I'm just showing it for a reference so that you know what the back Of a 360 frontal looks like, but if I wanted to wear it up, I would gel it down like I did the front and cut some flyaways along the back to help camouflage the leaf. What I think guys in the third video in this series, I'll be doing a video showing different ways of styling. This frontal see, if you're interested in seeing that I'll be sure to tag it up top and looking in the description box down below thanks again for checking out my channel until next time see
Comments
Itssamiraxo: Great job! This video made it easy for me to follow installing my wig ❤️
The Real Girl's Guide to Credit and Money: Wow! This is harder than I thought. Thank you for making it look easy! You have amazing results!!!
Downtown on 7th Avenue Handbag Adventures: You did an awesome job. I’m still learning how to do these wigs. Great video.
I C: Looks great! I struggle with laying the wig down in the front because I have a Widow's Peak so it always look weird to me. You made it look so easy!
Shawna McCoy: Sis you slayed this install! So natural!
Shae Tv: i take notes every time i watch your videos!! you do such a great job
Ashley: 1ST SUBSCRIBER! I really enjoyed your video. Very detailed. I'm just getting into this "wig, frontal" thing and your videos have helped me a lot. Keep uploading! Keep up the good work
Darbie Day MUA: Such a great job !!
BeautyNBeast: New Subbie. OMG Thank you so much for mentioning knot sealer. I never knew about it and it has really helped my frontal from balding.
Jacqueline McGrady: Simply amazing!
Suzan Siyoum: Great video!! Can't wait to watch more!!!
Rowena Sanders: Great Job!!! Good information! Thank you for sharing.
D Reid: You are gorgeous! I just found your channel and signed up right away. I love your tutorial. You did a very good job and gave useful information. Just one question - what texture hair are you wearing in this video? Your links take us to two different sites with two different hair: one texture is Brazilian Body Wave and the other is Peruvian Body Wave. The texture you are sporting looks amazing on you!
504 Gurl: This helps a LOT. THANK YOU
Love Yourself: You are such a natural and a beautiful woman inside and out.❤️❤️ Hair is really nice. Blessings and Love
Frances Brewer: Beautiful!
Meisha Robinson: New Subbie here!! Great video cuz!! You did a great job love
Kersha Beaver: great tutorial. I'm a new sub. keep up the good work
E Watts: Love it, Love it !
PYT24K: Ahhh, I wasn't cleaning with alcohol. That may be the key to making it stick. Thanks.
colleen watts: you are gorgeous, love this video
BeaBea: Ok now great job! I may give this a try I'm afraid to fail the hair and beat must slay!! #RWOYT
Classy Diva68: Nice tutorial How many bundles did u add in back? This 360 is really nice and thick and a nice length!
Epique Desizigns: great tutorial video what did you use to bleach the knots
LupieChic Jae: Cant wait to watch the rest of the series |RWOYT
BeeKayBaby: Great video! Can you recommend a good brand of hair to use?
marquita83: you did a great job new subbie liked and shared #RWOYT
Aniya Summers: Love the video!
Keiana Lanay: omg I loved it :)...... that hair is beautiful #rwoyt
The Melon Patch by Deb: In your video you say its a Peruvian body wave, but been I went to the website, it saids it's a Brazilian body wave. So is it the same unit or was that a typo? thanks
Jus: When youre making a wig how do you know if its too big too small or just right
Sabrina Shiell: Very nice. Thanks for the tips and tricks. That wig cap colour is not the best tho. Scalp colour doesn't look realistic. (Constructive criticism) ❤
chyna Doll: perfection
RIETTIE100: I love all your style
Connie Phifer: Get it gurl!!!!
ItWasJustMeantToBeAconversation X: It looks so real
Shan S.: Like whyyyyyy are you so bomb!!
Janet Davies: so good