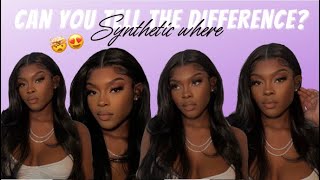
How To Slay A 360 Human Hair Lace Wigs | Bellewigs.Com
- Posted on 14 July, 2017
- 360 Lace Wig
- By Anonymous
360 lace frontal wigs are the best of both worlds for a natural type 4 girl. It gives you a break from having to do your hair AND it serves as a slayed protective style!
The 360 Lace Wig is from: http://www.bellewigs.com/
360 Lace Wigs 150% Density Bouncy Natural Wave Natural Color [D0336030]
Link to the hair: https://goo.gl/pPUavp
Hair: 100% Premium Brazilian Virgin Human Hair
Color: Natural Black
Length: 18inches
Cap size: Medium Cap Size 22.5inch
Cap Construction: 360 Lace Wig
Lace Color: Brown
Free Shipping Worldwide
I received this wig from https://fbit.co/5MBD.
How did I place my wig on with the glue? (6:04) I did the same steps that I showed you in the beginning at (2:03). You basically have to tug it into the spots that you want. Once I place the glue on there, I put my wig on the SAME way as I showed you before. The glue does not change anything.
Tips: Use a blow dryer to make the got2b glue tacky before laying down edges of wig. When got2b Glue is tacky, it gives off a white tint like real glue. Don't be afraid of got2be Glue it is not real glue. You will be blow drying for quite a while until it is 100% dry so don't even be surprised. If you finish blow drying and your sides still come up, you either didn't let the glue get tacky before applying the edges, or you didn't keep blow drying long enough after applying the edges.
My opinions: I actually like to wear my wigs wet and just like I don't like to apply heat to my hair, I don't really do it to my wigs either. Just because it gives off an effortless, relaxed look. However when this wig dried it did get a bit thicker and natural looking. I plan to have another video where I am wearing it and definitely follow me on instagram @Chazzzisawesome to see more of it! Follow BelleWigs: Facebook: https://business.facebook.com/bellewig... Instagram: https://www.instagram.com/bellewigs/
All right, ladies buckle up because we are going on a Wiggy ride all right. So in today's video I have a 360 lace front. Whole wig, okay, 360 lace front all around. It can't even be a lace front because it's all around okay and it is from Bell perfect combination of quality and design Bell, wigs right on the box y'all. Now this right here is the wig. Now on the inside, yes, you'll see all that lace. You'Ll see all of that all around yes, all around in the middle is where it stretches. Okay, and also it has comb, that's what I love most. It has what see it has about four combs and it has adjustable straps in the back. I feel it comes with everything you would need you don't need to put any straps in it. You'Ll need, but no combs in it. You already need nothing. Okay, the only thing you do need is for God to be glue, preferably the ultra glued invincible. Styling gel. You know the black one, yes, that one and some scissors to cut the lace with and then of course, your 360 with okay. Well, I don't know what they're doing here, but we don't push. So when I receive my wigs. The first thing I like to do do not cut the lace first of all before we even get started, oh god, I can't believe we almost got started. I'M tell you that number one rule of our wigs do not cut the lace. Okay, do everything you can before cutting the legs? Okay, which means I'm going to put this leg on okay and we're going to see if it fits. If maybe I need to take it back or you know anything like that, because once you cut the lace, the wig is pretty much over okay, so you don't want to do it. So this right here is the back of the wig that I have and the front of the wig. You can pretty much tell because of the hairline or just because most of your lace is always going to be in the front. The back side length definitely does, but the front just has more space for parties. That'S all. So I want to take the back and I'm just going to roll it over my head. We'Re checking now. Basically, when you first get your way, you're going to play this little snuggle game, okay, this little snuggle game of finding where the wig fits on your head. Now, unfortunately, your girl has a massive cranium. I think we have been through this before all right. So not all wigs sit on my head perfectly, but since I have such a large cranium, you know you got to do what you got to do, but it's been quite snug. It'S kind of a bullet see these are the sides right here? Okay, that's not too bad! Basically, what I like to do is I like to pull the sides out that way. I know exactly where I need to cut and I basically to glue that down right. There cut off the lathe I'll still have space, because basically these right here are your baby hairs, do not cut those off; okay, don't cut them off at all. I'M telling you won't. Thank me. I do have some legs rolled up in there. Okay, so you see that I'm basically going to cut this off all right. We need to make sure that this is good on this side yeah. This is definitely something I can glue down so now that I've tried the wig on. I want to take it off and we're going to get to cutting okay, okay, so now that I have my lace cut, see all that. Actually there wasn't too much lace on this unit, anyways, which is okay. It'S really up to your preference, but I cut it all off now. Let me tell you a bit about my scalp and what's going on okay, a lot of you guys do not know how to cornrow okay, so I literally did flat twists throughout my head. Instead of cornrows, I even did a video on it that I will link above here, okay for you to check out just so. You won't be looking at this, like, oh, my god, I don't know how to braid hair or do something underneath the wig. I'M not long get it. Okay, I literally show you how to do a flat twist super simple, easy. Okay, I even leave links in the description box so check out that video flat twist your hair down and then what I like to do. I don't often do it, but I do like to have a new color wig cap, okay, just because I'm not really someone who bleaches my knots or anything like that. Typically, if y'all want the truth, a lot of these wigs are not big enough for my head. Okay, so I have to actually show a little bit of my hairline anyways, so the next thing I'm going to do is actually put my gut to be glue around the perimeter of my hair. So, basically, going to take your got to be glue, you are going to take oh see if I can swirl it around here. You want to take as much as you pretty much alike. I guess you could say and you're just going to place that, where you plan to place your hair all right, okay, so I just placed forgot to be glue around the edges of my hair and I actually put some behind my ear until I kind of down The nape of my neck just to see just to see now I'm going to go ahead and let this get tacky and let the glue kind of dry or whatever and then I'll be back with you guys, alright guys. So I got the glue on and it's drying slightly full bit tacky right now, so we're going to go ahead and throw on this wig. Now, if you're wondering why I'm in different clothing, my makeups different all that jazz it's because I had to refill this part. Okay, don't let that distract you? Alright, we got a task at hand here, get the wig on before the glue dries. Okay, let's go now I'm going to be taking a VBAC of the wig like I did before when I showed you guys, you know how you should try on your wig before you cut the lace, I'm basically going to do that same thing, because we tried on The wig, but we know that it fits so you're, going to place it on just how you like it okay. So this is the back and I'm just going to tilt my head down and then place the back on and since my glue is drying, I don't want to disturb my glue too much because, like the hair is getting in it right now. So right now we're about to just play the tug-of-war game: okay, you're, just going to grab it and place it where you want it. Okay, I like to cause little tug of war games, because since this is a 360 wig, you have sides. You have all these things that you want to make sure that you get in place. You don't want to fill around on the inside for the comb like here's, a comb right here, I'm gon na place that in my hair and then grab the side, try and get it on where the glue is okay and don't worry too much about your glue Drying because that like glue and wigs, is a little difficult for me, I feel like it's a little difficult for everybody. Okay, so don't even worry about it, because you can always add more glue. Ain'T, no problem, all right same thing for this side. Here'S another cold want to drag it down, place the comb in my hair and then grab the little flap and place it on the glue. Okay and then you just probably want to sit here, make sure everything's sticking together. Okay, so to give you got a good idea, what I'm talking about what I mean by if your size aren't all the way laying down with the got to be glue, it's okay, we got time. Patience is key when it comes to finessing the slay. So let me show you oh, and this will also be for the girls that want to go ahead and use. You know blow dry what they got to be goo y'all. Just ain't got time to be waiting around for boo to dry when y'all got places to be people to see. Okay, let me show you so first things. First I'll, take your guys to be glue. Now this is just a little touch-up, so you're not going to use that much. Even though y'all know, I'm already I'm super heavy hands. I probably didn't even need that much. You are going to lift up your spot, alright, lift it up slowly it real lightly. So you can actually see you like how much you need to put on there and all this right here is not sticking, so I want to take the gossipy glue and just rub that down the edge okay. Now you see, I have these long strands. That is not your girl's hair. Okay, that's not my hair! That is the waves baby hairs. You do not want to get that mixed up with the glue, so you really want to make sure you move these little guys out the way, because the gossipy glue will make them harden and, as you see this like I'm placing this wig over my baby hairs. So if you don't even have baby hairs, you do not need to worry about doing that old. Like trick of you, keep your baby hairs out to make the wig look more realistic. This wig comes with its own baby hair, so you can keep all of your hair protected. Okay, because I'm not about to have no lace rubbing up against. My baby is okay, but you don't need that much! That'S just me and my heavy-handedness so you're going to grab your little side place it over the glue grab, your blow-dryer. You anybody hear me right now. So let's go ahead! Oh and before I go, you know how I like put the glue on there and I slap my edges down and then I dried it. That'S one way to do it, but you will have to keep your finger on that little edge and keep drawing for like straight 15 minutes. If you want to save yourself some time and some arm power strength, thingy go ahead. Put the glue on then dry with the glue and make sure that you're getting it nice and tacky, it will usually start to get white like regular glue. It'S not real glue, it's just hair gel, but it will start to get white. Then just lay your hair down on that and keep your finger on it and then dry the rest of your hair. Okay, I'll leave more details about that specific tooth in the description box below, along with Belle Wacom and all their social media check out now we're going to get on to news of the clips. Alright, ok, so I do want to show you guys which side it is this side. Normally you guys know that when you have a wig you can I you cannot show any size, like literally the sides are slightly cut off. For some reason, my head is a little on the big side, so the back does not lay perfectly, but for me to go ahead and brush these sides. Nice, real roll back and I put it in a low ponytail people would not suspect that I'm trying to hide a wig or anything like that, which is what I really like now. As far as my hair, like I said, the got to be blue is still drying and I actually went ahead and washed it, while the back to the glue is drying like that yeah. That'S how long it takes when you don't use. He was about to be glue, but anyways it comes out just to spice it all right. So, just to let you know, the density of this hair is one hundred and fifty percent. It is natural, color, bouncy natural wave, 18 inch, 360 lace, wigs okay. Now, if you're curious about anything about this look, I will definitely leave it in the description box below. But honestly, those are the simplest tips that I can give the simplest tips for a natural girl. You know put your protective style on okay. Get you some guys to be glue. Get you a 360 wig, so you can have you know some nice edges where you can pull your hair back. You know just pull your hair back a little bit that way when somebody's, like, oh girl, you know you wearing a wig, you can just pull it back a little bit and be like what wait. What do you see? Do you see my edges? Do you see my line like what way now, if you want to see more of this wig definitely click that subscribe button, because on the hammer and a few more videos, I will be posting pictures on Instagram and I'm going to be doing different styles with her. So on my Instagram at Chas is awesome: I'm going to be throwing her up until ponytail, I'm going to be doing braised all kinds of styles. Just to show you guys how well this 360 works. You know we are versatile with our natural hair, so our wig should be two 360s are the best. I will leave everything in the description box below. I will leave Bill wig calm in the description box below, so you can follow me on this journey too. Okay, now I love you guys so much. Thank you for watching my video I'll see you guys in the next one peace out.


Comments
Whispering Eagle Landers: What size is this wig? Me too, I have a man’s size Cowboy hat and I have a very hard time finding a wig or topper that fits!!