What Lace??? Cutomizing My 360 Frontal Wig From Amazon
- Posted on 02 May, 2018
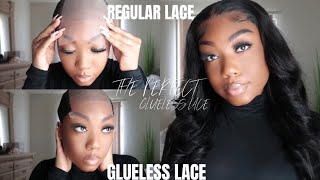
- 360 Lace Wig
- By Anonymous
Welcome back to my channel.
I hope you guys enjoyed this video!
Leave a comment and LIKE and remember to SUBSCRIBE!!!!
Link to the hair: https://www.amazon.com/gp/product/B074...
Social Media:
IG: jada_laughoutloud
TWITTER: jadawithoutfail
SNAP: leshary101
Hey guys welcome back to my channel for today's video. I have yes the long awaiting week, video so this week right here, I sewed a band on to it. I got this from Amazon, guys, yes, Amazon and it was really affordable. I'Ll list. The details in the description box cuz - I can't remember right now, but I'm just gon na customize this wig right now and you guys can watch and learn. So what I'm gon na do. First guys is I'm gon na part the front part of the wig, because I'm gon na pluck it and, to be honest guys, this wig really didn't need that much plucking, because it didn't come like extra thick like 300 density, but this one's actually a 180 density. 360 lays so I like that about it, so I'm just plucking a little bit of the front part, so it looks a little bit more natural and while it's plucking it guys, I realized that I don't know why I'm plucking it so you guys are gon na See that I eventually stopped plucking it because you really just don't need to pluck that much as long as it looks good on your head, you're good guys so yeah and now I'm cutting the little baby hairs because they were a bit too long. And that's what I'm doing also when you guys are plucking a wig. You want to comb out the wig just so that there, the loose hair isn't still there and you aren't plucking the same thing also another tip is to do it run when it's wet. That'S. Why I have a spray bottle spraying the hair, because it's better to pluck or make your part when the hair is wet. The part will stay when it's wet guys. So if you want a middle part, you have to wet the hair and then make the middle part. That'S the key right there guys the key to life, the key to success, anyways. So, of course, I'm parting it and when you want to make um the front to look more believable, you have to part every row in section and pluck in between, but as I told you guys, I just felt like it didn't really need all that. And, of course, I'm combing out the excess hair, so I'm going back in parting the front part of the hair to create some more baby hair, because when you put the wig on you want to have that hair of swooping over your head just to make it Look a little bit more natural, so I had to cut it in like different angles, so it doesn't look like a blunt cut. You guys, you do not want a blunt cut for your baby hair. It doesn't look real, so you know just cut different sections and and then just chop it up in on even way. So it looks like more real, but don't chop it up. I mean just cut it in on even ways and of course, just comb it out. Just to see if everything is looking right now, I'm on the other side of the wig and of course I have to spray it again, just to make it wet cuz. This is how you do it and if you guys can see the hair looks a look very. It looks very believable and the way it is so I didn't want to pluck as much so I'm going in to create the baby hair first, because I didn't want it to have bald patches. You know, but I wanted it to look nice and real. So, of course, I'm cutting it a little bit more uneven. So now I'm plucking it and, of course, I'm not doing this for a long time, because it really doesn't need that much plucking. The wig looks very believable on its own, even though it's 180 density, it still looks pretty believable now, I'm going in and parting the hair so because the hair is wet, it's easier for me to part it and lay it and guys. I made a huge mistake. My part was lower, then I thought it would be so, of course you definitely want to line it up properly. I didn't before making your part, so I'm just making the part right now and I'm making it into a deep part. The hair actually came with a a frontal that was about four inches deep. Is it's not a lot, but it's a good amount, so I just parted it in a curved way, a deep curved part, and then I one thing you have to do is pluck the part. So it looks more real because you don't want the part to look so tight that it looks like no scalp can be shown. So you want to pluck your parts, even if you change it to a middle part. You want to pluck it. So it looks more believable and, of course, when you change it in the future that that part will still be there, because it's plucked more than anywhere else in the hair. So that's what I'm doing currently and after you pluck it. You want to comb it out. So that the loose hair can be out, you can see what you're working with. Do you guys see that scalp that faux scalp, guys wow that looks so natural anyways, so I'm just plucking around the part again just to my liking it. This is really just for your liking, guys. So now, I'm taking the front section of the wig which it's gon na be covered anyways, but when I do a middle part, I do want this part to look a little bit more natural. Now you can spray the hair and comb it out and leave it overnight, so it can dry and be beautiful and flourish and see the hair. You really want it to be, so you guys will see the next clip of me actually applying the hair. It'S all dry and I'm just gon na put it on for you guys. This is morning, so I have my hair braided back and I have my wig cap on so the first thing I like to do is use my got to be glued yeah. This is, this: is clutch clutch I squeeze some out, I'm taking a tooth brush, it's very dirty, so don't judge - and I get some out and I've kind of laid, my edges down a little, because the reason why I do this is because sometimes when I do The baby here on the wigs, my actual hair, shows so I'd rather be laid. Then Notley, I'm gon na have a side part going this way, so it's gon na be focused more on this side. Take my wig cap and I put it over the end, and so that's how it looks underneath I'm gon na put it on my head just to see how everything is so, as I told you guys, I did attach a wig, a band. So what I'm gon na do, for it is put the band on the back flip the hair over grab the lace, and then I basically try to line up the wig to where I like it to be. This is a 360 lace, so on the seat doesn't matter where anything is so. I still have the lace on because I wasn't done customizing like I wanted to see it on first before and, as you guys could see, my weight cap is really yellow and that's. Okay, like if I try to put concealer or foundation over it and it doesn't disappear, then I'll definitely remove it. It doesn't bother me though, but if I realize it's like really bad, I will definitely remove it. So my part is like not the cutest right now. So I'm gon na see if it's feasible, I did um wet the hair and do did the part last night, so it's kind of molded to where I put it, but that's okay. It really doesn't bother me. Looking at the wig, I feel like everything is okay. The next step really would be to cut the lace, so everything that's even this is the front. This is back, it's 360 lace, so it goes around. So I'm just gon na start cutting. So do you guys realize why I laid my edges because it's sticking out from the wig, so I will definitely lay some of the wig hair into my girl just still kind of like blend it, but I'll just wanted you guys to see it right now. I'M just trying to see if I could put some foundation on my wig cap to make it blend more with my skin tone. Cuz right now, it's like really yellow. So it's standing out, let's see how this looks. Okay, I can still see the wait. Cap is really evident and I think I'll just take it off. So I put the band on in the back and I put some of the clips in my hair because I don't normally use the clips. But tonight I don't want my wig flying off, because I have something to do as you guys can see the roots. It looks a bit more natural now that I took the wig cap off. It'S it's really long. It'S just this isn't cute guys. So I'm gon na try and cut those off right now, I'm gon na start on this side. Okay, so I clip the sides. The sideburns, as you guys can tell it - looks a bit more on believable right there. So the next step is really just to glue down this way. You'Re like ready, I take some got to be glue. I make sure it's very smooth and then I place the lace there. Sometimes I take my rat tail comb and I press actually. My next step is to use my scarf and hold this hair down what I'm gon na do before I do. That, though, is like try to find my part against the headscarf off and the wig feels pretty secure on my head. But you know I have to come on my edges and I'm gon na put some oil on it to get rid of the white residue from the glue so combing on my edges, and you guys can see that there's some white residue from the glue oil gets That out, you don't want to use water because then it will start lifting and then you're gon na have to do this thing all over again, I'm not too picky with how my hair looks like it's a wig, so it really doesn't matter to me. This side is gon na be hidden, but I still want it to look cute just in case the wind reveals my secrets, I'm not done, though guys cuz, I'm gon na lay like the center part. So what I'm gon na do now is make my part again, as you guys could tell from the first time my part was kind of low, so I wanted to switch it up, but then now my hair isn't cooperating. I'M gon na try and lay this hair down so guys I'm gon na try and finesse some of these grown adult hairs. So looking at the hair right now, I don't have a big issue with it. Let'S see how it looks when I can see. Look but not like this, so I just take a regular brush and then I take my powder foundation and I just go through okay. The color is not too dark. One thing: is you, don't want a color, that's too dark for your roots because come on like we all know, your scalp is lighter than your face, so I go in with this and if I'm not satisfied, I will go over it with a lighter shades. Like I'm getting to know and go over it just to brighten it a little bit more and then I go over the regular powder. I know this is a weird swoop in my hair, but the hair wasn't listening. I'M gon na lay this wig down with my scarf and I'll be done with this video. So this is pretty much it guys like there's nothing else that I'm gon na do, of course, over time it's gon na be more finessing and more plucking and just different styles, but friend today. I think this is okay. If I wanted to swoop it, that's fine. The part will get better guys. I just I didn't know it was this low, but I'm just gon na put a scarf on my head for now and I'm done


Comments
Karlisa: That hair looks so bomb! The hairline already looked so natural. You did a great job customizing it, very beginner friendly
MamiChula4eva: how is the hair holding up now ? Does it last long ? Thanks for making the video
therealsongstress: Gorgeous wig
Esther Sowell: Beautiful
Ciara Berry: You are too cute, and the wig looks great
Treasure Divine Femme: She’s so Cute . And her MakeUp at the end?
elizabeth Bartlett: im ordering this wig, did you get the silk top or just the regular lace?
100Years Apart: Very very nice
Anne M: I saw the reviews on Amazon and apparently its not big head friendly But otherwise I guess thats cute
Robyn Latice: Bomb
Blu’s Aura: Bought it today
It’s Ya Girl Sheena: Yesss huntyyy
Lvtinv P: What Color is the hair?
Riri Kingg: How long is the hair ?
Natasha Davis: Did u braid ur hair b4 installing this wig?
Mae Morris: Lmao this wig head with the wig on looks like a “white” Michael Jackson I cant stop laughing
Jhadai McDonald: AMAZON? Amazon....
Kristy Register: Is this 16 inches
dan humprey: $153 is not affordable