How To Customize A Lace Frontal | 360 Lavy Hair
- Posted on 25 March, 2017
- 360 Lace Wig
- By Anonymous
Follow me:
INSTAGRAM➜ https://www.instagram.com/forevercryss...
SNAPCHAT➜ @crystianadenise
ALL PRODUCTS ARE SHOWN IN THE VIDEO
HAIR LINK:
1.Coupon Code: H1046121
2.Hair Details: Lavy Hair Superior Grade Peruvian Body Wave 18"18"20" with a 16" 360 lace frontal.
Link: Bundles:http://www.lavyhair.com/superior-grade...
360 Frontal:http://www.lavyhair.com/360-lace-front...
Website:www.lavyhair.com
LINKS TO PREVIOUS VIDEOS
Original Frontal video: https://www.youtube.com/watch?v=XRPbXZ...
FAQS Frontals: https://www.youtube.com/watch?v=PiRlQY...
H E L P F U L V I D E O S:
BRAID PATTERN FOR WIGS/WEAVES: https://www.youtube.com/watch?v=yRX_Ab... TO
CUSTOMIZE A FRONTAL:https://www.youtube.com/watch?v=XRPbXZ...
MAKING A FULL WIG WITH CLOSURE(ELASTIC BAND):https://www.youtube.com/watch?v=To4KF2...
P R O D U C T S :
CANVAS BLOCK HEAD: 23"
https://www.amazon.com/gp/product/B00W...
... I MAKE WIGS ..
ALL BUSINESS INQUIRES: Email me -- [email protected]
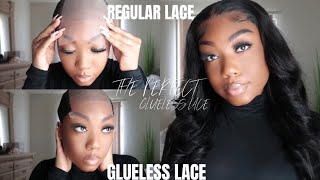
Hey babes welcome back to my channel so today I'll be showing you how to go from this very kind of standard 360 frontal to this customized and a fully wearable natural 360 way. Let'S get started alrighty. So, of course, I'm going to be taking my canvas blockhead I'll, make sure that I'll link this down below so that you guys can find it and also the hair pins just to get the wig cut broccoli on this mannequin head in it just makes it a Little bit easier just to kind of plug the lace as long as the lace is pulled tight and just so that you know I did go ahead and previously bleach these knots. If you guys with like a detail, you know how to bleach your front 2 or higher bleach knots on any lace, closure, wig so on and so forth. I'Ll be sure to get that posted for you just make sure you give it a thumbs up, and let me know in the comments and here I'm just kind of showing you the parting and just letting you know that. Basically, all those knots are bleached. So, as you can see, this hairline comes really really standard in full, which is just kind of standard across frontals, 360 frontals, so on and so forth. But I just take my tweezers and literally start to cook I'm making a point not to plug in the same spot over and over and over and over again, so you just kind of want to do this for radically I kind of find my own little method. I check my work over and over again, so I'll kind of tweeze a little bit and random spots back and forth, make sure to get rid of any harsh lines around the hairline and then I'll go through with my comb or my brush. Just to get rid of the excess hair or excess here, alright, and so, as you can see on this one, it actually came with like baby hair. So what I like to do is use that area just to thin out the hairline as much as possible and with this wig I actually didn't go as thin as I could've, simply because the density on the wig was not too too crazy, and I didn't want To make my wig bald, obviously, so you really just want to take your time. It typically takes me about 30 to 40 minutes, just to kind of go through the frontal and get it plots and customized to my standards, but it will kind of vary. I see a lot of people do really quick, tutorials and they're just kind of plucking just a little bit, but I feel like if you're going to do it, you might as well go all the way. So here I'm just kind of pulling out some baby hair and I'm going to take my razor comb just to kind of get those a little shorter. I don't need anything coming all the way down my face, so yeah, you can definitely kind of determine if you want to do this or not, I'm not too crazy about the baby here on the frontals when it comes to like laying it down. Like I whip my natural hair, but I do find that it helps the hair to just kind of blend a little better and it just looks a lot more natural and soft. So I think that it is a must for creating frontal, wigs and just customizing those, and so of course I am taking my argan oil um. What is this moves, so I create with nature argan oil mousse just to smooth everything down. If you guys saw my last frontal wig tutorial, you know that this is like my favorite product, and it really shows you where that hair is and how everything is going to lay so yeah. This is like my close to product. I swear. I'M literally obsessed with, like all of human nature, products like why am I not sponsored butter? You hit him like what's really going on but anyway, so I go ahead and go in the temple area and I'll just part that out. This is where I really really thin the hair out, and this is just because, most of us in the temple area, your hair is going to be a lot thinner than where we'll be around. You know like around your ears or at the top of your head. So, just to make this look really really natural I'll go kind of heavy when plucking those areas and so of course, going into the hairline. I want to get rid of that really really harsh straight line going across, and so of course, I'm just going in that sporadic motion here. I notice that I actually over bleached the knots from the top, but I'll show you guys how to fix that in the next upcoming videos. This is actually going to end up being about a three part series kind of similar to not at the front videos. Just so that it's not super long and I can be super detailed and if you have not noticed already, I did not speed up this video at all. So I want you to really see what it is that I'm doing so again, just kind of playing around with it, making sure that I get those baby hairs in line and, as you can see, it's already looking a lot better. You really just kind of want to take your time and it comes to getting that frontal. I guess as plus as possible, you don't want it to be bald. You just want the hair to look thin out literally, that's it we're just thinning out the hair, we're not balding spots and then brushing baby hair over it. No y'all got ta, stop doing that. So I even kind of went into that parting area just because it was a lot more dense than what I would like. As you can see, I just keep checking my work. I go through with the comb to get rid of that excess hair and just keep going, and so this is kind of the transformation. This is the customized side and then, of course, I guess, as it was before, okay and as you can see, I mean I could have been this out even more, but it's already a major different thing from when I started so even like around the top of The hairline around your forehead, I definitely go ahead and just kind of get those baby hairs together. Also so it kind of makes it versatile for those you know, customers or you wig, wears that decide that you like baby here and those of you that don't either way like I said I feel like it's definitely needed just to get that natural feel and, as You can see I'm already. The wig is looking a lot better, so you just want to continue to just pluck pluck pluck you'll kind of know when you're satisfied either one your fingers will be tired or you will truly just be satisfied with your work. So I mean I'm pretty quick at this out. I don't know I just I don't know, I'm just really really fast when it comes to doing it, but um yeah definitely take your time and get this to your liking, and I am a fan of like those um. I guess around your temple area, where the hair kind of protrudes out, so I definitely like to deepen that a little bit kind of up to you. I think it just looks really really cute when you do side, parts or flip over just to have little smooth areas, and so it's just kind of funny that whenever I'm doing the right side, your left, my right. I'M always I just don't pluck as much as I do the initial side, I don't know, that's because I start to get tired or it's because I'm right-handed and I just have a hard time, I'm just kind of judging the left side or the right side of The hair, you get what I mean you can see what I mean actually but yeah, so I'm definitely so thinning it out. It'S just my hands aren't as comfortable they're, not in a comfortable position. So I kind of get lazy and of course I just take the razor and go through with that and all the while I'll just keep checking my work and going back and back like I said you don't want these areas to be bald, we're just thinning the Hair out and the mousse definitely helps everything just kind of lay naturally, and as you can see, I'm clearly just obsessed with baby. Here I keep playing with them so, and I got a lot of questions on my frontal of video. You guys I did post our frequently asked questions about frontals, video and I'll, make sure that I'll link that down below as well just for any unanswered questions. But hopefully this video is just as detailed and for you, visual learners, you'll be able to just kind of shut me up. Put me on mute and continue to watch alright. So now that we're pretty much done on plucking everything, I do kind of go back through. Just to comb out that excess hair - there is a lot of here in this, so just be mindful with that. It doesn't mean that you're, a frontal was falling apart. I hear a lot of people. Tell me like oh my front toes, don't last very long. I have never experienced that. I don't know if you guys are over bleaching knots. I don't know whose frontal you guys are you guys are using, but the only frontals that I typically use is La Vie, hair. Just being completely honest, I haven't tried any other company, so yeah and the moment that clients send me other companies, I'm just kind of so it's oh yeah, but yeah. So I'm just kind of teasing the hair just kind of playing around with it and, as you can see, everything looks really nice and natural. I'M literally obsessed with this, like it looks really really cute and the hair is a natural wave. So the baby hair kind of did the same thing as well and, as you can see, this is about how much hair I ended up pulling out. It looks like a lot, but it's really not that much and it did help. So I did go ahead and just blow dry, this hair out and, as you can see, this definitely looks really really flawless, but I wanted to go ahead and just take it just a little step further. So I actually take the wig off of the camis head. Flip it on its back side or the underside, and then I go in with those pins just to hold everything down, of course, and the hair is not perfect up under there at all. But my goal is just to actually tint the lace a little bit, but instead of me, using like another product like a chemical product, I'm going to go ahead and use my fit me foundation, a pressed powder and, of course, guys use your skin tone. Whatever you would use to like set your highlight, that's what I suggest you use to do this so brown skin girls like skin. It doesn't matter a medium, so on and so forth. You literally just want to take a fluffy brush. Some draws have a powder, preferably a pressed powder, that's like a foundation and just go all over that lace. That'S really going to help! You know if you did mess up anything with bleaching the knots under bleaching, then that's just going to kind of correct it or, if you don't know how to bleach it at all. This is a really quick fix and it'll definitely help you out so and so of course you can use like a wig cap, but for me it's kind of hit or miss with those. So I definitely prefer just to put a little white powder on there and go out the door all righty, so here's the wig I just flipped it back over and I'm just kind of showing you the difference here where it does look. Just look a lot more natural than before, and so I don't know tell me what you think, god I've not leave any comments, questions down below give the video a thumbs up if you enjoyed it and, of course, stay tuned for the next couple of videos that Are going to be released with me, showing you how to style the hair, how to install it glue, lessly and other than that? I love you guys stay pretty, and I will see you in my next video


Comments
Rededj: I bought this exact wig back in November bc of the frontal you did but the hair I got was terrible. The wig was tangled all the time and shed quite a bit. I'm so disappointed that regular customers get the crap hair and youtubers get the good stuff. No offense to you... you make those wigs gorgeous. But shame on the vendors. Im glad I didn't spent more than I did on the wig.
ForeverCryssy: Thanks for watching guys! Please look at the links in my bio for more info on how to customize frontals. This video focuses on plucking the hair to reach your desired hairline. The next video will focus on bleaching the knots. Stay tuned ✨
Rene Sole: I love how natural it looks
Nicole Iheme: This came out so nice and yes definitely do a bleaching video
Mrs.RED'VON 77: just beautiful Love it
Caitlynn Collins: I would love a tutorial but idk if I can wait lol I'm making a unit this weekend , just wondering how long I should leave the bleach on for
Nicole Iheme: What origin did you choose for this wig when you were buying it?
Ki: Everybody on their 360 frontals and im still here strugllin with a lace front closures ..i hope to get this talented with my videos soon.
Desiree Victoria: Love your vids
Mo: I'm trying to learn how to do this because I needdddddd a frontal for prom
Ashleyjhai Imperfectly perfect: I would love to see how to bleach knots
TheHareLife: What origin and length is your wig?
Priscillaw heat: What mouse do you use? good video
AccidentalBeauty91: can i send yu my wig so yu can bleach and custom my hairline im scared to do it myself
S La: Disappointed that you didn't show the bleaching process, to me, that's a part of customizing it.