Making A 360 Lace Wig: Very Detailed
- Posted on 07 February, 2017
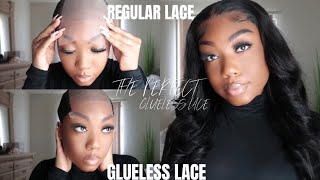
- 360 Lace Wig
- By Anonymous
Hello this video is showing the process of how I construct my lace wigs for my clients. I'm making this wig for myself using WoWigs.
Hey love, so I'm here with a wig making video I'll make. You guys know I own a hair and makeup bar here in Saginaw Michigan, and I make wait quite a bit for clients, so the wig I'll be making today will be a 360 lace. Frontal wig and the hair came from both wigs, which is a very popular company. I'M sure you guys heard of them. Typically, I order here from a different vendor, but I wanted to give them a try and see if I like it and of course I experiment on myself first, so I'm making its way for myself and um. As you guys know, it comes in this pretty pink box and what I got, I believe it was the Indian body wave. This is the 360, I'm sure you guys seen this quite a bit and then I got - and this is a 18 inch and then I ordered 3 22 inches in the same texture. So if you guys can see that really pretty hair, I don't see that many split in so that's awesome, and so I'm gon na get started on constructing this cap. If you guys want to see the process stay tuned, I forgot to tell you guys all so. Usually before I start making my unit I like to try on the 360 before I do anything to it to make sure that it actually fits how I want it to fit before you know, I do any alterations or anything like that to it, because once you Start sewing it on the dome cap, which is here if it doesn't fit properly already, then, is not gon na fit once you get it on here, unfortunately, so I do like to always try this on and again make sure if it's pretty good before I do Any constructions to it, because the other flip side, I know I look crazy with it, but the flip side is that um this cap here, even with it being elastic, is that once you soul, especially like 3 bundles going to the the middle part, it start adding Weight and the 360 sometimes slips back like that. So if it's not already fitting how you want it to fit, which of this is pretty fitting pretty snug on my big head, then you will have to either use an elastic band to keep it on your head or you'll have to tack it down. If it fits like perfectly - and you put at least three plus bundles on the hair now, if you do two bundles, sometimes it doesn't cause that heaviness to slip back but like, if you do 3 plus bundles, then you're definitely gon na have to have a way To tack her down or it will slip back so just a heads up and let's get started on this. Alright, so, basically, I'm showing here where I've already bleached the nuts - and I just shown you how that looks, but those not bleach where the back and the front and the sides where look more see-through - and I am going to get this. Oh actually, this trick I like to show where, if you're a mannequin head is not fitting right, just put a plastic bag underneath it for your stand and it'll hold, but now on here I'm just stretching down that elastic cap and I'm going to make sure. I stretch it all the way down and pin it, because what that's going to do is allow you to have a smooth surface at the top in the middle. You know how sometimes the elastic cap can bunch up when you start to sew, but if you stretch it all the way down, then it will be smooth in the middle when you start sewing the actual bundles. So what I'm doing right now is again just positioning that around the cap, making sure that I pull it forward more in the front and then right at the nape in the back, because again with that is gon na. Allow me to do to give me enough room in the middle to sew all the bundles that I want to sew on here, which is three bundles without running out of space. So I do like to stretch that down a little bit further in the front just to give myself that extra sewing space you so here, I'm now, I'm going to start stitching around the perimeter of the 360 place, closure or frontal, whatever you want to call it, And I'm going to stitch right on the edge of the hair and the lace right where it stops. I feel like stitching right. There just really gives that secure hold to the elastic cap without a shifting or moving or coming too loose, depending on how long you want to wear this big, how long you want to keep it, which, hopefully, for a long time, just joining right there. It just keeps that secure base all around the perimeter of the cap, so I'm just going to continue that stitch all the way around and make sure that is on there tight and I'm stitching to the side of going into the loops. That'S going in through the side way and set it up and down I'm going to the side so again just speed this up as the stitching make sure I continue to stitch until the meet all the way back around so where I first started that first loop And what I'm going to do is join those two together doing like a crossover, so I can make sure that that thread is in there secure and tight. So I'll show you what I mean it's coming up here, where I'm just going to go in and make sure that thread meets the beginning through it, so it can be nice and tight it. I wish we can sew this fast in real life. The way I can speed it up makes making these looks so much easier. So here the only thing that I'm doing now is taking it off of the mannequin head and I'm going to cut that extra fabric. That'S underneath, where the 360 set at and I'm gon na, snip that right at the base, it's again again to have that clean, smooth cut of the wig. I, like cutting mine's, really neat, because again I guess I make I make these for people and I love them to look neat and professional. So so here, I'm just gon na put that back on the mannequin head stretch that again all the way down. Because again we want that fabric in the middle, as you can see, to lay smooth nice and tight, so you see how that is really smooth at the top. So when I start stitching, I won't have all that extra spandex material bunching up inside of my West and I'm gon na start stitching these webs from ear point all the way around so ear to ear and I'm going to do the flip over of the track Method, so here I'm going to start again, I said stitching those webs and I am stitching through the West cuz. I do like to knit to be tight and secure and I'm just going to stitch and get my tracks as close as possible. So I can part it anywhere I want without seeing the tracks. I also like that little method of sticking a pin when you're getting ready to go to your left or right side depending on which hand you use the most to hold the track up. So that way, you can stitch freely without the hair grabbing into the thread. So that's just a little tip for you guys now. The only thing I'm doing here is just taking it off of the mannequin here, removing the pins and I'm going to brush it out. I wish it was real life where I was sold this thing that fast, it actually took me four hours, but, as you guys see, it turned out really pretty it's so full and I love love. Love, love, love, big hair. So here's me just wearing it again. I like to put it on before I get into the coloring process, so I want to show you guys how it looks on my head and how good it fits, and you guys see I'm still going to tweeze that. But I want you guys to check this out. Okay, so basically I have this made and I just looked liked again. Try it on before I get to coloring it just to make sure everything is okay and you see I haven't tweeze it yet, but again I'll do all of that once I'm done coloring. So, as you guys see, it fits perfect ear to ear and you see how full it is: beauty, fo phone boom boom, and then I will be back, I'm not too color and you guys stay tuned for this color now. The only thing I'm using here is the quick blue developer and I'm going to use salon care 30 and 20 volume. What that does is speeds up the process, but not too fast. So I'm gon na cut it with the 20 volume to make sure it doesn't get too blonde and over-processed the hair. But I'm gon na use the 30 volume to make sure it gives me a nice lift and what I'm going to do is do highlights I'm. I am doing waves and slices so two slices and a weave two slices in a weave. What that's gon na do is give me the most dominant blonde that I can get without taking the whole unit blonde and giving me some nice honey tones and chocolate tones in my highlighting process. It'S also know give me a nice dimension, so I've part of this hair in six quadrants and I'm starting on the left first quadrant and I'm just showing you guys how I did that and again that is a weave and two slices, a weave and two slices. So I'm just continuing that patterning over the entire wig. Now here is the unit with all the foils, and you can see it really took me an hour and a half to find an hour half an hour and 15 minutes to foil this whole unit. And so, as you can see, it's foiled - and here is the wig after I washed it out - I'm going to put the toner on there to get rid of those brassy tones and I'll come back and show you that unit all finished. So you can see how beautiful is going to be okay guys. So here is the finished product. I love it now. I have not acted down yet, and I will do all that and come back with the video of you guys, showing you guys how I put this on. I would do that tomorrow and show you guys and then I am also going to show you how I get the part looking natural, so it actually looks like scallop because right now, it's just you know your regular typical lace part, but I'm actually going to show You guys how to do that and get it looking natural, but right now I just want to come and show you the color, so you all can see that. How pretty that is, I love it and yeah and it's just blown out again. I haven't styled it or anything yet, but I just want to show you guys this color. So what does it almost look like the way that was offset? This is human that one with synthetic and see it's 22 inches. So you guys see that this is basically her and oh and the hair color amazing, like it still feels so soft, which you know again. I was worried about what color in his hair, you never know is sighs. Oh you never know. If how the hair is gon na hold up and it's funny, because that's actually the vendor texting me now, ask me: do I like it, but I'm get ready to text her back and saw her, I'm in love and that I'm videoing right now so so I Use my alcohol just to clean around my edges, just to make sure I get like any makeup any oils, any sweat off my forehead before I go in with this tape, how you tape adhesive by the hair diagram. I love her she's on Instagram, but you guys have to follow her but anyways. I use her bold, hold tape there and it works amazing. You see it's really simple, really easy to put on. I just kind of map out around my hairline and I have extreme edges so like I have those ashanti edges where they are everywhere, but this tape is so easy to get off and show you guys. So then, I kind of mess up a little bit right here on my forehead and as soon as I put alcohol in there, it's going to come right off without taking my hair off. So here it is here. Look at this tape act crazy on me on that moment, so I was like you know what forget about touch to it: let's take it off alcohol screw up and you see come right off, though pretty easy you instant, facelift, alright guys. So this is a unit. I went ahead attacked it down tonight because I wanted to sleep on it so the way I can put my gorilla snot on the edges and kind of really lay my hairstyle like I want to, as you guys, can see, here's the ear tabs everything laid down. Pretty nicely - and I have one little piece right here - kind of flapping. But again I can fix that with my gorilla snot and tie my hair down tonight. But yes, I absolutely love it and it's amazing and the color makes it looks natural. So I will be doing other styles with this and I will show you guys the back when I pull it up, so they too over that video and have a good day. Love'S bye,


Comments
MzKesh: Did you mix the developers? How long did you leave the colors in? Its beautiful!
Naruto: did you start sewing the frontal at the edge of the dome cap even though you pulled the cap all the way down on the mannequin's head?