How To Make A 360 Lace Frontal Wig Unice Hair
- Posted on 06 September, 2017
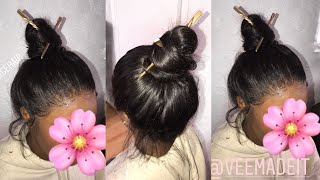
- 360 Lace Wig
- By Anonymous
DIRECT LINK TO SUBSCRIBE TO MY YOUTUBE CHANNEL ....... ITS FREE https://bit.ly/1FabbulousC
LIKE | COMMENT | SHARE - Thanks
Hey Loves here is a new video on How to make a 360 Lace Frontal Using hair from Nice Hair Wig UNice Hair
$4 discount code: unice201708
Peruvian straight hair 4 bundles
https://www.unice.com/3pcs-lot-unice-p...
Peruvian straight hair with 360 lace frontal
https://www.unice.com/unice-4-bundles-...
Straight hair 360 lace frontal
https://www.unice.com/unice-hot-sale-3...
Peruvian straight hair with closure
https://www.unice.com/unice-peruvian-s...
Peruvian straight hair with lace frontal
https://www.unice.com/unice-3-bundles-...
UNice official website: https://www.unice.com/?utm_source=yout...
(PRODUCTS USED)
*Canvas Block Head Mannequin (From Amazon)
*Tripod Wig making Stand (From Amazon)
*T-pins
*Dome mess cap
*Weaving Needles
*Weaving Thread
*Scissor/shears
*Razor comb
*Tweezer
*Rat tail Comb
*Wild tooth comb
*Hair Brush
*Hot Tools curling wand
*Nairobi Wrap it Foaming Lotion
*Coconut oil Hair Polisher
*Got2b Styling Gel Spray
*My Foundation Powder to tint the lace closure
~~~~~~~~~~~~~~~~~~~~~~~~~~~~~~~~~~~~~~~~~~~~~
(CHECK OUT THESE OTHER VIDEOS)
*How I Make My Wig Look Natural Video *
Customize my Wig , Make Baby Hair ,Tint My Lace https://youtu.be/8PEmvNs20q8
*The Best 360 Lace Frontal*
How to Sew on your 360 Lace Frontal https://youtu.be/9Q_uQwNUiPY
*Pixie Cut Weave*
Full Sew In Weave Pixie Cut Start to Finish https://youtu.be/9cUTq9_VpJA
*Get Ready With Me*
360 Lace Frontal Flexi Rod Curl , MakeUp and Outfit https://youtu.be/aFMZqzpOkOs
*How Long can your Sew In Weaves Last*
Lace frontal 4 Weeks Update https://youtu.be/5FMCUOMb-Kk
*Watch All My Wig Making Videos Playlist*
*Watch All My Full Sew In Weaves Videos Playlist*
~~~~~~~~~~~~~~~~~~~~~~~~~~~~~~~~~~~~~~~~~~~~~
(KEEP UP WITH ME)
*Instagram: @fabbulousc https://www.instagram.com/fabbulousc
*Facebook: @fabbulous https://www.facebook.com/fabbulousc
( BUSINESS INQUIRIES ONLY )
*BOOK ME* For Clients Custom Made Wigs or My Pre Used Wigs Sale
*If you are in the Philadelphia Area I take APPOINTMENTS ONLY *
BOOK ME for Sew In Weaves and MakeUp Appointments at My Small Home Beauty Salon
Inbox me on Facebook , DM me on Instagram or Email me
My Name is Caroline , i am a License Cosmetologist , a MakeUp Artist, a License Practical Nurse and a Owner of a Small Home Beauty Salon
*THANK YOU FOR WATCHING AND SUBSCRIBING TO MY YOUTUBE CHANNEL *
You you hey guys, welcome back to the channel. This is your girl, Caroline, I'm back with a new video, so this is gon na, be a 360 lace, frontal wig how to make it for yourself. So let's just get started there here, I'm gon na be using. It'S from a company or Aliexpress called you, nice hair. This is the Brazilian straight hair. They sent me three bundles up here, plus a 360 lace closure piece. The wefts on this hair looks pretty good. I haven't had too much beer on it here. Itself looks really good: the hair has been washed, so this is how it looks after being washed and conditioned the front. Shal looks pretty good. The frontal came free plug, so it looks really really nice, but I still had to go in and um pluck some more because I like mice to be customized to my liking so way they come pre pluck all around it. I think the lace color is also like a medium brown color, which is OK for some skin tone, but you might have to go in and add a little bit of bleach or foundation powder to tend the lace a little more depending on your skin tone. But the Front's are looks pretty good, so we're just gon na get started with this video. Okay, all right. So the first thing I usually do is wash or co wash any hair that I get. If I'm making a wig, then I will go in and customize the hair, including tweezing, making my baby here, I'm tempting the list and all that good stuff. If you want a detailed tutorial on how I customized my wig make my baby here a little tutorial on how Pacific I tweeze my hair, you gon na, have to check out my last video. I will leave a link in the description box, so you can check that out, but I'm just going to get straight to the part of where I start to make the wake so we're gon na start to make this wake starting off. You'Re gon na need some type of weaving cap. I like this one is a mesh breathable cap because it has the hole holes in it. I like that one better, so I'm just gon na take the 360 and I'm gon na place it over the net. Why placing it on the net? Remember the positioning of the 360: you don't want it behind the net or you don't want it directly on. Then you want to position that cap a little past the net. This way when it gets on your head, it falls right on to your hairline, because the the caps usually falls exactly onto your own hairline, and you don't want 360 to be right on your hairline. You want to let it pass a little off your hairline, so I'm gon na position it and then apply these t pins just to hold it down and then I'm going to start to sew from the back. So once we have our 360 composition with the t-pins onto the weaving cap, I'm just gon na take the needle it's right. Now, I'm going to thread a needle and I'm just gon na make a nut. I do a double nuts at the end, just to make sure that it's secure and then I'm going to start from the middle and I'm going to sew around the 360 in the middle so that the thread gets attached to the weaving net. For me, this is how I do the sewing of the 360 around the cap. What I do is, I hold the thread in my left hand, and then I take the needle and thread and I pass it through the lace and the weaving net and I make a loop releasing the thread. That'S in my left hand. I don't know if that makes sense, but this is how I does it, so it makes a continuous loop around a 360 okay. So this is what I mean by a continuous loop around the 360. As you guys can see, the black thread is making like a circle around the 360, and I like to do this because it really keeps the thread see killed and the thread does not easily get the scroll or gets cut or separate from the week. So I really like to do this thread in ethic around the 360, all right so once I've make my way back to the top after going around the 360 - and I know that 360 is secure, usually some people - and I have done it - how usually we'll cut The edge release, or sometimes I've done, I will leave it on and if you want to leave it on, all you have to do is do the same method around the three six people on the top of the list, so that the lace can be secured, and It'S flat when you soldier, once you saw your wax on now, once you have your lace and your 360 perfectly secure, you're gon na start to apply your webs from the back, and you want to start with a single web and you're gon na start with your Longest left, depending on the style that you're going for I'm starting with a 24 inches, because I have 24 22 and a 20 inch. So I'm starting with 224 and with a single track. I'M gon na start in the back and I'm going to start to sew. Going in one direction, this is how I do it. I'M going to also cut my tracks. You don't have to cut your tracks. You can flip your trunk if you want to, but I'm not going to flip in matter, because I need this 360s to be flat. As possible, especially if I do pull it up, I want it to be really flat and nice, so I'm not going to do the slip over method. Instead, I'm going to cut my tracks, you definitely definitely do not have to cut your tracks, but you can, if you choose to okay, so moving upwards. Now, I'd like to apply to track down, as you can see, I like to apply two tracks at the nape area and then, after that I will start to open, apply the tracks in or uShip form. I will apply the tracks. I'M going in an upper uShip form just like this, and then our just starts to apply my thread and needle and I'm going to I'm going to continue on doing the uShip, for until I get on to the top of the wake okay. So once we get to the top, you can see a continuum in au part shape till I get to the middle. Now it turned into like a u / circle. If you want to call it that now, what I'm going to do is apply my track. I'M still doing just single track and right now I have about two and a half bundles on there. So I'm gon na do the same single tracks, but instead I'm just gon na. Do it straight across and I'm going to do it in the tiny little section till I get to the top of the wig, where the 360 closure and all right you guys, as you can see, we are at the end of this 360 week. This is my last track. I'M going to marry the last track, so the 360 frontal I'm just going to show them both together and I'm going to close this week. Okay, all right, you guys, we are finally completely done with our lace. Frontal wig, I'm just gon na, add the finishing touches. Now I'm going to cut off the extra lace in the front because I don't need it anymore and then I'm gon na take the wig off the mannequin and I'm going to cut off the wake up. That'S inside the lace so as to be able to expose the least and then I'm just going to apply my elastic band to my wig and I'm going to attempt. That least, if you want more details on how I customize my lace to fit my head and how I make my lace looks as natural without bleaching it. You want all that information. You can check out my last video. I did a for customizing lace, frontal and how to make your wigs look realistic. You can certainly check out that video, but that is it for this here I actually love the hair. I love the texture. I did not get to curl this hair, yet I love the gray style that it came in, so I will leave you nice hair in the description box, make sure you guys check it out, but that is it for this videos. As always, I love you guys and I will catch you all in my next video bye here we go


Comments
sugarlips1231: Beautiful your sooooooo talented thank you x
marcelle dupon: Merci FabbulousC, merci d’avoir partager avec honnêteté tes connaissances. Tu es un amour ❤️, tu es pour moi un bijou précieux. Cette vidéo je l’ai vue plusieurs fois. Cette vidéo montre ton amour et ta sincérité pour ton travail. J’espère que tu nous en referas d’autres comme ça. Love you FabbulousC ❤️✌
Latoya Andrews: Beautifully done you always slay I love it
Valarie Mendonca: beautifully done
Makeshia Nesbitt: Absolutely Fabbulous!!!!!!
Monsie Babe: You're always fabulous xx
lisa g: Wow! Give me your hands...Lol very nice as always I may try it myself..? Where do you purchase the elastic band to hold it. Thanks for sharing
Ethel Stinson: You are so awesome!!! I LOVE IT!! YOU ALWAYS COME THROUGH Girl!!!
Monica Randolph: Once again u r fear's wow enjoyed watching
Glenda Rogers: Luv your videos!!! Subscribe
Cristy Ventura: beautifulll god
Kayla Johnson: Can’t wait to fix mine
Michelle Davis: Do you ever bleach your knots?
Katherine: guess i should watch the video since i clicked like...love your video Love tfs
Gabriela Costache:
Lakhwinder Kaur: To keep it flat
Sandra Ikhayere: You are the best
Lakhwinder Kaur: Did u use single weaves