Let’S Make A Bob Wig | Quick & Easy
Hi guys,
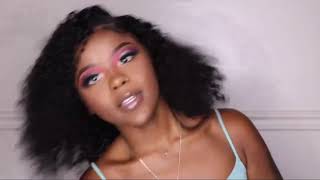
Welcome back to my channel, If you are new you are most welcome. Today I will be showing you guys how i achieved this bob wig, I have detailed videos on how to make a wig on my channel, you can check those out if you need a more in-depth explanation on the process. I am happy with the way it came out, hope you find this video helpful.
Hair
Aliexpress.com
Social Media
Instagram: its_alicia07
Twitter: its_alicia07
Facebook: Alice M Hautanen
Snapchat: joan1238
Tiktok: its_alicia07
email: [email protected]
#wig #bobwig
Hi, everyone welcome to my channel hope you guys are doing great today, I'm going to show you guys how I achieved this unit. It'S been long since I made a week, and this was a bit challenging, but anyone will to show you guys how I achieved this shot Bob. So what I use were just two bands of 10 inches and 10 inches less front or so for the less front row. I bleached it off-camera. I just bleached the notes off-camera and I used two binders because I didn't want to week the unit to be very thick than the usual way. I always do it with three bands, so I went right ahead and got a medium sized wake up, and then I just placed the less frontal and the wake up on the manikin head and secured it with some tea pens and also made sure that the hair Was tied up with some ribbon just to make sure that it does not disturb my process when I start sewing up and then for the needle. I used a u-shaped one because I find it to be much easier to use and I made sure that the less frontal was well laid like it was flat at the back. So it does not have any bumps or anything, and then I just went right ahead. Starting from the bottom and say sewing in the lace front is so I have a video on my channel on how like a detailed video on how I make a week, so for this one, I'm just going to be speeding up the process for most of the Parts because I feel like this time pretty much - everyone is more familiar with how to sort like you know, like sewing and stuff like that, so I'll try to explain some parts which are a little bit like maybe new, but most of it I'll put the link To the video which is more detailed on how to bleach the nodes of the front row and the other pads as well, now that the less front row is well secured and looks neat and well, then I go right ahead and start putting the bandar. So for the pandas, I didn't want the bottom of the unit to be very thick. That'S why I'm just using a single worth. I didn't double it up, because I did not. I don't like the thickness bulkiness at the bottom of the week. That'S why I just went as a single weft, so I went ahead and just secured them with the tea pens, because I want it to be neat, I don't want it to be lumpy or bumpy at all, so the tea pins come in handy in this one. So I just say it sewing through and then I didn't cut the banner at all, because I just did the fold-over method. It'S much easier. So for this as well I'll. Just speed up the process because I'm just repeating the same thing going over just sewing around the week up onto the top. So by the time I said using the second bundle, I started doubling it up doubling up the web, because now at least it has to have some more volume at the top. So I'm just sewing in the same method as well, just going back and forth back and forth the same procedure just easy way of doing it. Then, once the week was all done like I was done sewing the week, I cut off the excess wake up which had remained, and then I put it on the mannequin head and started tweezing their hair, like you know like making it look more realistic because it's A bit thick on the edges, so I go right ahead and just plucking out some hair. So most of the times, I don't usually do this like full plucking on a mannequin head. I feel like I don't get to see the real. You know like the real deal, so what I do most of times. I do it on my head when I'm styling and everything, but at least I do try to remove some hair while like, while I'm sewing it. So I just spray some water and it makes it more easier and then just that plucking out some hair on the edges just to make it a little bit more realistic. So when it came to styling the hair, oh my god, it was a little bit challenging cutting, because I wasn't really sure what I was doing and I wasn't really sure if you don't come out like it did. But anyway, surprisingly, I was able to lever up the back. It'S always so challenging to cut the back, because the size of the mannequin head and my head are not the same. So but this time I just tied it up with a ribbon and then I just cut it. I wanted like to be it to be really not really short, so I didn't really go like for the shortest length, but anyway yeah. I just liked it style. It up on the mannequin head, put it on on my head and then check and try and see how it looks on me and then, if I needed some things to be adjusted, I put it back on the mannequin head and just at it. You know like just by boiling eyeballing stuff and just seeing which part needs to be adjusted so but yeah. This is how the hair came out and I should say I'm really impressed with what I did. It'S been long since I made a week and achieving this. Just feels nice, it's, it was a bit challenging, but it feels good that it came out just the way I thought it would and yeah, and I did actually. I did also trim the hair as well. I just removed some volume because it did also look a little bit thicker than I thought it would. So. I did use like a little air razor blade to just like trim out the hair as well just to make it a little bit lighter so yeah and I just went right ahead as I it's tiling it. I did style it and do everything off-camera as well. Yeah and that's the full look, then this was how the hair looks like what'd. You guys think I liked it and considering it's been so long since I made a week, I'm liking how this one came out and it does feel so light they here is so amazing in the shade that much is from Aliexpress I'll put the link down in The description box, if you want to check whether I got it yeah, this is how it looks. Thank you so much guys for watching and please don't forget to subscribe to my channel for more videos like this. Thank you for watching and I'll see you next time.


Comments
RitaRiri: Very beautiful wig and it’s just perfect for this season. Love it
Nelly Harma: Yaas girl! Giving us all the tips. I need to try this out. It's pretty and perfect. I love short bob wigs. They bring out a sense of class. You look stunning on it queen.
Lilac Glo: Hey sweetheart! Love love the Bob! It’s amazing that you made it yourself sis! It’s absolutely beautiful! This style really suits you. I love love love ❤️
Kaj Yakuzonik: Wonderful! And the result looks so pretty! <3
Rosslyn Mamai: good job! this came out so well actually. I love it and will try this out sometime
Miriam and Twins: Wow that short hair looking bomb, i like how you sow the wig step by step and the style is beautiful, rocking this wig in this summer like yassss
Miriam and Twins: You literally chop the lenght well, was so good one could think it came like that lol, and the front plucking handwork is everything sisi
Ashleytima: love it
sabinablackk M: ❣️
butterfly9274: Wow! You so Talented!
dhermohlab: you should teach me,,beautiful
Serahz Sirama: Wow so beautiful love it love it and you look stunning to new friend hope you pass by my home to.
2120 Six Strings: beautiful dear... dropping my gift here ...see yaah
sabinablackk M: Good job am coming to steal it