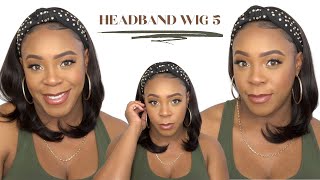
Must Have ✨ Clear Hd Lace + How To 613 Highlights In Mins | No Bleach | Beautyforeverhair
●▬▬▬▬▬ #BeautyForeverHair ▬▬▬▬▬●
☛Get $10 Off Use Special Code:
beautyytb
☛With QuadPay or PayPal, 4 or 6 Interest-Free payments
☛Stripe Payment is Available!
I’m Wearing: Body Wave 13*6 HD lace wig 26inch 180% density
Direct link➤https://bit.ly/2TW4opp
Gorgeous Ombre highlight wigs➤https://bit.ly/3gRbd4J
Top 1 Selling➤https://bit.ly/2TTyWIq
Hot Selling 13*4 lace wigs➤https://bit.ly/2TZOhY5
☛Don’t Miss BeautyForever Hair Official Site Huge Sale!!!
https://www.beautyforever.com/ ➤Super Brand Day:
the 3rd Friday&Saturday of Each Month EXTRA 10% OFF
Aliexpress Beauty Forever Website: https://bit.ly/3epWyuk
Hot Sale hair on Aliexpress
Store: https://bit.ly/3kVOzI7
Amazon Beauty Forever Hair: https://amzn.to/2KSGkyB
Instagram@beautyforeverhair: http://bit.ly/IGBeautyForever
Beauty Forever YouTube
Channel: https://bit.ly/38akLUg
Customer Service WhatsApp:+8613783534924
——————————————————————
♡KEEP UP WITH ME♡
IG: @Hypnoticlaadyy
Twitter: @Hypnoticlaadyy
Email: [email protected] ——————————————————————
TAKE CARE By Julian Avila : https://soundcloud.com/julian_avila
Song promoted by No Copyright Music Library: https://youtu.be/-lw02iQkQYk
Hey, ladies, it's your girl, hypnotic lady and i am back today. I am working with the company beauty hair forever. Here, i'm just showing you all the gifts they gave me all the goodies. It did come with this cute little holographic package. I got a silk head, scarf, of course, a wig cap and an edge control brush. They also gave me some cute ass lashes y'all get into it. Packaging was a1 and, like i said, i felt like you got everything that you needed for beginner status. This is the wig that i received. This is their body wave 13x4 lace wig. It is in 26 inch lace and it is hd here, i'm showing you guys that i did go ahead and bleach and pluck the hairline off camera, and it looks just like this. Now we are going to be doing. 6 13 highlights girl with no bleach, and this is how we gon na do it. You see that price tag for beauty supply. That was a little high, but you know we don't make it work. We gon na make it work, so you want to take your one bundle and your wig and we are going to start in the back and the lower back portion and section off. I did go in and buy the bundle 26 inches, so it matches the wig length as well. So it's not looking scraggly at the ends and i'm just going to take some needle and thread and just go in and sew in a blonde track and then pull out some hair and then sew in another blonde track. On top. Until you get the look that you want, you guys will see what i'm doing in just a moment, but section off your hair. Get you like a little hair clip or something pin the top off and then we're going to start sewing in with needle and thread. It'S real, simple, y'all, real, easy, quick highlights. If you don't want to damage your hair or risk damaging your hair, putting bleach on your hair simply just go to the beauty, supply store girl or if you already got some blonde hair that you don't use sew it into the weave. Just like this, you see how i'm doing it, i'm just wrapping around twice two or three times, locking that knot in and then i'm just going in and sewing in the track and i'm starting all the way at the bottom and then we're gon na work. Our way up to the top of the head me uh now, once you get to the top there's going to be a line of demarcation from where the frontal is and where they started, laying the tracks um, i am placing my blonde tracks right, where the frontal Begins and the tracks end once you get up to the top you'll see more than what i'm more. What i'm talking about um here, i'm just brushing out the hair, make sure everything looks good and then i'm going to show you the top angle. When i go off in section the last piece in between where the frontal is and the hair is, i hope i'm making sense when i say that, but i'm talking about where the net frontal piece and the actual cap of the back of the wig, where the Tracks are laid when those two meet, that is where you want to place your front. Your tracks at me me me, okay, this is the last placement of the track that we are going to use, i'm at the top of the wig, where the frontal and the cap meets and, as you guys can see, i'm just going around the base where how The cap was made where the tracks are laid and i'm just going in and sewing in that last track around the top. Now you can leave it right here if you want to keep it in and just have it looking all natural where you don't see the tracks or you don't have to you know have more than one part you leave it like this, but since i am going For a side part, and i'm going to go ahead and pre-style this hair on the mannequin head instead of on myself, i am going to go ahead and sew tracks onto the front tool, but that part is optional. Like i said once you get to the base where the lace is and the cap construction is, you can stop there if you want to add more color depending on where your part is going to be. You can do that, but you will be sewing on the net on the lace where the hair actually is on the frontal part me now. I am sewing in the track that is going to be on my frontal, because i'm doing a side part all i did was go in and put some black root spray on the edge of the track where the blondes are where the root is. So it's not looking super super blonde and it blends in with the frontal - and here i'm just sewing it onto the lace right here on the side of my part and then i'm just going to flip my bang area back over blow dry, the hair and we're Going to get ready to install this is what she's looking like once we've sewn in every track: y'all, i'm loving it. This was so quick and easy, and it only took me like 30 minutes and we didn't have to bleach no hair. We have to dye nothing. We have to wash no hair, no nothing and we got a full head of highlights girl like get into it, get into it. Look at all that color baby, it's giving me storm, it's giving me grandma what i want. What we need now, i'm going to take some heat protectant spray just a little bit and i'm going to take my blow dryer with my comb attachment and i'm just going to blow the hair out and get ready to press it out before we get into the Install and that will be it y'all. I hope you all enjoyed this process like i said this is so quick and easy. You can go to your local beauty, supply, store and buy a bundle of any colored hair. You can do 613 and then dye it. So if you wanted to do colored highlights or if you wanted to do brown highlights anything any color girl. This was so quick and easy, and i felt like i used to do this, like back in the day when i used to do quick weaves, and it's just like of a fad that like went away and now it's coming back, but yes, girl get into it. We got a full head of highlights and we didn't die no hair cysts period once i press the hair out. This is what it's giving me y'all can't tell me: that's not a forehead, a highlight. That'S a forehead baby, one bundle forehead, no chemicals, that's what we need and it's still silky the hair blends. Well with the wig. It doesn't look synthetic or anything like that. If the hair does start getting old, you can take it out because it's just sewn in but getting into this install y'all let's go. This is what the hair looks. Like you already know, this is a couple days postpartum, but yeah um we're gon na go ahead and install me, i'm just trying on the wig making sure everything looks right and then we're going to go ahead and get into the cutting i'm going to take my Cuticle scissors and cut off both ear tabs on each side, i'm going to go ahead and do that. First, before we clean our perimeter of our forehead and get ready to glue the wig down once those are cut off, i'm going to go in with my alcohol and y'all. I don't know if you cannotice, but keep the quality sis your girl got a new camera. So i'm loving the quality of my camera y'all, it's giving me life, but back to the video okay, take your bolt hold active after you've cleaned your. I mean bolt. Yeah bolt hold active after you've cleaned your perimeter of your hairline and i'm going to take my rat tail comb and get like a wet rag or a baby wipe or something to wipe the tail of your comb off after you do each layer of glue because It will get messy and will build up on your um tail end of your comb, and you don't want that. But yeah i'm just going to do three or four layers on each side, starting in the middle and i'm just smoothing it out, like so with my rat tail comb. I just want to zoom in and show you guys that you are putting it on your cap and on your skin. I have a little bit of hair showing, but not much, but, as you guys can see, i tried avoiding the hair as much as possible, but yeah take your time um. Let it air dry or use the blow dryer. I feel like the bolt hold active kind of dries, a little faster than usual, so i really just didn't - have to use the blow dryer. I just went in um in between each section and let it air dry and by time i started on the other. Other half of the glue it was already turning clear, which is what i needed so yeah. Just i think, if you, if you smudge it out enough and make sure it's a thin layer, going all the way good, you should be good, but yeah doing this like. So i think i'm on my third or my last layer and then we are going to get ready to press that lace down once the lace is ready to go. We are going to place that on top and gently press it into the lace, i'm taking my time and not really applying much pressure on the lace, because i don't want it to stick down anywhere until i get my definite location where i want it. So, as you guys can see, i'm just taking a rat tail comb, pushing all the hairs back and then lightly pressing the lace into the glue where i get the liking of my lace placement once you like everything, take your rat tail comb comb, everything into the Glue not into the glue, but you know, comb your lace back into the glue and then we're going to tie it down with an elastic band and let it sit for about 5-10 minutes. While that lace is melting, i'm going to go ahead and press out the rest of my hair with a hot comb. I'M just going to take my wax stick, and i think this is human natures or something naturals. I forgot the name y'all, but i just take my wax stick and my hot comb and i'm going to press out my frontal making sure my part and everything is laying flat and my tracks. Where i place them. I tried doing my best, hiding them up front, but hopefully you guys can't see anything but yeah. I'M just going to take my hot comb press everything out, make sure everything's laying flat before we take the elastic band off and cut off the excess lace going in with my eyebrow razor, i'm going in and cutting off my excess lace. Take your time and don't apply too much pressure because you can risk cutting yourself or ripping your lace, i've done both before but yeah. This is what it's looking like. It'S already giving me scalp, i haven't put anything on it and any excess hairs or lace. That'S sticking up just go in with some cuticle scissors and cut that extra lace off but yeah. I already cut one side off. This is the second side and, like i said, i'm just using my eyebrow razor going down and a motion just cutting off the excess lace, whatever is adhered down by your glue, will not come up so, as you guys can see, whatever comes off, wasn't meant to Be laid down and it wasn't adhered by the glue anyway, taking this press foundation powder from my local beauty supply store in the lighter shade right here, i'm going to take my makeup brush and apply some powder foundation to the perimeter of my hairline just to make Sure everything is blending in well and not looking too wiggy, since we did go in and cut kind of with a straight line and not diagonally or anything like that. Once that is done, i'm going to pull out the baby hairs that i like, but so far it's giving me scalp y'all. Now, since i am doing a side part, i'm going to do two baby hairs like on the temple area of my hairline and then two edge ear tab thingies. I keep forgetting what you call them sideburns taking my cuticle scissors. I just pulled out a thin layer of hair and i'm going to take my little mini micro, straightener and curl those up like arrogant, and once that's done, i'm going to take my eyebrow spoolie and just lay those down. I got this method from slay like jordan and some other couple, people that i've seen on instagram and youtube, and i just take a little bit of freeze spray that got to be free spray and eyebrow spoolie and lay my baby hairs down like. So. Take your time with this: this is the time consuming part. I like my baby hairs, not to be perfect, but you know i want them to look as natural as possible, so take your time with them. Um it takes. If it takes you a minute. That'S okay! Sis work, your mid work, your magic, it's all in the wrist, it's all in the wrist, but once i get the liking of the shape of my baby hair, i move along to my sideburn and then i'm going to repeat the same process on the other side. Until i get a complete full hairline of baby hairs and we laid and slayed - and i'm also going to repeat the same process, cut with my scissors and use my micro, straightener and curl up and then use the got to be glued spray, my spoolie and curl, The hair, you kind of have to use your fingers and whatever you're, using to lay your edges to get the right curl, but practice makes perfect y'all keep swooping to you can't swoop. No more and you'll get the look that you're going for we're almost done. I'Ve got to do my other sideburn and then we will get into the styling portion of the hair. Once that's done, i'm going to go back in with some more pressed powder and go over my hairline one more time. This time, i'm going in with the shade a little bit lighter, because i felt like the shade i used before was a little bit too dark and this evens everything out i'm using the same makeup brush as i used as before. You don't want to use too much a little goes a long way, so i just took a little dab from my powder brush and just spread that around until i got the light that i look will look that i like sorry and now, i'm going to take My edge control brush edge control, my wax stick and use my hot comb and press everything out one last time again before we get into styling and that will be the completed look curl, my hair, i'm using my baby list, pro titanium straightener and i'm just going To curl away from my face, starting in the back and working my way up to the top um, i sectioned my hair hot, my hair off in the backyard i'm so tongue tied today. I sectioned my hair off in the back on each side and just pulled one side to the left. One side to the right start on each side: either side you prefer and just curl away from your face until you get all the way up to the top. I sped through this process because y'all know why it took me forever to curl this hair. I think i was just being real lazy but yeah curl away from your face until you get all the way up to the top and then we are going to take a wide tooth comb and do a comb out but yeah as you guys can see. I'M just taking small slash medium sections of hair. I was going for like a messy look and i'm curling away from my face. I started on my bang section and then worked on the other side. You can do either or whichever one you prefer, but yeah all right. Ladies. This is the finished, look get into it get into it again. This is beauty forever hair. This is their 13x4 hd lace, wig body, wave, texture and 150 density. I did go in and add one bundle of 613 to get these highlights y'all, it's giving me life, i'm loving it tell me what you guys think tell me if you guys like this method, if you guys like this video, please give it a thumbs up. Don'T forget to like comment and subscribe. Tell me what you guys think tell me what other ideas you guys want to see with wigs. If you like this company, let me know below, i will do more reviews but hit your girl with that subscribe button. Again i am hypnotic, lady and i'll, see you guys in my next video bye. You


Comments
jordan_lexisss: The quality of this video is really giving you don’t understand how much I appreciate your channel. status fr babe
Yveness: Just when I was about to bleach my black box dye wig! Scalpiana back at it again! ❤️
Ibuprofen: Oooh girl i think clip in blonde pieces could be a good solution for ppl that wanna move their parts around daily!! Much love♥️♥️ thanks for the idea!
Yolissa Hair: It's giving!!! Really looking forward to our video!
Missie: Again what wig? Flawless as always. You could have gotten three 613 bundles from Amazon for $87. $149 in that length.
Necessarily Nece: So pretty !!!!!
Jayenna Bayna: O my fucccciiin I'm in love‼️ broooo I want to see you do a half up hand down with swoop install using this hair
Modest Transformation by Celeste: You did that .that looks good on you❤❤❤❤
Tina Haynie: Love it
Sentoria Oliver: Amazing sis
Adrienne Davis: Flawless
Christina Jackson Buchanan: Can we get a updated bleach or plucking video ?
Jayenna Bayna: Can you do a tutorial on the side part molding method with the side up a lil idk how to explain it.
Shenell Mejia:
pinkhead: I’m Jesus name! I’m so here for this!
bunny bear: gorgeousssss
SappFamTv: Do you mind sharing where you got your boots from that you're wearing in the thumbnail?
Angie: Flick of the wrist, your bussin
ASTERIA HAIR: Yesss!
Tatyana Dekatra: Bomb!!!!
Jayenna Bayna: ‼️
tashaye brown: PreTty x
Xoxtheprettyjayda: Period
Flawless Felecia: Bombbbbbb
SAN PERRY: I don't understand the swirling of the baby hair - it gives away being a wig.