Dying A Wig For The First Time | 613 Blonde Wig To Purple | Water Color Method Ft. Dollfacehair
This is my first time dying a wig EVER! I think it came out cute considering it was my first time.
The dye I used:
Adore: Rich eggplant
Tintation: orchid
The wig:
613 Frontal Wig Brazilian Straight Lace Front Human Hair Wigs Honey Blonde Body Wave 30 Inch T Part Lace Front
https://a.aliexpress.com/_mrnqsbL
Let's Connect:
Business email: [email protected]
IG: https://www.instagram.com/taintedxo_/
Twitter: https://twitter.com/taintedxo_
#DayByDai
** I do not own any rights to the music being played**
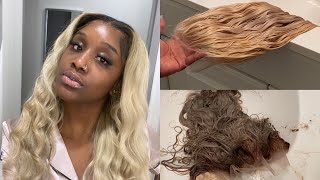
Hi honey welcome back to my channel. If you are new and welcome to my channel, it is dead back there's another video for y'all and today, y'all are about to see me um die away for the first time ever. This is the wig right here. If y'all haven't seen, my last video then go watch that this hair is from doll, face, hair wig store on aliexpress, and i gave you all the information in my last video, which was the wig review. Now we're going to take this 613 blonde wig and i'm going to try to dye it. I'M scared! This is my first time ever dyeing a wig. This could go horribly wrong in my anxiety right now, because i don't want to waste my money. That'S why i'm scared, so i saw this wig right here on aliexpress and i absolutely love it. I fell in love with it. It was just screaming like by me by me. The issue was it didn't, have any reviews um it had like one sold. So that's a red flag to me so i didn't want to and then i looked around for it for like a week to see who had it. Where can i get this wig everything can't find it. So i said you know what we're gon na try to make it make this exact wig and i'm i'm terrified. So i have the water boiling. I'M gon na try to do the watercolor method or whatever, and now i'm going to tell you all the materials that i have but again, i'm not a stylist, i'm not a professional. None of that this is trial and error, trial and error. So this is the die i'm going to be using um. This is for the front part like that lavender light part - and this is for the back. I did want a dark purple wig, so i'm excited to see how this is going to look, but these are the two that i was using. I wanted both a door, but they didn't have a light purple in the door, so i got the temptation. Um light orchard color. So these are the dyes. I have a mixing bowl. If i need that, but being that i'm doing watercolor, i don't think i'm going to need it. I have some gloves. These are gloves in here got some bobby pins, so i can part in the comb. So i can part - and i also learn the new method when you're dying lace, they said use god to be glued. I was told to use god to be glued along the lace so that the lace won't turn purple. So i'm gon na do that and hopefully it won't because if i eff up this wig y'all, i'm about to be livid like i'm going to be livid so mad but yeah, so we're going to die this week today. I'M excited because i'm ready to take this one off so bad, but yeah. I got the water boiling and i'm about to go ahead and prep everything in part the wig and we're about to get right into this video okay. So this is me trying to figure out how i want to part it for the dye now this wig is like a tea like a tea lace, type of closure or whatever. So right here i'm bumping into the track and i just don't know how exactly how i want to dye it. I'M thinking i want like the two parts right here in the front that light purple and then the rest dark purple, but i'm not sure so. This is me trying to figure out how i want to part it and then, once i figure out how to part it, i'm going to separate this area with some bobby pins, i'm going to keep this part away from the rest of it, so that i can Water dye, the other part of the wig - does that make sense? I hope that makes sense. Okay, so i feel like i should have used clips, but i didn't have any at the moment, so i used some bobby pins, real gasoline, i know but yeah. So i put this piece right here, so this is what's going to be the light purple in the front and then the rest of this is going to be the dark purple. Um yeah, i'm scared. I don't know how this is about to turn out, but we're about to find out right now, the water - i don't know if y'all can hear it, but it's boiling. So i think i'm gon na do the dark first and then the light i don't know. I think i'm gon na do the dark first and then the light piece in the front and see how that goes. Oh, but first before i put it in the water, i'm gon na spray, the lace with the got to be glued so that hopefully the lace won't turn purple, because what am i going to do with purple lace? I need it to stay this color, so it can melt with my skin on my scalp okay. So this is the pot with the boiling water. I don't know if it's supposed to be this hot, but it's boiling - and i have the dye right here - that i'm gon na use and i'm gon na start pouring it in there. I just realized my phone wasn't recording me pouring the die. I poured it in there and i did pour a lot, i'm not sure how much i was supposed to do, but i poured a lot in there to make sure the color really goes on there and it's vibrant. So now i got ta find something to mix it all together and dye the wig okay. So i found out, i wasn't recording me doing the front piece, but what i did was while it was outside of the um pot. I put some aluminum foil down and just dyed it, so what i did was while it was outside of the pot. I just laid it right here on aluminum, foil and use this brush to kind of get some of the dye on there, and then i just dipped it all in the water, and it looks like that. It kind of looks all the same like it's slightly lighter, but it's not that light. So what i'm going to do now is go wash the wig and hopefully the color really come together because it's kind of patchy, like i can't lie it, has like highlights and some parts are lighter than others and all of that so i'm about to go wash It and then we're going to come back and talk later, okay, so this is the wig. The lighting is kind of bad, so it kind of looks like it's all one color, but it's a lot of different colors like it has some highlights in there and then this part is slightly lighter than the rest, but i know you can't really see it on The camera also, i want to show you this week, sheds kind of it's not horrible, but it's been shedding and i'm about to take some shampoo and conditioner and wash it, but so far and yeah after that, i'm gon na um dry it and then we'll talk After it's all dry, instead, okay, so this is the wig dried. I left the conditioner on it for about three hours and let it sit, i rinsed it and then i let it air dry actually. So this is how it came out. It didn't come out like the picture, as you all see, but i still think it's cute um. I even tried to put a piece on aluminum foil to see if i can um bleach it bleach the front part where it was supposed to be lavender, but it turned the hair that i cut pink. So i'm just not even gon na try. I'M gon na leave it like this. I think it's cute, i know some girls will usually like go ahead and pluck it and um do their baby hairs before they put it on, but as a beginner, i have to see how it looks on to determine how i want the wig to be like How i want my baby hairs to be how i want it plugged all of that, so i'm actually about to install it and see how i want the baby hairs and all of that to be - and i also have to straighten it and after i install it, Then i'll come back and show y'all how it looks on my head and that'll be the end of this video, so i'm gon na go ahead, install it and straighten it, and y'all will see me when i'm put together. Oh you


Comments
pinkinthebrain: You did good! It didn’t come out like the pictures but it looks good on you
TrapGirlTyraaa: Love it!
Queen Brittney (QB Wig Collections): That purple is cute!