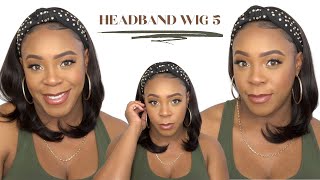
Diy |Step By Step| Quick Weave Blunt Cut Bang Bob
Now you guys know I had to redo my version of the "BAYANG ". Yassssss Blunt Cut Bob Vibes.
- - - -
Hello Boys and Beauties,
Welcome back to my channel. Today I will be showing you ..
DIY |STEP BY STEP| QUICK WEAVE BLUNT CUT BANG BOB
- - - -
⬇️⬇️CLICK LINK TO SUBSCRIBE⬇️⬇️
https://www.youtube.com/channel/UCTgGk...
⬇️⬇️ITEMS USED IN VIDEO VIDEOS: ⬇️⬇️
Outre | Purple Pack | 10 inch |1B (2 Packs):
Remy Saga - Brazilian Closure Color: Natural:
Comb:
Stocking Cap:
Scissors:
Blow Dryer:
Hair Glue:
Glue Shield Protector:
Baby bliss Flatirons:
I hope you guys enjoy the video! Be sure to follow me on social media:
⭐️CONNECT WITH ME ⌚️⭐️
Instagram: https://www.instagram.com/themarkelata...
Facebook : https://www.facebook.com/MarkelaTarran...
Business Inquiries : [email protected]
⬇️⬇️ CHECK OUT MY LATEST VIDEOS: ⬇️⬇️
DIY| STEP BY STEP| BLUNT CUT BANG BOB
HOW TO: DO A SILK PRESS ON SHORT THICK NATURAL HAIR | TUTORIAL
DIY |STEP BY STEP| QUICK WEAVE BLUNT CUT BANG BOB
"40 INCH" DISTRESSED EXENDED FAUX LOCS JANET COLLECTION 2X MAMBO NATURAL BORN LOCS TUTORIAL
PROTECTIVE QUICKWEAVE | BLUNT CUT BOB
PLEASE SHARE BELOW WHAT YOU WOULD LIKE TO SEE NEXT!
Thank you for watching. Do not forget to hit SUBSCRIBE ! See you next time .
Hello, boys and beauties welcome back to my channel for those of you who do not know me. My name is marquila, terence, and for those of you who do know me welcome back so today i will be showing you all the updated version of how i do my quick weave, blunt cup, bang bob. So, as you all see, i just took my hair out of two braids. I just had my hair in two braids because i had a um. I did a silk price in my hair, but i worked out so my roots are extra thick. You probably can't tell so i'll say: let me just go ahead and do a quick weave. So anytime you do a quick weave. You can either put your hair in a ponytail or you can put your hair in smaller braids. So, for me, what i'm going to do is um braid, my hair into four braids. So it's not like a particular size. You do kind of want to make sure they are nice and flat. So i'm just going to go ahead and braid my hair so go ahead and continue to watch. So so here's what my hair actually looks like braided down, i just put a rubber band around the braids in a bobby pin. So now that i have that finished, i will be using a black cap. This is a um weaving cap. It'S not that thick cap that you use if you were like wearing a wig or making a wig um. This is just what i particularly use anytime. I'M doing a quick weave is nice and thin and i always make sure i pull it down with the band down a little bit. That way, it's easier for me to apply my argan oil weave protector. It pretty much helps to protect your hair from the glue um, so i'm just going to go ahead and put a generous amount on my hair. You want to be extra careful with this. It'S not super sticky or anything, but it will dry up and when it does dry up it gets hard um. So i am going to apply this throughout my hair. I did do two coats um. I will be blow drying my hair in between each coat just to make sure that it is nice and dry, because you don't want this to be wet when you are gluing your tracks onto the cap. So now that my hair is completely dry um, the today the hair i'll be using is the ultra purple pack hair. This hair is about 12 at my local beauty supply store, so i only spent about twenty four dollars, um, so yeah. So now what i'm going to go ahead and do is i'm going to just measure the track to my hair um? I always feel as though this is important. You don't necessarily have to do that. If you are pro with it, i would just say: go for it, but for those of you who are not, i would definitely say, go ahead and measure your hair. So now that i went ahead and measured that i'm going to use my 30 second super hair bond hair glue and i am going to go ahead and apply that to the tracks. So this glue dries extra fast. So you want to make sure that you do apply the glue in a timely manner so that it won't dry on you or else you'll have to keep putting layers and layers of glue on the track. So this part is kind of self-explanatory. I did go ahead and speed it up, so just make sure that you all continue to watch and make sure you leave comments below letting me know what you probably would have did different, so so alrighty guys. So this is what my hair looks like. We are just about finished in my last video. I did not show my subscribers how i actually made the closure piece, so i wanted to make sure that i broke that down in this video. So what i'm going to do is i took a nice amount of the track. You don't want to make it too long, but you do want to make it a reasonable amount, because eventually we are going to have to roll this. So the first thing that i want to do is just check to see if there's like any discoloring of strings once i do that, i take them out, of course, as you all just seen, and now what i'm going to do is split the track in half. So it's really important when you make the closures that it is nice and flat. So the best way to do that is thinning out the track, so you guys can use scissors or you can use razors. I personally feel like a razor would have definitely been easier, but um the scissors would just have to do because i couldn't find a razor. So, as you all see, i am gently splitting the track. You want to be extra careful because i've cut myself numerous times. So if you are doing this, it's probably easier, if you have one person hold one side and you hold the other side and split it. But if you feel as though you can go ahead and split it by yourself by all means, i would definitely say: go for it so right now here what i'm doing is just splitting the hair down the middle. So i'm gon na go ahead and speed that up, because there was like a really kind of a long process, because i was doing it by myself so so now that we are able to go ahead and split the track all the way down to the end. This is what your track should be. Looking like, it's nothing, that's really different! It'S just that! It'S a thinner piece of the hair so now that we have that i'm going to go ahead and apply the hair glue onto the track as well. And you want to make sure like. I said you want to kind of move expeditiously because if not, the glue will dry and you will have to continuously put layers and layers of hair, so i'm just going to go ahead and speed this up, because it did take me a little second to do That so now that we are finished with that, this is what it looks like so now it does not matter which end you do you want to begin rolling the hair in a circular motion, of course, so you want to make sure when you're rolling it you Want to hold it tight and you know continuously row, so you kind of want to pull. Don'T worry about the glue getting on your hands, of course, because you can definitely wash your hands and of course you like you, can just wipe it off and it'll just come right off um, but i did want to go ahead and speed this process up and Also show you all what it looks like, so you kind of have to just trust the process here um. I know it's like what the heck are we about to do, but everything will all come together in the end. So this is what it looks like. So let's just go ahead and continue to watch so so now that the piece has been blow-dried. This is what it looks like, and so now what we're going to do is try to find a center. So usually, when you are finding a center, you want to make sure that the hair is evenly spread all around, because you have to think this is going to cover the top of the hair. So you want to make sure when doing so. You want to also see if there are any other discoloration of strings anytime, that you are dealing with packed hair for some eye reason. They have like different color strings and i've never understood that. So you want to make sure when you do the discover the strings. You want to cut them out, you can either pull them or you can cut them out, but i would try to cut down as close as you can to exactly where it is um. That way, you won't have to worry about this, showing because, as i say that this is going to be the top of your head, so um once you cut that out um. I believe that was like the last piece that i've seen. That was like obvious. So once you do that, you want to find the middle so now that i've found the middle i'm going to take my flat irons, i put them on the highest um level. Um that way, it can pretty much melt the closure piece now. Some stores already have the closures made like this, but if you want to go ahead and make it just just because you want the hair to, of course blend and you want it to all look the same, you want it to make sense, you want it to All look, even i would recommend doing this um, so you just want to keep flat ironing this part until it is nice and flat. But as you all see, this is essentially what the top closure piece looks like. It'S, not our. You know normal lace closure. Our you know frontal or anything like that. This is you know, i'm taking you all back to the old school okay, since we are about to rock the bang okay. So now that we have successfully made our top piece closure now, i'm just going to cut small pieces and just apply them for my bang. I usually do not like to put a whole lot of um tracks at the top of my hair, because i want my bang to look as natural as possible um. So i always make sure that i kind of shape um like my end pieces and like a? U that way, i can just cut them into small pieces, so i'm just going to go ahead and speed up the process and i'm going to just blow dry the tracks and everything, and then you all will be able to see how exactly i glued our closure Piece on the top of my head, so now we are about to apply the closure piece. You want to put a generous amount on the closure piece and you just want to place it directly in the middle. So you all see it's like a small opening. I made it just big enough so that the piece can fit right in the middle um. So now all i'm going to do guys is just keep pressing down and blow drying this. You want to definitely make sure you take your time and you blow dry. This um, so that it is completely dry. Usually i mean with this glue. It does dry pretty fast, but you do want to be careful when you are putting heat directly at the top of your head as well um, so this is pretty much it. So we are just about finished with installing the quick weave. It wasn't really too much to it, and i also wanted to show you all up close and personal how the closure actually looks um. So this is what it looks like now that it is laid. Is nice and flat? You cannot see anything and, like you really can't tell this is one thing that i really like about the entire thing, like the quick weave. Is this laid so now that we completed that i am just going to go in and i'm just going to start cutting my bang. So i usually anytime, when i do my bangs, i usually try to align them with the end of my eyebrow, because essentially that is where i would like my bangs to pretty much lay, and i just feel as though it's just a good guide. So, whenever you're cutting your bang, make sure you cut your bang, you know like below your nose right above your top lip and then, if you want to do like the straight across braiding you're more than welcome to do that. But i like the fringe, look because i like to have realistic, looking bangs, so i'm just going to cut my hair and i'm just going to do the fringe bangs just to thin it out a little bit. So i'm going to go ahead and speed this up. For y'all, so you all can see how exactly i cut the rest of my bangs. So now that we are just about finished with the bangs, i'm going to go ahead and take my scissors and i'm just going to cut my hair in the blunt cup bob. So it's not really much to it. I'M going to just cut it straight across now. If you want to just make it easier for you as well, you could like wet the ends of your hair and then just cut it so that you know it's like super straight super blunt cut. But if you feel confident enough to just cut with the scissors like i'm doing here, i would just say: go for it, so i'm just going to go ahead and speed this up and let you all see how i cut the remainder of the bob. We are almost there. As you see, everything is coming together. So now that i have cut my hair into the bob of my liking, i am just going to go ahead and take my flat irons, which you will see i'm going to flat iron this piece. A few times because my flat iron were on the lowest level, okay, so um! Now i'm just going to go ahead and flat iron, my hair, so you all can just continue to watch so now that we are done flat ironing. I am just going to take my hair and i'm just going to place it back um. That way i can cut the band part um. I did want to show you all that i do cut my band. I didn't cut the entire band because i did glue some of the tracks onto the band by accident, so i just cut like the top part, because i wanted my bangs to look natural and i wanted them to fall. Naturally - and i did not want you know that black piece to be showing so um if you do cut your band and you want to cut the entire um band - that's fine. I would recommend that, but if not just cut the top, but essentially this is what my hair looks like. I really hope you all enjoy this. If you guys have not already seen my last video on how i did the blunt cup bang bob, i would definitely recommend you all do that and let me know what you all think. I hope to see you all next time. Bye, you


Comments
Destinyatk: Loved this, especially the closure. Looks so very natural too. Best tutorial I've seen. I feel confident enough to try this. Thanks..
Diamond In the rough!!: That was mad cool how you made your own closure piece overall you did a good job with everything i have one question how long can you wear the quick weave like how many weeks ?
Silk Queen: It's much easier splitting the tracks with a seam ripper....but I love the video sis! I still do my closure old school! If it ain't broke don't fix it that came out BANGING
Kums1023: You def took it back to the old school closure. I love that!
LetTracieXplain: I was doing my wig, and you helped so much cuz I got to the top and got stuck lol thank you! Looks beautiful
Ky’Lia Saroya: You make it look so easy ! I would have a mess ! Bobs look so good on you
MzBanks Baby: Thank you ! Thank you! I did this on myself and I love it!!! I still can’t believe I did it!
deirdre Hardy: Love it. You made it look so easy. Can't wait till this weekend to try this on my own.
TheBelizegyal: Love this video! You give such detailed and clear instructions! Thank you for the information on the closure, can’t wait to try this ..
SumogritsforHazel: You did a fantastic job, Markela!! When it comes to those bangs, girl you did the thang lol! I say that because I too like a tiny bit of a thick bang with a bob of this style. Why? One, it fits my forehead better. Two, as you put it the style looks way more natural... so talented! More blessings to you and yours here in 2021.
Breanna's Beauty: Just bought my bundles!! Can’t wait to try this with my #27 hair
Antonio Owen: Honestly you are amazing I just found your videos tonight and I only watched two. You’ve definitely inspired to get up and get back at it. I graduated cosmetology 2 years ago now I just need to take state boards thank you for the detailed videos. ♥️♥️♥️
Lady Yvonne Elaine Hickerman: Omg that’s just amazing hair, your a fantastic hairstylist. Please keep the videos coming please x
Caramel beauty😘: Yessssss girl you did a awesome job your hair is beautiful...I'm going to do mines next.
Zakeya Dodson: Best video for this hairstyle yet! Thank you so much
25kimt: Thank u for this vid. My bob came out great with ur directions.
RUE L.E.I.: THIS IS THE MOST INCREDIBLE HAIR TRANSFORMATION VIDEO I HAVE EVER SEEN!!!.....EVER!
Carolyn Hooper: Awesome job that came out really nice!
lynne Hunter: Absolutely fabulous!
Cookie Thomas: You did an awesome job.. I it
Beautiful Peace: I’m trying this today. Wish me luck.
CENTRELLA'S STYLE: You did an awesome job...
Kieshla Knight: You did a great job
L E: Super back in the day called the Cleopatra look. You are very talented.
Falesha Green: I like youI just subscribed to your channel. Thank you for explaining and showing how you do the closure. Very well
Breezy Boo: Looking for some hairstyles jus to do at home I love this Ty
Dee: Trying this today, thanks love
Rockell Dunaway: Awesome Job!!
Christal Watkins: Really cute and neat
Jaina B: I have never watched a youtube tutorial from start to finish until today
Blessed Esther: Great work.How many hair bundle did you use to come up with that look?
Made In Designz Slayyy: Im new && i love this hairstyle
Toya B: Pretty you did that!!!
Terri Thomas: Girl you did this. Watched every ad. Get your coins
Doris Young: Beautiful job
MsPrissyFace: Just bought the stuff to do this today
Bed wars fan: The only person, I’ve ever let touch my hair at Benedict
Gladys Agiende: Beautiful and explicit
Anita De La Cruz: I will cut the weft to make a tin closure...great idea!
Tracy Prayer: Love it
Patricia Hogans: Gorgeous
Freida Martin: Love love!!❤️❤️
Sierra Taylor: It's the bangs for me that Bob is popping ‼️
Reann Sargeant: I love this i boutta try this
Fab u Nista: Good job!
MIRANDA TILLMAN-DAVIS: Beautiful
Valerie Mckee-Arnold: Can you please let us know how to remove safely
Nyla Slaughter: Can you do this but as a sew in?
MrsLH: Bomb luv it!!
Fee: You did great
Kimberlytics: pure art
lealea j: Cute!
Britt-knee.: That was tooo goooddd let’s get the billll puurrrr
Teighlor Coston: Yessssss I love
jae ivy: Let me go trying this, but I need soo flat irons
LadyQ Burnette: BOMB!!!!!!!!!!!
Life Of Moni: i loveee some use razor combs!
CreoleKisses DiaryTV: Pretty
japan dollie: Where are you located I need this
Britt-knee.: Toooo cuteeee gotttaaa tryyyyy
Lanetia Wright: How many pks of hair did your hair
Opulennnnce: Are you a stylist?
Aria Smith: bob me please !
Theyadore.niyahnni: What kind of hair is this
Felix Miguelina: Oooooooohw shit