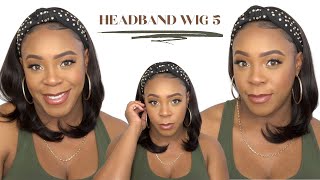
How To: U-Part Bob Wig | The Removable Bob
PLEASE READDDDD!!!!!!!!!!!!!!!!!!!!!!! :)
I AM NOT A PROFESSIONAL!! I AM SELF TAUGHT! I TAUGHT MYSELF EVERYTHING lol okay thanks ;0)
instagram: thomasadrianna1 (this is MY REAL instagram) lol
follow me on twitter!!!!
https://twitter.com/#!/thomasAdrianna
CHECK OUT MY TALK WITH ADRI CHANNEL! for rants,real talk, advice and more :)
http://www.youtube.com/straightADRInoC...
"like" me on facebook!!!!
https://www.facebook.com/pages/TheREAL...
watch all my hair and makeup videos on the go!! on my.tv
http://www.my.tv/thomasadrianna
click here for part 2...the CUTTING AND STLYING!
http://www.youtube.com/watch?v=W0LEQIV...
click here to see how the bob looks: my SHOW n Tell video with the first bob I made:
http://www.youtube.com/watch?v=h06ahey...
I WILL BE DOING PART 2 on styling and cutting the wig :)
Video of me SEWING IN the Janet Collection Dolche' hair
http://www.youtube.com/watch?v=kEgz5fY...
Review and Information about the Janet Collection Dolche' hair
http://www.youtube.com/watch?v=eplt4Yf...
Products in this video:
Janet collection Dolche' 100% human hair 8in #1b
Model Model DreamWeaver 10in 1/2 pack #1b (I suggest buying 1 full pack, the only reason i have 1/2 pack is because I already had it in my house lol)
Sensationnel Premium Now 10in 1/2 pack #1b
What you need:
Wig head
Wig pins (optional)
Hot Glue Gun (from walmart)
Hot Glue Gun sticks (from walmart)
Wig stand holder (from sallys, its just makes the wig making process easier
Scissors
WHAT YOU NEED:
if you would like to attempt this look...all you need is a pack of Duby hair(doesn't not have to be velvet remy) or a pack of 8in hair ( prefer duby because its already pre-bump and easily to maintain if you're not a pro at curling,bumping or cutting hair) and a pack of 10in hair
Types of Duby (I've used)
Sensationnel Bump hair (8.5in)
Sensationnel Bump Remy hair (8.5in)
Outre Premium Duby (8.5in)
Outre Velvet Bump (in the video) (8.5in)
Janet Collection Doche' (8in) (I PREFER THIS OVER THE REST)
NOTE: I DO NOT HAVE A FAVORITE DUBY HAIR they all do the same thing
10in Hair (I've used)
Model Model Dream Weaver(holds a curl the best)
Sensual Gold Human Hair(blends with alot of remy hair)
Sensationnel Premium Now (holds a curl the best)
Saga Gold Remy Hair(last the longest)
Caps Used for U-part wigs:
Multi-Use Weaving Cap
Standex Dome Cap
Method I used to create my Bob Wig THIS TIME:
Plug in Hot Glue Gun so it will heat up
Place Weaving cap down first
Place Stocking cap on top of weaving cap
Place 4 wig pins on the sides of the cap to keep it in place
Start at the nap and glue down the Duby hair in the back
Once you get to the sides start gluing the longer pieces to form your longer bob pieces
REPEAT this step until you form an "I" or "V" shape
to install this hair i SEW IN THE WIG....I sew down the perimeter of the wig on my braids and thats it :) plus the straps in the back give extra security
Hey guys, so I'm going to get right to the video and I do a video on details later. So this is my old. You part Bob that I made and I'm just trying to figure out where I'll cut it at last time, so I had a site apart like this and make sure see this one is good, but it got all messed up when I went out one night. So that's why I just want to make a new one. I wanted to do some color, but I did it off camera next time, um when you guys learn how to make your own. So I don't freak people out with the color here, I'm gon na. Do it with a stocking cap on your head? Here'S the cap that I'm using some people like it, some people - don't I like this cap. This is the leaving cap. Mostly deluxe shoes. Is this one size fit all, but that don't believe it? It don't fit everybody, but my head is really big because I still have a huge head and it fits me. So I don't know so. What I like to do is I like to take the cat stretch it out some just to give it some flexibility, and then they have these straps in the back. I make sure they're loose, I don't pull it. I make sure it's loose. So when I put the cap on - and it's just too big, I can tighten it up a white pencil, but I noticed we're using white. Sometimes that white gets stuck on the cap and you can see it. So I use a very dark um eyeliner pencil, and this is just a blue. I learned actually use this in my videos in my own learning. I don't want it too much to the side because, like I said when I split it, it turned into a V. So I'm gon na do it about here see how that is so, that's where my part is going to be now. This is not going to be perfectly here. It'S just doing. I'M just doing this to give a guide to see exactly where I'm going to cut it at so I may be over here a little bit, but this is just a stockman point, so I know for this side. I don't go past this line for this side. Right through my thing, I want my band to stop at least here, because when I cut it is gon na split into like Oh see. So I'm just going to mark off this area right here and if this is where I'm going to stop it. When I do it, I'm gon na put my stocking cap as my base. Now this is just so that the phone won't get stuck on to under here some weird pins, I'm just going to pin the cap down, so it just won't move. This is the Dulce and Jenna collection hundred percent human hair. I have a tutorial on how to do this as a sew-in, so I'll put that the bottoms gon na see how this looks as a sewing and not cut into a ball. I really like this hair. Better than the old trade Dooley, because it's just hiding my body and it just last a little longer. In my opinion, I couldn't find the velvet ring me like I wanted so I fiddle for this hair - and it's just do be here. Okay, so I'm using two different type of beauty supply store here, companies are not the same, which is fine. You don't have to have the same company. The reason I have the Dreamweaver is because I love having curls and it just has this purity like this gorgeous flow to it. So that's why I got the model model, My Damn Adele whenever Dreamweaver and I have his sensational premium nail hair. I just have some extra hair in case. I need it at the same. Inch 10 inches comes like this, like typical. Do the air take your hot glue gun and put it on the track, but it's hard to hold it at this angle with me filming so just know you just take the gun. You go right across like this see, I can't even get it in the camera and you just go straight across. So that's all you do. This is where we gon na lay our first track. I'M going to put it right here right above these straps right here. You don't want to put it under that, because it's a ball, and sometimes, if you put it too far down it kind of manipulates and it messes up your shape. So I don't like to go all the way to the nape. When I do my box, even when I do a Sun, when I don't like going all the way to the Nate, because it's a box, so you're gon na cut it anyway, one thing that I found that was easier for me. I do my glue half wing and just lay it down, because sometimes it can get messy if you put the glue all the way across the track in one time and then try to place it. So what I like to do, I'd like to do it half way going through and then I just go and fill in the rest of the glue on the track and just go like this. Okay, so the tricks are doing my box and how I get it to UM lay a certain way get the shape. I'Ve ran on manually place my longer tracks as I go, so sometimes people tend to mess up by doing the do B. All the way up, and so they get to their pain so doing that you're really just making a short ball with long things that you're going to end up cutting - and I learned that - and I learnt on by doing that, a lot of times and anything. I didn't get the look that I wanted, so this is how I do it so right now I have my do B in the back of course, and then then I'm going to go with my ten inch now, I'm just gon na place my ten inch here And start curving it that's the trick to doing it, make sure you curve it because when you, when the wind blows or blow like this instead of having it there, then your tracks won't lay right so make sure you should just start curving your tracks. So we're going to go about half way back with the longer piece like this, and this is where our stopping point is going to be, because when you do your Bob you're not going to cut all the way back, you're gon na cut this one who's that You'Re going to cut out here we do your Bob, so you don't need these long pieces in the day and that's how you preserve a lot of your longer limbs too. So you don't really need like two full packs of here. So I'm going to cut this here, you okay! So now that I'm running out of here, I'm going to go ahead and start filling in the gap, so basically interesting throughout this whole tutorial, I'm just filling in gaps and placing it how you will visually see it. So I have the long pieces in the front here and then I have the doobie in the back. So that's all I'm going so this is all the doobie I have left and this is going to carry me through the top and then there's your seat. Okay, to go ahead and start placing your long pieces at the on closure part because you already have your length at the sides already. So that's why I do my limp first. I start the very tips of the wig right here, because that's where you get your lens from now about what I have brought this doobie all the way around. First, I will have a short bob and it'll just come out as a short bob, but not like a you know like uh. This is kind of an angle: ball asymmetrical bob or whatever. So this it's different ways: you can do bonds, but this is just higher than mine, Oh okay! So now this is the tricky part that I can't even really explain. This is the band of course. Let me see how we're curving it over now. We don't want to keep curving it until when you cut it, that's the curved part as you get to the top. You want to create this box, so just keep filling it up until you get so I'm gon na gon na keep doing the curve like this talking about here. So, as you can see, I'm gon na keep curving it like this curving and curving it until they gradually turns like this. So I'm gon na do it again. I'M gon na keep curving this like this, keep curving it curving, it curving it until it gets to a straight line and that's how I'm gon na decide it's different. I can just see I can do it now. I just do my line like this. Until you get a box, but over here it's different, you want to just keep curving and curving it curving and curving it until you get this right here and then you're gon na have like a eye part or a V you so, as you can see how We curved that so this is ours going to be basically our last track and you see how close we got that so I just want to make it as close as possible, because remember it's going to spread a little bit wider, so I'm going to go ahead And add this track one straight bit? Okay, so I pull that part out because I don't want it far to the front, so I just pulled it off, but it's going to be cut anyway. So this is it you guys how to make the Bob, as you can see, see it's kind of it's better this time, but you see dr. Carlock of D. For some reason, and of course, when I put it, you see, it almost looks like a ball already see how it is. So if your eyes, you probably wearing like this, I like I'm just placing my caps - I mean my longer tracks as I go, because it's just so much easier. So as you can see, it's almost like a ball, so it's easier for people to do so. Always this witness in a rubber band, cut it up and ER. We have your ball and play now. I'M going to do a different video, of course me styling it and um. Hopefully I get up here soon, but for now um y'all want to see the ball done. So a lot of people already did it with the instructions I'll put on my last two other videos of chantal video, but on yeah this is it and, like I said, all of this is beautiful. I store hair, I don't believe in buying no expensive Remi or you know, virgin hair football cuz. It'S just gon na get cut anyway, but I'll be nice to get some virgin hair at the ball. I wan na have that look but yeah this is it and it's nice and full over here. So you can kind of see how it's gon na look once I cut it and everything, but that would be a separate video. So I just wanted to show you how to do it and I hope you enjoy, and I hope it helped you a lot so I'll holla at y'all later when I started you


Comments
Chacorrie Holloway: Love this! Very simple and easy steps . You did a great job!!!
xo_CrystalNicole: Love it! I definitely want to try this out. Can't wait to see you style it.
alwaysbubblydeva: Thank you so much for your time and patience my friend. I love how detailed oriented you are. I would have never thought about using a glue gun, thats a 1derful idea and it seems to save alot of time as well. I love your work chica :)
Franchelle Marie: All I can say is Thank you! Thank you! Thank you! Thank you! For a college student looking to experiment with MY hair and still look beautiful you are a blessing on video lol PLease don't stop what you are doing. I love your detail and descriptions! Let's even an beginner like me understand :)
4LADYSWEET: Excellent job, and thank you for being so detailed, THIS WAS VERY HELPFUL :)
Sheresse Williams: Yessss this tut was so helpful, I cannot wait to get me some hair & try this! I know it will come out cute b/c this video was detailed! Thanks for a great video
ArrealW: My first time doing a bob and it came out FABULOUS!! Thanks to your video! You are a great teacher!!
applesaucekiss: Best quick u part weave & u part wig tutorial I've seen thus far.. great job .. looks nice and nicely angled
Crystal Nicole: THANK YOU SO MUCH FOR THIS!!!!! I've Been Soooo Tired Of My Long Hair, So I Followed Your Video and Made My Bob!!!!! And I Love It!!!! You are THE BOMB!
Jay Nicole: This was soooooo helpful thanks adri!!!! I will be making one!
afrikahchick: Very helpful!!! Thank you!! Can't wait for part two!!! :-)
Derricka: I love this & I watched the video of you cutting & styling it...you make it seem so simple..I"m going to buy everything & try it out! Thanx
Briana Sumpter: This is the most informative hair tutorial I have seen great job and thank you so much for explaining it the way you did. :)
Ty E: You are so talented! May God continue to bless you. Thank you for being so authentic and also for sharing with us!
Sweetz: This video helped me A LOT! I've watched so many Hair bob tutorials but I now see what I was doing wrong.
thegirlof1983: THANK YOU FOR SHARING!!! You always do a great job!
Gloryia M: youre a great teacher. you make it look so simple!
luvyaever: I like how you explain your reasons and tell us tricks and tips! Thanks I might try this!
rosebudthorn: Adri, you are my weave and u-part angel! Thank you!- Rosebud
Keisha Brown: Good job!! I'm going to make one this weekend. Thanks!
Paula Dick: chyle i followed your tutorial to the t and i did my own and its fabulous thank you
All About Natural y Unica By: Luzdeyvis Menendez: Girl thank you very much, i never knew that you could do a wig like that, i think its better than sawing.
MrsLady718: I'm going to try it because you make it look so easy :-)
Ashley Nadine: yeap i WILL be doign this style for summer !! This made it so easy!!! THANKS ADRI !!!
TheJsmiles33: Great job! Can't wait to see the finishing touches in the next video! Have you seen my son on campus yet? I keep telling him, he better get your autograph for me if he ever bumps into you!
Olivia Yahsharel: LOVE IT!!!!!! This will be my bday style! Thanks
dymensions33: OMGoodness! You truly have crafted your art:-) You are amazing at what you do, and don't let anyone make you stop with their hate. Oh yea, quick question. "Did you sew the wig to your hair?" LOL j/k
DIORBEAUTYOFNYC: Thank you! Finally ! Can't wait for the styling video !
Gwyn Washington: Thank you so much. I made this wig and it came out beautifully. I love my hair. This is the first time in my life that I have enjoyed my hair. When I was a child my mom and sister had long flowing "good" hair. I took after my dad with extremely thick short coarse hair. My mom did not know how to style it. My uncle would have to come from across town to comb my hair for me. It he wasn't there my mom stuck a knit cap on my head no matter what the temperature was outside. Under that cap was dirty matted nappy hair no comb could get thru. By seventh grade my mom would relax my hair and style it - - like a 40 year old woman hair. (God bless her. She tried her best) By high-school my friends tried to take me to the beauty salon, but it was too expensive and to be honest even the stylists didn't know what to do. In college I didn't care. I didn't really know how to care for it. When I started making money I spent up to $400 a month on my hair, but it was a waste, since I didn't know how to style it it was frustrating because my hair only looked good for one or two days. It was a waste of money. It wasn't until your tutorial and the other YouTube tutorials that I started learning how to do my own hair. It wasn't until I watched the videos that I started taking care of my own hair and for the first time in my life I love my hair ( and all the hair I bought) . Now i I don't have to fight with a stylist, or cry because I hate what they did, or wait in a salon all day long, or pay more than $30 a month for my hair. You are a heaven sent. Love my U part. Please make more tutorials showing how to cut and style. Thank you.
MsLovinEverything: Great method...love the results.
Nicole S.: I did it!!! It took me all day and it's not as easy as it looks but I did it!! I love the way it came out :)
Kat Vanity: This is so informative. I can't wait to try it
AKIYIAKELLY: I Love this Girl! You have taught me so much. You are such a Blessing! "Thanks Girly"
Mademoiselle Opelouses: You are great! Thank You for showing us. This isn't easy! You did a great job!
Jessica Miles: So detailed and neat! I love this chick!
goldmouth100: Cant wait to try this thanks girl;)
Chinonye_D: THANK YOU SO MUCH FOR THIS VIDEO! MY BOB IS BEAUTIFUL
kishababy90: Yessss now I need to try it,thanks adri!
Tiffany E: This is awesome I'm straight stealing it! LOL great tutorial!
Mel T.: got all my materials..about to try this right now! Thanks!
Leah Granby: my 5th time watching this vid -- determined to do this for my holiday look this season!!! .... first team weaver **fingers crossed**
Fatima B: Brilliant video and tips, thanks hun! ;-)
caramelbeauty415: Love the bob!!! Will be doing this also this weekend want to know are you go to sew the bob down or use combs???
ladyjones07: I am definitly going to try this, Imma wait until you put up the other vid on how to style it first. I love you Adri, man you be puttin us on when it comes to hair! LoL! Thank you so much!
shanel1987: girl this is so CUTE!!! You always do your think!!!
Candice Williams: Thank you sooooo much!!! Truly helpful video. :-)
Shareen Morris: Thanks for sharing, now i know how to create my own wigs
Jasmine Monique: Thanks Adri!!!! I'ma post my results after I try this!
jhall312: Love it!! Thanks Adri:-)
Love Doing It Myself: I been waiting on this tut girl. I called myself cutting my sewin. It was a hot mess lol
QueenK_: love your comforter set!!:)
Sj Rose: Thanks I've been wanting to learn how to make a bob
exclaimationmarkable: Thank-You! this was so helpful!!!
Foster10ful: It looks good, and the first wig u made still looks great to!
Chelle Ariel: best TUTORIAL i have seen yet. thank you for actually explaining what you do how u do it and why. most vid r just them making the wig infront of the camera with no explanation!
MakeupByLadyJae: Thanks so much for sharing. You are an AWESOME trainer.
Gabrielle Macon: I've used that dolche hair before and for it to be so cheap it is everything !! Real cute ! :)
Jessica Lisa: I can't wait to make mine.
Alex Missick: Really good job! I may have to try the glue gun method! what made you try as opposed to using regular weave glue?
Simone Cheree: I love how she's not like the other YouTube girls using unreasonable $900+ hair. Thanks for showing a more affordable hair style for people to follow.
Nkechi Enwereji: Thankyou so much for the tutorial!
MzShevyDiva: Girl when I say I love u !! I LOVE U!! I did this today and I was sooo scared but it came out bomb!!! Even the cut omg thank u thank u tell me u have a fb I will add u :)
Prettynikki815: Your videos are really helpful, thanks!
Audrey Bentley: Very good tutorial. Took me a minute to figure out what you were describing as a reason for the placement of the different hair, but watching it...finally it clicked. Less cutting and shaping necessary once you're finished attaching the hair...makes perfect sense.
teeteewest1: get tut looks so easy looks like I have my plans for this weekend
M Charmayne: Always great instructions
Dym3d0utMiiSz: just bought all the items today...HOPEFULLY THIS WORKS OUT FOR ME lmaooooo
dAjaV00: i love tha simplicity:) thanks fuh breakin it down Ms. Adri, i really appreciate you & all yu do. God Bless:)
DaBoss Ella: Thanks for posting this.Love your videos.
Dazmine Black: I know I am late, but I can not wait attempt this for the first time. Good Job!
stillettopumps86: i know i told you already but i swear girl.. this wig is really the bomb!
tamicka brown: mine came out just like it!! im so happy!
zetta b: Love the Wig. Really like the tip bout where to place your longer pieces.
TemBrie Redd-Wafer: This is the best tutorial todate!!!! You are the ShizNic!!!So Young and So Knowlegeable. You can teach anyone to do this. I'm very impressed. Thank you and bless you.
Netta J: 4 dislikes? WTH ppl will hate on anything! Smdh. Keep up the great work Adri. Thanks for the tutorial u did a great job
Maddie Wyatt Videos: OMG!!!! How creative are you?!!! Lol, I kinda want to try this, but i am afraid it'll just be a hot mess with the glue gun and all, lol. Anyway, fabulous job, love your tuts, keep it up young lady :)
geffy85: Honey i've been watching all your videos, and girrrrrrrrrrrrrrrrrrll lemme tell you, you the damn bomb ok, your so beautiful and you've inspired to do all my styles, girl I LOVE YOU!!!!!!!!!!!!!!!!!
Rosilyn johnson: That came out really good i am to scared to use a glue gun but i am going to try this with regular hair glue.lol and your tips were really great.
Jaz M: Ive been watching videos ALL night on how to make a quick weave (which I have never heard of before). How come some people use Hot Glue Gun instead of weave glue? Just wondering. I can't wait to get some money so I can get the supplies to try this out!
Shonnay2012: This method is genious. Sometimes I don't feel like sewing the hair in my head. I bet this don't take as much time.
applesaucekiss: I like the way you did your middle method for the part & closure looks easier .. good idea
Tayv22Fun: Girl you are bomb no matter how you do your weaves, glue gun or sew in...you do what you do and you do it soo well!! You inspired me to make my own u parts weaves n lord knows i would be at work looking like a fool if it weren't for you!! thank you for doing this us women who can't afford to always go to the salon...forget the haters!!
tayee09: Does it last the same amount of time when you glue it as it would if you sewed it in?
Lynnae Sabali: It's funny cause I have no intentions on making a Bob but i sat and watched this entire video because you just explain things so well lol keep doin the damn thing adri! You are truly talented
Pooh Waller: Thanks so much! Great job
50 Shades of Siobhan: great job, thanks for posting!
marn bishop: i made my self a bob today because of this video lol i woke up looking for braid tuts and saw this and just made a bob with duby hair only because i have never used it....
Kimberly Myrick: Awesome video. I gotta try this!!!
Natalie Ghana: thankyou so much, very inspirational and helpful. no need for hairdressers and spending so much money!!
TheRealDollyB: Currently making my FIRST U-part
Melanin Queen: Sooo helpful Adri!!
dmindahouse: "Those can teach...you are a great teacher..seriously its not just about the hair I've never touched hair in my young girly life...lol now I can make wigs... you have a talent for teaching/explaining... Thanks for sharing....
jocelyneofcourse: Hi girl. I was wondering how long the glue last because I really like weaves but sewing takes so much time!
Brenda Byrd-Grimes: I watch your videos over and over. I love, love, love them. You might even find an older comment from me below. LOL! Try using the MilkyWay Remy hair.....not very expensive and it's great hair!! .
Terrel Mison: Thank, I was inspired to make a wig on my own, with some of your Techniques. I added and subtracted some elements. thanks for pushing my creative
_Vanntastic: See where was this vid when I made my sis a bob 3/4 wig a few weeks ago! Lol. Thanks adri, ur THE best.
crisstalle: Now thats what I call a tutorial!! Thanks homie!!
MzDymond: AWESOME JOB GIRLY =D
Gigi Lewis: Awesome tut Adri!! U are the bomb!!
meshel67: girl once again, youve hooked it up!!!!