Blunt Bob Wig With A 360 Frontal | Tea Bag Method
H A I R
Vallbest Unprocessed Human Hair Store
Peruvian Straight
http://s.aliexpress.com/zeUnIbyi
360° 12inch Frontal
2 Bundles 10inches
Bleach Powder
40 Volume Developer
Dye Brush Applicator
Toner / Neutralizer
Gloves
3 - 4 Boxes Of Jet Black Hair Dye
Shampoo
Conditioner
Hair Dryer
Blow Dryer
Dome Cap
Curved Needle
Black Thread
Sewing Pins
Duck Clips
Paddle Brush
Denman Brush
Rat Tail Comb
Clippers
Clipper Comb
Flat Iron
Wig Stand
Wig Head
Scissors
Bobby Pins
1 1/2 Inch Elastic Waistband
Gorilla Snot
Doo-Rag
-----
K E E P U P W I T H M E on all my other social media platforms!
Instagram: https://www.instagram.com/chimeluchini...
Twitter: https://twitter.com/ChimeLuchini
Snapchat: @SosoGorgeous
-----
W A T C H T H E S E V I D E O S
PREVIOUS VIDEO:
- https://youtu.be/aICjRASLD7U
- I Permed My Natural Hair: https://youtu.be/bKpcPYc2C50
- Eyebrow Routine | Instagram Eyebrow Tutorial | Step By Step: https://youtu.be/woXEuHoZq2s
- My African Mom Does Hilarious Bean Boozled Challenge | ChimeInWithSochima: https://youtu.be/7DCX5wO6VHc
Peruvian Loose Wave 4A Virgin Hair Unboxing: https://youtu.be/OyYfsSzcWLk
- HowTo Bleach & Tint Your Frontal: https://youtu.be/Ps1d-uY4tK4
-----
B U S I N E S S I N Q U I R I E S
Subject: (Business)
-----
M U S I C
Soundcloud
Nomandsland - Chillaxin
https://soundcloud.com/nmdslnd/chillax...
**Music is used for entertainment purposes only. I do not own the rights to any of the artist played or mentioned. No copyright Intended.**
-----
T E C H G E A R
Editing Software: iMovie
Camera: Sony Alpha A5100
Music: SoundCloud
-----
A F F I L I A T E L I N K S U S E D
This is not a sponsored video. Post contains genuine recommendations and opinions.
-----
F A Q
I am by no means a "professional","guru", or "expert'. I simply post videos on my lifestyle and things I personally enjoy.
I am Nigerian
I am Located in the United States
-----
T H A N K Y O U S
If you are still here... YOU ROCK!
Thanks for all your support!!! More videos coming very soon. Comment down below if you have any question or video suggestions.
XOxoXO
C H I M E
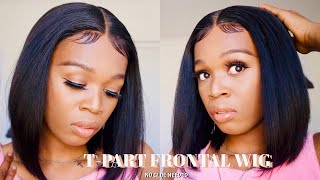
Hey friend welcome back to my channel, I'm back at it again with another video. Today we are going to be doing this hair tutorial and you're going to be watching me slay this wig from start to finish. If you would like to achieve this, bob stay tuned and I'll show you all the details on how to so. Today we're going to begin by actually bleaching or not. I have another good video that shows in detail step-by-step how to bleach and tint your frontal I'll link that right above here, the products that we're going to be using today will be the BW to extra-strength lightening powder, also known as bleach, and the 40 volume developer. As you can see, I have a good consistency going right now with the bleach as far as thickness goes and I'm actually really dabbing the excess bleach into the frontal and we're working on a 360 frontal. All of the products that I'm using in this video will be linked in the description down below, and I really wanted to over process my hair, because I wanted my knots to be extremely bleached just so it can help with the process of blending and and matching Up the hair with my natural hair line and as you see here, another a neat trick to do is kind of covering up the frontal and and and any closure really with foil, because a kind of speeds up the process and makes the chemicals work a little Bit better, you can also get a blow dryer and speed up the process as well. So when you're done, the frontal will be high and just keep your nose kind of clear, because when I smelled it like a lot of the fumes came up and kind of burn inside of my nose in my eyes. So there was kind of a close-up of the knots and how it should look, and here you can kind of see that the hair is really extremely over-processed and I was actually going for that. So don't don't think I missed it, and here is why you really can't even see any of the knots and later on, we'll go back and dye the hair so you've seen that black. Not that was what all the dots used to look like, and all of the yellow knots are what they are now. So here we are going in with the dye. I actually don't know what kind of dye this is. I just seen it had a black girl on it and I chose that one because I feel like it would work best with the hair yeah. I don't know, don't judge me, but it came with the developer and it came with the dye and you kind of just mix those together and also came with instructions. Some gloves and like a shampoo to get the dye out to when you are finished. So I've seen this method on YouTube and I thought it was pretty neat. I thought it was quick and it would you know, kind of speed up the process. Cuz, I'm really trying I'm all about being quick right now, like I wasn't trying to take all day to do my hair, so I put it inside this jar like one gallon ziplock back, and I put my three bundles in there. It'S actually three bundles of 12-inch, Peruvian body wave, I believe, Peruvian curry, but it's perving here and yeah. I used two full bottles of the dye on the three bundles and now I'm using a full bottle on my 360 closure and keep in mind that you want to kind of stay away from the net as much as possible. So you see me going over this. First part right here and then individually partying each section and going back in with the dye, and you know, applying the dye a little bit more. Careful, also keep in mind that dye expands. So when you apply don't apply it all the way to the root, because, as the hair processes it'll, actually you know go to the root without touching the neck, because it doesn't it defeats the purpose. If you bleach the knots and then read, I the knots so be careful when you, you know, put the dye back on there. Also. The reason why I'm dyeing the hair is because the hair came and a natural Brown, and I wanted a blue-black jet-black type of feel quick shout-out to my room annual. She told me I should try the teabag method and I did so for everybody out there. Who is new to wig making? I would completely throw out all other methods, including Ritz dye, and do only teabag, because this is the one that is the most natural for me and got me the closest to my skin tones okay. Now you see me throwing my hair in the microwave because, like I told you before, I'm all about being quick today, I started off with four minutes checking every minute just to see if the hair got pitch-black and once I achieved that pitch-black color, I took my Hair out just because I didn't want to wait that hour for it to process now, you see me rinsing off the three bundles and I'm going to be using the shampoo that they put in the package. I'M also going to be going in with my own personal toner. A toner is really essential, because not only does it remove the excess chemicals, it also traps in the excess color. So that's really important and, as you see here, the gloves that they gave me how to hole in it. So I had to switch these blue ones because my finger turn pitch black sadface. Now I know y'all are looking like. Why is this girl by her on dryer? Well, let me tell y'all this is what I do when I'm not trying to that's what I do. You can go fabric softener in there if you want to, but yeah that's what I do and now that we have prepared all of our hair. We can go ahead and begin. You know crafting and putting together the wig. So I started off with a dome cap and my 360 frontal on a wig head and a wig stand, and now I'm going in with some pins to kind of hold everything down and in place make sure you really stretch the 360 frontal out. So when you are done sewing, it fits in onto your head and I'm just going in with a needle and thread and just sewing all the way around the 360 frontal I'm using a blanket stitch about a centimeter apart as far as like the width goes just To make sure everything is really tight and will not come down later on. I just wanted to give you a little bit closer view on how I sew everything down and, as I start getting closer to the end, I start preparing myself to tie the thread about in about three knots yeah. I usually do about two to three knots. Just to make sure that the thread won't slip back through either the net or even the dome cap. So I was just for extra insurance, extra security and, like normal, like usual, like all videos and like before we're just gon na go ahead and start sowing. Our three bundles and it doesn't matter the order of the bundles because they're all 12 inches, so I just grabbed one and I'm doing the fold-over method. When I get to the corners, I make sure I sew through the left just to ensure that it will not come down. I use the pins to also hold the check in place. I'M literally laying my tracks like right in front or even on top of each other, because I want to pack on all three bundles really. If you have a 360 front, so you really don't even need three bundles, I would say two and a half as good, but I wanted my wig to be full. I wanted my BOB to be full, so I went ahead and squeezed all three bundles literally. You cannot, you will not find a part in my unit because I sewed everything so close together. So just keep that in mind the farther apart. You sew your tracks, you soul, your bundles, the less hair will be in the unit and the thinner that the hair will, you know, come out so right here. This part I split the track in half. I ended up beginning to like double the track, so I think when it came to the end of the track, I split it in half and I'm I laid one two go back to doing like single checks instead of double and that one single one that I Split and then I'm sewing right now, I'm gon na fold it over a couple of times and then I'm gon na finish off with the last track that I just laid to the side and there's no really specific reason. Why do this me personally? I kind of like the way it turns out. I don't like how bumpy hair turns out when you double the the left all the way to the top, because it's too much hair concentrated in one area and you kind of want to taper the hair out as it gets to the top. You really don't want to have too much bulkiness at the top, because that's when your unit starts to look, you know unnatural. So when I get to the top, I start doing you know one one track at a time and not to the center towards the middle. Is where I do like double tracks and when my hair comes close to the frontal, I start sewing the frontal and the hair together. So I kind of do like what is that, like a a circle stitch, I'm not sure how to call it, but I go. I go around and I kind of do like the blanket stitch as well, but I mainly go around to to attach them together, as you can kind of see here. Oh another, really important thing to keep in mind. I do not ever never do not ever cut my tracks and I do not cut my bundles. I somehow always just get everything to fit exactly how I plant it, so I wouldn't advise cutting bundles. Also, when you don't cut your bundles and minimize the shedding so yeah now you see me cutting off the excess dome cap on the inside, because the 360 front holds really what's gon na be used to hold everything down, and the great thing about 360 frontal is That it has like a like an elastic strap. So if the front 360 frontal is too loose for your head, you can tighten that strap the adjustable strap. Now you see me going in with a razor like some hair clippers and I'm making a very blunt cut. 8 cross, you see it well, you don't see me doing this, but I stop every so often to try on the unit to make sure I'm not cutting too much and I kind of started with a guideline as well. You didn't see that either, but now I am kind of giving it some layers and fixing everything up. It'S hiding all my work yeah. So this is a finished product right here I like how it came down. I'M really not sure if I missed anything or forgot to cover anything, so please feel free to leave questions or comments in the comment section down below. I make these videos to help y'all and also help myself. As far as reference goes - and you know if I want to recreate a look - so I mean this - I mean this video here is to help all of us learn and just to kind of show you all my process so yeah. If you enjoyed the video, don't forget to you, know thumbs up and yeah. I just like sharing I like, sharing with y'all, so y'all are my friends and yeah. I definitely plan on making more hair videos. So if you'd like to see anything, you can also leave requests in the comment section down below okay, this video is officially over, but I want to say that this experience was both great and been at the same time, it was a good experience. The seller absolutely phenomenal communication and she got my hair to me and three days three days, okay, so this this was a good experience now as far as the process of getting it. To this point, your for me to this point: okay process, the process of getting it to where I am right now like baby. Let me tell you it wasn't easy. Okay, I went through heck and back for this unit. It was worth it. It was worth it like. I think I think you know that this girl baby, I'm so happy. Oh yeah, that's pretty much! It I'll go ahead and just leave y'all with this slayage right here. Uh-Huh leave y'all with Aldous slaves right here, oh crap, you know what it's time for me to go. See you next time, bye! Oh wait, wait y'all thought I was done yeah. I thought I was then I forgot to show you this when I died this way. The gloves came with a with the hole in it already. You know the glove came with the hole and it already okay and um. This is what happened to my nail. Not only did it happen to this nail, it happened to this note 2, but this nail isn't as bad, but this now right here, like my whole thing, was pitch black. I'M not sure if I remember if I recorded it but uh yeah, um, yeah and um yeah, okay, but no boat. Oh yeah, like you know, make sure you wear nice gloves because you can't have bomb-ass, hair and ugly-ass fingers. Okay, number brother I'll go talk to y'all later until next time. Thank you for tuning into this video uh yeah peace. Oh my gosh honey, I'm not beating my legs. Oh! I can't sit like that. Oh man, I started cramping. Okay, oh that hurt man. I was cramping but um hey, I shoulda just faked the way it was anyways.


Comments
Pat J: Great job. I can't believe you put the unit in the microwave and dryer. It looks amazing on you. Thanks for sharing
Aliyah B: How long did this hair last you? Or is it still holding up? Looks great ❤️ great tutorial
LARCHMONT BREEZE: Watched the video twice ... gosh ... *that's SUCH a beautiful Bob* ... well done! I'm sorry, I'd rather make one like this instead of paying all that money for RPG Show ... uh uhhh
deafheart23: OMG, can I just buy this wig from you!!! Haha
Tempist Haywood: Very cute!
LovableMe137: Do you sell wigs ? This is so cute and I love your skin
LARCHMONT BREEZE: lol ha so funny .... the dryer gurl really! lol love it ... great video (London UK)
amanda Wright: Yes!!! Put those bundles in the dryer !!! #realifehacks
LovableMe137: Please make me a wig lol
Carletta Mills: Wat Clippers You Used ?
Lakendralyn Henry: love it
CARALEE BROWN: Did you leave some of your hair out?