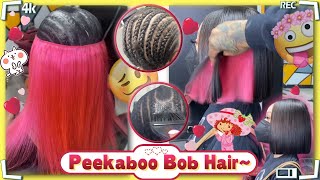
No Bleach! No Colour!| Quick Weave Burgundy Bob!| Sasha Outre Hair
Flat iron that I'm using is from
Duvolle® - 70% OFF PROMO CODE: ROXY
My earrings are from @bossytboutique on Instagram!
Products used:
12" Sasha Outre Human Hair in colour 425
Salon Pro 30 second glue https://amzn.to/30ryFM9
Bio Silk Serum https://amzn.to/372q84K
SUBSCRIBE to my channel! https://www.youtube.com/c/RoxyBennett
-------------------------------------------------------------
INSTAGRAM: roxybennett_
EMAIL: [email protected]
CAMERA:https://amzn.to/38iWQix
LENS: https://amzn.to/2TwMrf1
PAYPAL: paypal.me/RoxyBennett
Keep in mind that I may receive commissions when you click the links and make purchases. However, this does not impact my reviews and comparisons. I try my best to keep things fair and balanced, in order to help you make the best choice for you.
Hey guys welcome back to my channel, I'm gon na show you guys how I created this red middle part, quick, weave Bob, so I did prepare my hair by slicking it down with girl, patek solution. I have an entire video on how I protect my hair using GPS and how it works and everything so I did. I do have a leave out and it left a little bit of baby hairs around the side, so the hair that I'm using is Sasha but ultra in the color 425 and it's in 12 inches. The cost of the hair was 10 dollars and 97 cents, and that was a sale price at my local beauty supply store, so I definitely had to grab it. I grabbed two packs, but in total for this hairstyle I ended up using one and a half packs. So I'm just gon na show you guys how I glue down my tracks and I'm using salon Pro 32nd glue here bond glue. So first I just measure around the nape, so I'm starting at the nape. So I measure with my fingers and then once I got the measurement, I just pull the tracks apart, so you can definitely use scissors and cut your tracks, I'm just being extra yeah. So now that I have it, I kind of be measured again and I add some glue to the truck. So in addition to glue, you can definitely put some holding spray and spritz on it or free spray. But I find that when I use the GPS on my hair, it sticks to the glue very well, so it doesn't need for that extra hold. So now I'm just placing the track on the lowest part of my head. So for me, it's right under my ponytail and I'm just pressing it down with my fingers. So this is the same pattern I do moving up towards my head and up until I reach my level, it kind of turns into like a horseshoe shape. So, as you can see, I'm I've already glued I've already put the glue on the track and I'm just pressing it down, and I'm just showing you guys here again that I did leave some hair around the hairline out. This is because the hair at the front is a lot more weaker. It'S easier to break, and I didn't want to take the chance of you know gluing it even with the Groppi tech solution on it. So I just left it out and I didn't want it to look too too glued, so I just left some hair out, so it can look. You know a little bit more easy breezy. I don't know if that makes sense, but you know what I mean so yeah, I'm just continuing to lay my tracks down this process doesn't take too long. That'S what I love about quick leaves if you're really good at it. It can take you about a half an hour to glue down all your tracks, so, as you can see, as I'm getting to the top, it's coming into more of a horseshoe shape to more of a horseshoe shape. So you just kind of have to just go with the shape of you know your leave out or just the shape of your head really and I'm just adding the two last tracks to each side of my middle part. So I did, I measured it put glue on the tracks and I'm just laying it down and pressing it in and I'm trying not to go too close to my leave out, because my leave out does not have any groper to protect solution on it. So the glue would definitely stick to my hair now that everything is laid down, I'm just taking the comb to comb out the hair and I'm gon na work on my leave out now. So I'm just combing it out because it was in a flat twist. So it has, you know a little bit of a crimp, I'm using the bio silk serum, and this is gon na work as a heat protector and also it's going add some shine to my hair, I'm just working it in working it in and I'm parting it Down the middle so that it's even on both sides with my rat tail comb, the Flatiron that I'm using today is from Duval, and this is a titanium Flatiron in one inch it's called rendezvous. If you check out my description box below you'll, see that I have a coupon code for 70 % off, so if you want to take advantage of that, you definitely can so. The flat iron has temperature control. It goes up to 450 degrees and yeah. It'S pretty good, so, as you can see, I'm not sure if you can tell, but my lever is a little bit stiff, and this is because the wrap setting motion that I had used is was had a very firm hold, actually so a very firm hold. So that's why it was pretty stiff, but besides that everything was fine right now, it's giving me like an ombre kind of look. I could keep it like this, but I definitely wanted to do the whole red Bob look. So this is where I'm coming in with the Jerome Russell 10 temporary hair, color spray and the color is red wine, and I got this brave from my local beauty supply store. I forgot how much I paid for it, but you could also find this online. I believe it's on Amazon, as well as Walmart in the States. So yeah like I mentioned it's color red wine, and this is just an easy way to color your hair without bleach or without any dye, and it washes out right away with with shampoo. So I'm just using the piece of paper to shield my face because I just don't want it to sprout my face. I already have makeup on and I'm using the brush to kind of blend everything through, because some parts are picking up the spray more than others, because I just haven't mastered on how to spray it evenly. So the brush kind of like blends it through and it also tames. You know any flyaways that I might have, and it reads my hair. So this is one side done. You can see the difference there and the other side, so I'm gon na do the same thing that I did to the left side. I'M gon na do that to the right side. So now it's time to cut my BOB, I'm using regular scissors. These aren't professional scissors. They probably cost me about six dollars at the beauty supply store, so I'm just gon na I'm just cutting as straight across as I can and I'm trying to make it as even as possible. So I'm just using the tail comb to guide it down and then I'm just cutting straight across as I was cutting. I definitely before I started cutting. I knew that I wanted it to be past my jawline, but not completely touching my shoulder. So this is the perfect length that I was looking for, so I'm doing the same thing to the other side, of course, because I want it to be as even as possible, and I know that cutting especially my own hair, it's not going to be perfect. So, there's always, I need to you, know, touch up and and do some more cutting wherever necessary. So whenever I see any hairs that are longer significantly longer than others where it's not even I'm just taking the scissors and just trimming, I definitely should have wore a cape, because I have so much hair so everywhere it just got really uncomfortable. So I'm just showing you guys the back here, there's like a big little gap there. That needs to be evened out, so I'm gon na make that even try to make it as straight as possible. So I'm using my Clippers that I have and I'm gon na try and you know, make it even basically and make a straight line because you know the back of your bob cannot be looking all crazy, especially if the front looks nice. So I tried that and it didn't it wasn't perfect, so I had to try another method. So the method that I used was is the ponytail method and that's where you gather the back into a ponytail, and then you put so after putting on the pony like after I'm putting it into a ponytail. You literally just cut whatever is left at the end and it just helps to put to bring everything together so that everything gets an even cut. So that's the method I ended up using and I'm just showing you guys here that this is like pretty much trial and error and that there's always a way to fix your hair. You know: there's all these different methods to try. If you end up messing it up right, so I did that and that's a little bit better now and there's always room for tweaking, so just never give up pretty much and like it's not always going to be perfect, but you just got to do the best That you can come on alright, so this is what I got so far, so this is like my my rough outline of my BOB. So the next thing that I decided to do was use some thinning shears, because I noticed that the ends were pretty thick and um. What the thinning shears are gon na is gon na do is obviously thin. The ends out a little bit so that the ends won't looks super blunt or super chunky. So it's gon na help. It flow a little bit better and yeah. It just makes it look a little bit less homemade cuz. This is homemade right, so it's just gon na soften it up a bit, so I'm just taking the thinning shears and I'm just focusing on the ends of it and yeah. I'M just working it, and I do this all the way around. So all the way like from the left to the right - and I do the back as well - and it did make a big difference - I don't know if you can see the left side and the right side, how different it looks and it makes a difference when You'Re flat ironing it as well, so I'm just gon na show you guys the back here and I'm gon na show you the the difference that it made. It'S not completely perfect, but I did end up going in and fixing the areas that needed fixing. But after flat ironing it and making corrections, it turned out beautifully. So you know I have to put on my accessories and this earring is actually called Roxy, and this is from bossy T boutique check out bossy, tube. The bossy T, boutique I'll, leave their details in the description box below and this is the overall finished look guys. I hope you guys enjoyed this video if you're new to my channel, don't forget to subscribe for more videos. If you are not me and you've been rocking with me from the beginning, thank you so much. I love you guys. Let me know if you have any questions I'll, try my best to answer all your questions and I'll see you guys in my next video bye,
Comments
PrettyBrown Mia: Thanks for taking it back with a quick weave! Everybody is so pressed about these frontals and only wearing virgin hair but sis, if you know what you doin you can still rock the hair store hair and make it look good! Thanks girl♥️♥️
Reuel Lara: YESSSSSS!!! we need more leave out game in 2020 cuz the wigs we be seeing nowadays!! WHEW
Kiana Robinson: I’m sooo old school and prefer doing my quick weaves lol I am about to try this in orange and purchased the Jerome Russell spray so thanks soooo much for showing that it works!!
Ma'Kayla Washington: This video is a God send! I am doing a similar style and the hair is a little more jet black than my hair so I thought about doing the spray but was hesitant! So glad to see someone’s else do it and it come out flawlessly!! ❤️❤️
Stush.B: Roxy always serving LOOKS
Juanita Bethea: This was the easiest tutorial Thank you
Tonya Posey: You're way too hard on yourself... I think you do a great job! A lot of your hairstyles I have recreated!! The only thing is I wish I'd see you do videos more and also I enjoy your makeup looks as well!!!
CJolie TV: This is such a smart idea! and you look so pretty, love the color!
Lisa Dawson: Girl u are amazing thank u for ur detailed video I love it
IsThatYourHairrr: I love this look! Beautiful!
Cleo Proctor: Loving the color
Rina Mae: You should do a spilt hair hairstyle with that color spray I’d love to see that!
Mary Minor: Love it!!
Molly Sanders: I need the patience to do this. I keep my hair cut short, but I always had very long thick hair.. I wonder if I should try this.. Back to the video!! You rock !!
Leslie Jefferson: Really cute!❤
Lah lah Luv: Love it Please make more quick weave videos!!!
P V1231: Girl I ain’t seen a can of Jerome Russell in a minute...you slayed this.
Kerry Kay: This is lovely
SUGA SWEET: So pretty
Tiffy Kash: Need a makeup tutorial Roxy
Latanya Hoskins: You're Badddd! Ms. Roxie you're one of the baddest DIY hairstylist on YouTube.
TheRealJ.Armani: Next time use a cap love - bed it’ll cause more breakage applying on actual hair.
Christina Moreno: Any advice on how to get the leave out less stiff I tried this and my leave out was just not trying to stay flat Should I perm that part to help
Memory Copeland: ❤️ IT‼️
Ashocka Black: Hey long does this hair last and the quick weave? Di it come with closures I haven’t did a quick weave in so long. Very pretty!!!!
Antonia Richmond: yess you did that. i love it
Viviane sherazade: Quanto tempo dura ,colado na cabeça?
Tori Wayne: im jus looking for hair inspo but girllllllll u never have to be so pretty!
Toni Clayton: Amazing
Redbone Mango: THOSE EARRINGS POPPIN HUNNI & HAIR!!!
Cathleen Griffin: I like it'.very beautiful
Mo White: Omg!!! I didn’t even think about doing this! I been crying for a red Bob, I’m definitely going to try this! ❤️
Kashonda Scott: no cap needed or Gotstobe spray? Just the hair protectant?
Ayonnaz Glam:
Shronda Smith: Niceeeeeeeee ☺️☺️Roxie.
Sonja Felix: How many packs did u use?
Mildred Starks: Beautiful beautiful beautiful
dominique frazier: What did you gel it down with cause my hair is short as hell not even to my ears how do you gel it down ??? Cause im gona try this tomorrow ? And if i dont wanna leave it out at the top then what ?
Betsy Boo: Do they have that spray in blue
Asia Monna: Yessssss