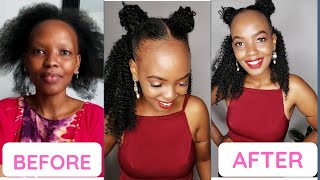
Simple Braid Pattern & Routine For Middle Part Closure/Wig | Courtney Lynn
- Posted on 19 February, 2016
- Closure Wig
- By Anonymous
OPEN FOR MORE
My FAVORITE shampoo & conditioner:
Camera:
Canon T3i (600D)
Editing:
iMovie
Music:
Social Media:
Instagram: @cece_lynn
Tumblr: voguelikeme.tumblr.com
Contact Email:
Hi guys welcome back to my channel for today, I'm going to be showing you guys how I braid up my hair from my middle part, closer wigs and let's go ahead and get started. So I start off with blow-dried hair. I do have a tutorial on how I build on my hair without having any heat damaged or anything so I'll have that up in the cards and I'm just brushing that there with a powder brush to make sure I don't have any tangles. So then I go in and I want to do my part, so I kind of suck at parting, but I do it a few times until I get it, how I like it - and I just part it down the middle - that's that I can and then I Also part all the way to the back and then once I part it all the way to the back. I just tie up one side up into a bun to get it out of the way and I'm going to work with the other side. So now I want to start braiding and I'm going to do my first braid high right at the perimeter. My first braids on both sides are smaller than the rest of them. So I just section that off - and I use my eco styler gel around my edges. As well as at the top, where the part is so that my hair can stay sleek all week and then once I have the eco styler gel, I just take a boar, bristle brush and smooth that in, and it just helps for my hair to stay. Really. Really sleek and I was going to use a little metal clip to get the hair on the other side out of the way. So I don't break that up along with it by accident. So now just cornrowing and if you don't know how to French braid or anything, just look up to a tutorial on YouTube where there are times, but it's really really easy. It takes practice, though, I'm not how to braid. Since I was really little. So it's pretty easy for me now, but all you do is really braid and pick up hair as you're going down. I know that doesn't explain much but just find a tutorial, and it really explains how to do everything. So I just write that all the way down to the bottom - and that is my first braid and then once I am finished with that, all I do is braid it all the way down to the bottom, and then I start on my next braid. All my other braids are going to be a little bit thicker, but still not too thick, because I want my like to lay flat. So that is how the braid looks when I'm done. As you see, it's not perfect, the parting is not perfect. It doesn't really matter only part of the early matters is the middle part. Like I said, the next braid and the rest of them are all pretty much thicker than the first one, and I do five braids on each side. So I have a total of ten braids and I'm going to do the same thing with adding an eco styler gel at the part, but that's only place, I don't add anywhere else. I only add it with my edges at the front two braids, so I'm just going to break that down, as I did the other one and then up and continue that process for the rest of my head. So now I'm on my last parade on the other side and I'm just going to braid that up really really quick and then once I'm done with that, I am finished and that's how it looks you could actually walk out the house like this. I probably looked, but you definitely could and who's had my braids look a little bit closer up and just so my scalp can stay nice and moisturized and healthy, as well as to grow out some areas, I'm going to put castor oil along my part. I do have a DIY oil mixture, video that I like to use. I just don't have that right now, so I'm just using castor oil but I'll have that up in the cards as well, and I'm just smoothing it through and really just massaging my scalp with the castor oil and once I'm done with debt. All I do is take a little satin scarf and tie up my edges and that just helps again with the eco styler gel, so really smooth my edges down, and that is about it. Once I'm finished with that, I am done and I was let the scar sit on for, however long and then I can continue on with my process with the wig and everything. So that's about it. I hope you guys enjoyed this video and I'll see eyes, and next one bye guys, honestly, just within the last week that my hair is kind of turned on me. I turned and died like a whole 180, but it has its time.


Comments
Chi-Nola: Love this, Thanks for sharing! - Mila
Having Tea With the Devil: Damn you just made that look so easy lol, sadly I haven't braided hair since I was 14! and since my hair isnt as long as yours, braiding my own hair will probably take the whole day But thanks for the tutorial!!
Willine Cyriaque: What do you do with the hair that’s hanging by your neck ?do you pin them up or tuck them into the wig
Lizzy Sway: can u do this for sew in weave
Gracie Wandyte: