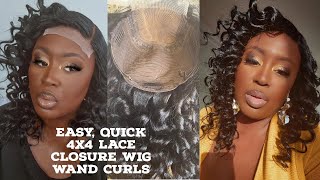
Diy Hd Closure Install| Beauty Forever Hair| Hd Clousre Wig
- Posted on 09 March, 2021
- Closure Wig
- By Anonymous
Welcome back Loves
Watch how I install this lovely HD wig from Beauty Forever
Quick Scroll:
00:23 Hair details
03:41 plucking/ baby hairs
08:06 Install
10:28 Styling
Make sure to LIKE,COMMENT, AND SUBSCRIBE ✨✨✨
Hair is from: https://www.beautyforever.com/
HD closure wig: https://www.beautyforever.com/beautyfo...
Follow me on Instagram:
@tru_kelz
https://www.instagram.com/tru_kelz/
Business inquiries: [email protected]
This is definitely a funny day, but you know what we bout to turn some heads today. So that's what we gon na do hey loves. Welcome back. We are going to do a wig review on a wig that i actually purchased again. I'M purchasing with my own coins and will be coming from beauty forever hair. As you can see by the lovely box, we will be just reviewing their hd closure, and this wig, in particular, is in the length 22. This is their believe. It'S their five by five closure, um wig, and so this is what it looks like coming out back. I did take it out. A little bit earlier took out the little paper piece that they usually keep in there to keep like the shape of the wig, but this also came with the little head wraps, which is kind of cute and a wig cap. That is not brown all right. Well, we're just gon na go ahead and just you know just dive into it. This is their body wave. You can see now the construction of the wig, it looks pretty secure, they got combs in the back. They have some combs on the side and it's interesting um. What beauty forever has been doing lately with some of their not just closure, wigs, but just wigs in general um to make it so that a lot of their wigs look a lot more seamless. What they've done is included the wefts kind of maybe like almost half an inch into the inside of the wig so that you don't see you know those wefts. So i'm really excited because i guess hd closures are supposed to be like the most realistic. Looking and so far it doesn't look bad i'll go ahead and wash it most likely i'll end up using my silicone mix, just to condition the hair really good and then i'll, probably let's see, should i bleach these knots there's a chance. I might not bleach the knots you guys, as you can see like my skin complexion, is pretty dark, so i don't think bleaching. The knots will really will be something i do to this wig unless it just gets to a point where it just doesn't look right, but besides that we're just gon na go ahead and get into it, we're going to go ahead and wash this thing deep condition. It and then blow dry and style, and then i will have my final thoughts afterwards. So stay tuned if you have never worn a wig before this is your first step sis you need to braid your hair. So not just half your head girl. You need your whole head and it needs to be flat flat. So here is my braid pattern for this and then, in the background, you'll see that my wig is pretty much already prepared, but don't worry, i may sure include this clip here to show you how i prepare my wig after i have basically deep conditioned it with The silicon mix so as you'll see, i am just going in randomly just plucking away row by row. This wig was not that dense, at least on the hairline. As you can see on the right side, the hair is not. You know it wasn't in like the way that they added the knots or at least added the hair is not thick at all. Really, all i'm doing is just trying to get rid of that line of demarcation and just thinning out some of those areas. That are, you know a little bit more thinner on on me based off of like my hairline. So that's basically all i'm doing here, i'm going to kind of just let this run, because this does take some time. Of course, i'm speeding up the process here. However, it does take some time to initially you know get this done, so i'm just going to go ahead and let this run and then the next step will be to actually get the baby hairs and i'll explain that whole process in the next clip. So on to the baby hairs, now you guys can see here that that line of demarcation is not as present as before. Now i'm just taking just a few pieces of the hairs where the ends of the closure are and that's where i'm going to start cutting. My baby hairs with this. I know people use setting lotion, i've kind of adapted to using eco styling gel and i feel like it, provides a much better hold for me personally now who's to say this is right or wrong. I mean if it gets the job done. You know i'm basically all about it, but i use eco styling jail whenever i'm trying to lay down baby hairs and stuff like that on my wigs and as you can see, it's it's holding up pretty well going on to the next side. As you can see, i'm going on that right at the end of that closure and y'all this wig like the way that they constructed this wood. I love the fact that you can barely see the wefts on the sides of the hair. So when i'm swooping the hairs to the side, like i just swoop them in with that track, that seamless track there and it just blends just really really well here, i am again just swooping those hairs into that track. I had to move some of those little little sticky pins, but um yeah. This is basically how i lay my baby hairs and even just the hairline you know in itself and as you can see it looks, it looks pretty good now those knots y'all. I may go back and just bleach the knots, but for this i'm just going to leave it, as is because, when i like, when i installed this way y'all, you can barely tell unless you're like really like up on me, and you know for my for my Skin tone like it's not like it's, not that big of a deal like i've, figured out how to conceal a lot of this stuff just so that i can like get by um, but as of right now, i i can pre pretty much get away with just You know not necessarily having to bleach the knots write that at the end right there on the end, all i did was add the collagen infused thickening pumping mousse by got to be glue. I only use a little very little, very, very very little because i didn't want the hair to be like stiff stiff, like that or anything now, i'm just going on my blow dryer. I, the hair, was still kind of damp the next morning after i had washed it we're just going in with that blow dryer just to make sure that there's no damp spots and here y'all i need to get another. I need to get another wig cap like soon very, very soon like right now i can get away with this one, but it's it's not as it's not as um. It doesn't quite fit. My tone that much but you'll see like at the end of the video like it's it's, not that bad, but yeah. Anyway, on to the next step, i took some alcohol rubbed. My hairline make sure that you know there wasn't any anything on my forehead like oils or anything like that, and i'm using the gossipy goo glue spray and i'm only using two layers for this install and yeah. I can basically get away with like two two layers. So this was the second layer and all i'm gon na do is just place that lace yo this lace, melted so well, so so! Well, you're, probably gon na see like some white pieces, but i did correct um yeah. I did correct that yo this lace, this hd lace - y'all, it's that's, probably all i'm gon na get from now on now that i know like i don't have to tint the lace. I don't got to do nothing. I don't have to worry about. You know my knots being looking like y'all. This lace was beautiful, like you can barely see it like you. Can you can see where the lace is and then you can see where the got to be glue is y'all and you can barely see the lace there, except for that, like that piece there, which i will correct that i will probably spray some i'm got to Be glue and then just put the tie, the little wrap thing around it. So this is what it's looking like without me, adding like any concealer or foundation like to my lace, which is what i usually do whenever i wear wear like a closure or a frontal wig, so um right now we're just going in with curls again, i'm gon Na go back in and fix the lace part, but y'all like you. Can you cannot see that lace, except for like on the ends? That'S the only part that you can actually see it, but like in the middle like where the hair, like that part girl, it's slaying, it's slaying, i'm like i'm liking it a lot right now we're just putting in some curls and i'm just using. I think that's like a it's. I think it's a one inch it's either one or one and a half inch um barrel curler and yeah we're just curling it away now the way that i curl my hair, i always curl it going away from my face and for this style that's pretty much. All i'm doing so how i do it, i usually section half and then half of that half. So you basically have four sections and i do the front first and then make my way to the back and then do the same thing on the other side front. First and then the back last, so that's what you see i'm doing here and making sure that i curl the ends of those the ends, because if they're not curl y'all, i get so paranoid. When i see curls that aren't fully curled like to the end like it really bothers me, because i remember you know with my grandmother and she'd always tell me, and you know, teach me while she was working in the shop she's like girl, you got ta, make Sure those ends are curls because you don't want them fishtails like that's what she would call them fishtail. So, in the back of my mind, i'm like okay, i got ta, i got ta, make sure i don't have no fishtail, so i think i did pretty well and curling, but again i'm just curling away from the face. That'S the technique and making sure that you also get those ends as well. So here i'm just adding my foundation and previous to that i did put in some hairspray. You know this hair. When you curl it, it will lose its curls. After probably like a few hours, so it's very important that you add some type of hairspray to make sure that you keep in those waves there. So that's the only thing that i guess that's really just the only con is that it doesn't hold curls that long. Unless you add, of course hairspray, so that's all i'm doing there and then now, i'm just adding a few layers just to frame my face later on. I will go back in and add even more layers, because i really do like a heavy layer effect like in my bang area. So that's all we're doing there, and this is the final look you guys. I hope you guys really enjoyed this tutorial. Slash review, slash, install um; this was really fun again. This is the beauty forever 5x5 hd closure and all i did was i got to be blue spray and some foundation, and this is yeah. This is the end result here. You guys. I hope you enjoyed this tutorial and again, if you are interested in this hair, i will provide a link down in the description box. So again, if you have any questions, please be sure to comment down below. If you have any questions pertaining to this hair um again, i am always open to other video ideas. For you guys i will be posting a natural hair, video pretty soon so, of course be on the lookout. For that and again, i hope you guys enjoy this. Like comment and subscribe - and i will see you guys on my next video stay blessed - oh you


Comments
Hassie Mitch: Styling was nice, if you watch other YouTubers with the same 5x5 they glue first, cut the lace, then lay the baby hairs so it’s straight across.
iDreamOfStar: Good Video! I just watched and ordered.
Prettyeyes Joseph: Do you still recommend this hair ?