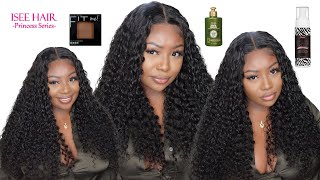
Best Wet + Wavy Wig Install | Luvme Hair |Hun Beginner Friendly
- Posted on 13 July, 2021
- Closure Wig
- By Anonymous
Hey loves ❤️ hope you guys enjoyed this video of me Installing this wet n wavy wig
Coupon Code: 23% off use "SylaniaN"
SOCIAL MEDIA:
Instagram: Sylania.mua
Tiktok: Sylania22
HAIR IN TODAYS VIDEO:
Link: UNDETECTABLE SWISS LACE WET AND WAVY 13X4 FRONTAL LACE WIG | https://bit.ly/3xBhG9X
Length: 20 inches
Density: 180%
Cap size: Large
#Luvmehair
#wetnwavy
Hi, you guys welcome back to my channel so today, i'm showing you guys how i installed this 3x4 wet and wavy wig sponsored by love me hair. Now this is the wig not straight out of the box. I already went ahead and washed and conditioned and bleached the knot. Now. This is what the hairline is looking like for the wig, it already came pre-plugged, so i did not have to do any plucking, which i loved. Now this is the inside of the wig. You guys might see some white spots, but honestly i was a little bit lazy and forgot to wash out some of the bleach spots, but that is okay. It didn't affect my hair underneath the cap and it come with combs and straps on the inside for extra security. Now, first things: first, you guys before i even install the wig, i'm gon na go ahead and put some foundation just to make sure that everything blends when i do put the wig on now, as you guys can see, i'm just gon na go ahead right in And put the wig on when i initially first put it on not gon na lie, you guys the wig did fit a little bit smaller than usual, especially around the ears. Now around. Like the hairline part, it was fine but, as you guys can see, i'm trying to like pull it forward to pull it in front of my ears, and it was just a tad bit small like it fit a little bit behind my hairline, which would have been Nice for it to fit in front of it, but that's okay, so i'm just gon na go ahead and take this razor. I couldn't find my scissors to cut out the ears, so i just went ahead and used what i had in front of me. As you guys can see. I was pulling it forward and it fit a little bit, but it would still tend to pull back on either side, but that's okay, because, however, this honestly has to be one of my favorite wigs that i have received from love me, hair down to the curl Pattern down to the hairline already being pre-plugged, because i hate going out of my way just to plug a little bit extra, sometimes because it could just be a little bit of a hassle. And if i could just get that part out of the way. Instead of doing anything extra that always helps the process, now, i'm just going to take my got to be instant, hold and spray it all along my hairline. This has recently been my favorite go-to when it comes to going down my hairline. I don't know something about it. Just makes my hairline look flawless, so i'm just gon na go ahead and do that? Oh, i, oh now, once i'm done blow drying my hairline and i know that everything is nice and dry. I'M gon na go ahead and with my razor and go ahead and cut the hairline off, i usually in my other videos. I usually go in and cut the hairline first, but i wanted to try something a little bit different today and i actually love the way that it turned out. I actually might start doing this method in my videos more often but yeah i'm just going to go ahead and cut off the hairline now by the ears. I went ahead and cut a little bit back. It wasn't actually on accident, because the wig of course, was a little bit smaller around those areas and it wouldn't come forward, but that's okay. It still ended up working fine in the end when i went ahead and made my baby hairs, so i'm just going to go ahead and continue to cut down on my hairline. You guys might see a little white cast, but we're going to go ahead and fix that once i'm done cutting the hairline down now, if you guys have made it this far, don't forget to comment like and subscribe down below and let me know what you guys Think so far about the video now i'm just adding foundation to my hairline just to make sure that everything blends, because we do not want a white cast showing through because that is not cute at all. Like i said this wig is a 13 by four wig. So i was actually really surprised that i had so much parting space on the side of my hair. I kind of was indecisive if i wanted to do a middle part or a side part, but i thought a side part would be really cute with this hairstyle. So, as you guys can see, i'm just going to go ahead and part the side part out and then i'm going to go on and move on to my baby hairs in the front. Sometimes i'm not really a big fan of baby hairs because when it comes to frontals, i honestly struggle with them sometimes, but this time around, i wanted to do something a little bit different with my baby hairs. So i'm just going to go ahead and try to do the little curl trick that i've been seeing on tick-tock, but unfortunately it didn't turn out the way that i wanted it to so i just went ahead and added some edge booster onto my edges and started To gel them back instead, because that curling method was not working, it's cute on other people, but unfortunately it didn't work for me. So i'm just gon na go ahead and continue to create some baby hairs up, and i actually was really happy with the way that my baby hairs turned out this time. This honestly has to be the best frontal install that i did like ever to be honest because i usually don't go this dramatic with my edges, but i'm really happy with the way that they turned out now. I do have a coupon code for you guys down below in my description box for 23 off, if you guys use the code, selenia and girl go ahead and get you this wig right now. This wig is the perfect summer wig and the install is so easy. You guys, like this honestly, has to be one of my favorite wigs that i've used from love me hair. Thus far, i'm going to take a lot of body, foaming, mousse and put it all along my hairline, so that we can now start the melting process with a hairline just to make sure that everything blends in nice and seamlessly. Because we want the hairline to look as natural as possible, so i'm just going to take my lovely hair headband and tie it around my hairline just to make sure that everything is secured. Now, i'm spraying my hair with water, nothing else just water in the water. I mean in the spray bottle: that's it no conditioner anything. So i'm just gon na go ahead and take my hard bristle brush. I honestly would probably recommend using a detangler brush, but honestly the bristle brush worked just fine. I honestly couldn't find my detangling brush. So i just used what was in front of me at the time. So, yes, i'm just taking my hard bristle brush that i got from the beauty, supply store and i'm brushing out the curls as i spray them with nothing but water, and i'm just going to continue to do that until i'm satisfied with the way that my hair Is looking when it is wet? I went ahead and left my headband on for about 20 to 25 minutes, as you guys can see, the hair in this clip is about. I want to say 70 to 75 dry now that everything is nice and blended in after i took it off, i'm so happy with the results and how the hair came out. I'M trying to fluff the hair just a little bit just to make it a little bit bigger, but this is what the curls are looking like up close and this hair is 20 inches. So i wanted to show you guys how long it looks on me or what the length is looking like. I also decided to go in with a hot comb just to make sure that my part was flat and nice and smooth after that. Everything is completely done. You guys, i'm so happy with the result and the way that my hair turned out. Thank you. Love me hair for sending me this wig, don't forget to comment like and subscribe down below and use my coupon code for 23 off down in the description and thank you guys so much for watching.


Comments
Anijah Carmichael: love how natural this looks !!
A Shine: Great tutorial! What products do you use on this wig please? I have this one and unfortunately cant use the same products that I use for the kinky curly wig I have.
Destiny Watson: So pretty and natural ❤!! #Roadto5k
Fatimat Alabi: Nice look. Great job. With the baby hairs I believe you are suppose to curl upwards, away from the face.
Karen Terrell: Beautiful install. How many inches was this wig?
Janell George: If you took off the elastic would it fit better? I have a very similar wig from them ( only difference is mine is water wave) in a large as well and I noticed A LOT extra of space in the back. So maybe taking off the band will make it fit by the ears? Idk I have to try it. I'm new to the whole wig thing.
L B: I have bought 2 wiigs from them and they were both too small. The sides were angled and would not come down. Done with them
Araybia Wilson: ‘Page not found’ what do you mean, I wanted to try this wig out
Larry Drake: Love this video
Shamar Updatess: