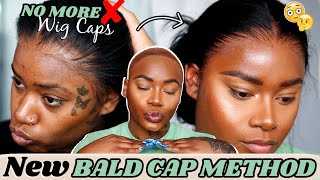
Tutorial: How To Make A Full Lace Closure Wig | Nadula Hair
- Posted on 31 May, 2018
- Closure Wig
- By Anonymous
Follow me:
INSTAGRAM➜ https://www.instagram.com/forevercryss...
SNAPCHAT➜ @crystianadenise
HOW TO DIY LACE CLOSURE WIG BEGINNER FRIENDLY TUTORIAL
DETAILS ON HAIR: NADULA BODY WAVE
LENGTHS: 20,20,22,22 18inch closure
Mid Year Sale 36% OFF, Join us Now!!!
Nadula Hair Information: Brazilian Straight Hair 20,20,22,22 with 18inch closure
Direct Straight Hair in the Video: https://goo.gl/JXftEs
Brazilian Straight Hair on Nadula.com: https://goo.gl/UC6Epo
2018 New Arrival:
Nadula Wig Arrival: https://goo.gl/MTZwEo
Nadula 613# Hair Bundles: https://goo.gl/tBaZz3
2018 Top Selling:
Top Brazilian Body Wave Hair: https://goo.gl/ntuArA
Top Brazilian Curly Hair: https://goo.gl/CifvUN
Nadula Youtube: https://goo.gl/dy3Cxd
Nadula Instagram: https://goo.gl/BQFo3i
______________________________________
I MAKE CUSTOM, NEW, AND RESALE UNITS:
BUSINESS INQUIRES: [email protected]
PRODUCTS:
Canvas Block Head: https://www.amazon.com/gp/product/B00W...
Wig Combs: https://www.amazon.com/Stainless-Steel...
Wig Caps:
1. dome- https://www.amazon.com/dp/B0103VEAQ0/r...
2. stretch- https://www.amazon.com/dp/B00TIW2LG2/r...
3. mesh- mesh-https://www.amazon.com/Donnas-Premium-...
Stretch Elastic Band: https://www.amazon.com/StretchRite-2-I...
Wig Stand: https://www.amazon.com/Abody-Mannequin...
T Pins: https://www.amazon.com/Diane-T-pins-Lo...
Needle and Thread: https://www.amazon.com/Crispy-Collecti...
HELPFUL VIDEO:
How to Ombre Hair: https://www.youtube.com/watch?v=eqMMc0...
Hey babies. Welcome back so I'm just gon na jump right into this video, so I'm gon na go ahead and start off by showing you my dome weight cap. This is a canvas wig head, I'm saying cap, but it's a wig head got it from Amazon. Along with these t pins. It also came with a wig stand and it is adjustable. It has a swivel a little mount, of course, and literally it fits perfect into that little hole. I believe I have a size 21 to 22, I'm not mistaken I'll, leave all the details down in description box below so the capsules. I use a youth variety of caps with mesh dome cap, a weaving cap and then the stretch cap as well. So my favorite is actually the dome style. It does not have any adjustable bands, it does have the holes, it's very breathable, get for flip-over frontals closure. So on and so forth, the customize weaving cap is going to be good. If you want to have a leave all around the entire perimeter of your head and then the stretch weaving cap is good for closures and frontals, because it has an adjustable band already made inside of it. But it is gon na be for you guys that maybe have a smaller to normal size head so completely up to you. What you want to use the dome style cap is definitely gon na, be more versatile and pretty much for everybody, but for this particular video I am gon na be using the stretch weaving cap just cuz. I think we could actually at home to just kind of show you everything so here's the elastic band. I won't actually meet this for this unit, but again it's optional. If you want to add that I do have weight combs, I got these off Amazon as well. Along with the elastic bands, so I'll leave all the links down below and the description box to, let you guys know what you need. Of course I have some shears. These shears are probably like five years old, so a very dull but whatever then, of course I have my needles. I usually can get away with about 12 to 15 needles for an entire install and I'd like to use the cotton thread. Some people will use nylon, but if you're a beginner, I definitely recommend using the cotton just because it is a lot easier to work with you don't have to pull it as tight and it just kind of locks into itself. So here's how to throw to new york, you see half that little hole. You literally are gon na pull the thread through the small little hole. The goal is to double it up, and so you want to pull it to the length I usually use my arm as a measuring guide, I'll, pull it to them. One of my arms so to the right arm to the center of my body, go ahead and cut that off and then I'll tie the end of the the actual thread, and I want to show you really quickly of how exactly you do that. So if you don't know how to tie a knot, of course, I'm not really gon na be that good at explaining it, but I'm basically gon na wrap the thread around my finger and literally pull the leftover piece through the middle and pull it tight. It'S almost kind of like not really like, tarnish a shoestring or is it I'm not sure anyway, you need more assistance. There'S other YouTube videos for that, but yeah there's the knob so go ahead and put that wig cap on the mannequin head and it has a lot of stretch to it. So you definitely want to pull this wig cap as stretchy as possible, make it as loose as possible when you put it on the cap that way as you're starting to so it's not buckling on itself. That way about the time you click a wig on it. Doesn'T fit so pull it as much as you can. This is what you need the t pins for just to make sure that the wakeup is not gon na move it on. I like to use it up for the front the back of the two sides. Now: here's the hair, of course, all the details will be down in the description box below it's a body wave definitely check out the company. Hair is really really soft, the webstore really really full and thick. I am gon na use four bundles and a closure. I think go ahead and do a light ombre. If you have not seen my arm brave video I'll leave that down below as well just so you can take a look so to start off, you see where the elastic band on the inside the adjustable one starts. I like to curve my tracks back and forth, so I start right before where the beginning of your ear would actually be. If you kind of just imagine this on your head or even try on the wig cap, you'll see I'm gon na go ahead and double the whips, and once I get those double inches, I'm actually gon na go ahead and stick the needle right through the end Of it I like to use to open in just so, I can kind of seal them together and then I put it directly through the way cap and the hair literally is attached. So if you're a visual learner, we're on this as many times as you have to just to kind of get the picture now, when I start to sew, I like to wrap the thread around the needle three different times. I'M gon na be curving. All these tracks upward, so literally every song. Every time I overlap another track, I'm gon na curve it upward for some of the tracks. I did flip it over for majority of the track, as I got closer to the top. I did go ahead and just use the individual tracks. I did not double them, because I did not want this to be lumpy and bumpy, but as long as it was in the back of my head, I was okay with the thickness. So you'll see what I mean I mean this is just me kind of speeding up me going through the threading here. You guys have any questions about how to thread this needle. I promise you just keep watching what I'm doing and you will get it eventually. Literally. I'M literally going under the track, I'm able to go above - or I guess around it at the top or below it, either or and then I literally just wrap the thread around three times pull tight. It makes a knot each and every time does not have to be perfect. You can literally go back through through the cup tracks, with a comb just to pull out any hair that may not have been placed properly. But if you keep your needle really straight, you should be. You should really be okay, alright, so I'm just going to continue this, as I stated before, I am gon na take this from right before, where my ear would start so back and forth back and forth. As the post is starting with those smaller trucks in the bottom, I just found that this you know, makes it a little bit easier and everything a lot more seamless and I'm able to really pack the hair in there like. I would want to without too many loose tracks, so just for you guys that don't know how to flip the track. Here'S a very easy guide to show you how to do that, because you curve the tracks it makes it a lot easier to flip over. So just slightly curve it up you're not doing anything dramatic, but just slightly curved that track and literally flip it over as flat as possible, go ahead and use a tee pin. Obviously, if you're doing this on the client, you cannot keep in their hair, but if it's a mannequin go ahead and T pin it over and as you can see, it's pulling really really tight. So all that you need to do is make sure that you really secure the thread over the top of that. You know that track in the beginning part, because you want it to lay as flat as possible. I should have actually gone over that about two or three times, but I didn't so whatever it's just a wig but yeah. This is pretty much what that looks like man, if you guys have any questions as far as like you know what I'm doing or why I'm doing what I'm doing leaving leave all of that below, because I definitely want to make sure that I respond to you Guys like this is the more detail than some of the other wake videos you may see so jumping right into the closure. So, as you can see, I have the closure laid down as flat as possible. You kind of have to play with this to get it positioned in the way that you would like, I like to kind of push it a little bit forward than the actual wig cap itself, because by the time I actually starts to thread in and sew this Onto the cap it will move back a little bit. So that's what I have to see pins. I go ahead and start with the very end of that closure and sew it down. As you can see, it was already soaked down and yeah. I'M just continuing that. Now, to make sure that your closure is consistent throughout, you want to make sure that you are pulling it taut. When I say taut using T pins, you can secure one side while you're starting to sew the other side continue to hold it as tight as possible. Not so tight that is crooked, but even if it is crooked, guess what you can part it out to fit exactly where it needs to fit, because it's just a wig and yeah, it really won't matter now. This is a client. Obviously, you want to make sure that you've practiced this to make sure both sides are taught. You can actually have your client hold one side while you hold the other and kind of go back and forth, so I make it a habit of instead of sewing this entire thing around the entire closure down in one swoop. I actually have two separate needles. Already. Thirty I'll start on one side and get to about not even halfway just to the end of the closure and then I'll start on the other side. As you can see, it's already laying really really flat. I just want to make sure that everything is lined up. If it would have been less in the middle and more to the left side or the right side, it really wouldn't have mattered. Because again I can part this wherever it is a four by four closure, so I would have been okay. Had it been a little quicker, so don't be, you know, intimidated by that at all, and I'm gon na go ahead and start off by nodding again the left side of that and, like I said, I'm pulling it really really tight just to make sure that it Does not move it does not lift up. It'S not gon na buckle or anything like that, and this is just a really good close up. As you can see, I'm still using that loop and one-two-three method, it works every single time. I promise you as opposed to just pulling it through, holding it really really tight and then maybe during the one two three every maybe second or third loop go ahead and do that on every single loop and you'll know your wigs will last a lot longer. You won't have to worry about the thread on untying itself. After a while, I can promise you it works just do it so definitely go ahead and continue to it. Alright, this all the way around, like I said you want to make sure you're pulling it tight, and I definitely depend on those tee pins to hold the front of the closure in place so that you know the tension of me pulling. It is not actually moving it back and it's exactly where it needs to be, and, as you can see, all I have to do is really just close this off and continue to sew that down. So it really became an easy job. It did not take very much effort at all, and again I mean I like to go ahead and make sure that I get my first two tracks on. Usually then I'll go straight into the closure. I even do that without my frontals a lot of times at the front, so I'll try to make me put the closure on first and then starts to show the bundles just so I know exactly where it is that I'm sewing, but whatever this is a 4 By 4 closure wig tutorial so yeah, let's just focus on that. So anyway, as you can see, I went ahead and just cut off the additional third didn't need it, and you can see that it's really really flat like I said that cap was pulled, really really tight, and so when it's time to part everything, that's gon na Lay just flatten flawlessly without very much effort. Alright, so, as you can see, I'm gon na go ahead and continue to curve the track upward, I'm just using the t, pin to hold it into place to make sure this is exactly where I wanted to place it and I'm not gon na be doubling the Second wet here, I believe I did go ahead and just go back and forth literally using the flip of our method. Until I works my way all the way up to the top just to really get this sewn down evenly and yeah - I mean it gets pretty simple after you've done this for a while, and it literally the method would be the same on the dome cap. You literally I mean, even if you have to try the wig on and maybe have a little marker to, let you know maybe a little white island or something on the cap and just literally show you where your ears start. So then you have an idea of okay. I need to curve the tracks here all the way up until I get to the closure curve, the tracks do not forget to do that. We have otherwise they will peek through and it will not be cute so yeah and it also just provides a very like effortless, pretty much flow for the unit and for the weave as well. So when it blows back and it pushes back, nothing is showing, and it will allow your hair if you do want to have anything out on the side to blend very seamlessly so yeah that works, and I just continue that up in a u-shape all the way. Until I got to the top so what I'll end up noticing, but you may end up noticing also and once you get closer to the top of the unit, it may be that the tracks are a little bit closer to the closure, because you were curving. Those up and that's okay, so you want to make sure that you go ahead and fill in the back. I actually could have squeezed. Another bundle in here actually started to kind of separate the tracks a little bit further apart than necessary, but it was okay and I'm just gon na literally close in the back. So I wasn't gon na focus on bringing the tracks all the way to the front or to the end again, I'm literally just closing in the back portion of this. So going back and forth back and forth. Literally, I can do the flip over and with it. In the middle of that no problem and then when it's time to close it once I get about, maybe an inch around that is completely even from where the closure starts to the other side of the closure. Then I'll start some just closes in doing that. You method again, and so, as you can see, I used to flip over method to just close this off. I could have totally cut the wefts but yeah whatever I just kind of already got the hang of it uh-hum, as you can see, and I literally will connect the cap with the track and also the end of the closure to make sure that it all becomes. One, and so the closure is attached to the track which is attached to the cat, so once I'm ready to cut the middle of that out, I'm not gon na have too much trouble. I don't have to worry about that closure ever disconnecting from the track, and so there's your full wig guys. This usually takes me about 30 minutes to complete, not too too long at all, and so again this was the body wave hair and I will make sure that I'll leave all the details down in the description box below. I did go ahead and also ombre the hair. Now this is from another company from what I show you in the ombre video but same same idea, and then I'm gon na show you really quickly how to go ahead and cut off that lace. So go ahead and take the scissors just. Did it really really close to where the base of that hair line is, and literally just start to cut it straight across completely up to you? If you would like to use a little bit extra lace and leave that there, if you want to do a little baby hair situation, you totally can I don't believe that I did this for this closure wig it was kind of necessary, but uh yeah. It'S definitely an option, and this is what the inside of the unit looks like really really clean, still have a little bit of stretch to it and flex to it. So it should not be too hard to fit into my my head, like I said always, try on the wigs, are the weight caps before you commit to slowing it down so just to go ahead and cut that out. I always use my hand as a guide. Just to make sure I'm not cutting the actual closure, and I do that really really slowly. I don't care too much about having a lot of excess around the actual inside of the closure, because all that I care about is the middle and that that black piece is not showing when I part this down the middle or down the side. So whatever I feel comfortable with and then of course, I did bleach the knot, so what I'm going to do is go ahead and add on a wig home to the very back of this again I got those away comes from amazon.com. They come in black. I believe Brown like a light brown in a dark brown, so I'm just literally gon na show this through the it would be. I guess material. That'S there. I mean there's a little bit tough to kind of sew through because, of course it has some metal bands. So it's usually a trial and error for me when I saw these on sometimes it's flawless and sometimes it is a mess either way. I just want to make sure that they're really really tight. I'M and again I try to do that same method, we're just doing the you know three stitch and then tighten it really really good to make sure that it forms a knot and yeah it usually works. Effortlessly definitely be careful to make sure that you kind of have your finger in front of there. So you're not sewing the cat onto the weave. That gets a little awkward right and then you end up having to redo the entire thing. Um yeah, but as you can see, it's really tight. It'S not going anywhere and, of course, because you're making this wig, you can definitely always just readjust it. You know or resell them. If you have to and as you can see the adjustable band there. I did not sew onto that, so I was proud of myself and yeah. That also will help it fit really really tight. The combs is gon na make sure that it's not sliding back. So with the dumb cap, you do risk. You know the cap sliding backs. You don't have any comb, so I definitely suggest that leaves putting one or two unless to do the elastic band, then you don't really have to worry about it, but that's for another video, so yeah. This is pretty much what this looks like. I actually enjoy filming this for you just because I feel like it's definitely needed. I know that a lot of times we were like. Oh, I don't want to spend all this money with the stylist. Well guess what now you can do it at home? I definitely understand your pain, so yeah I feel like this is a very beginner friendly. Definitely leave your comments down below, especially when it comes to the details, so, like the small things that I may have missed. Definitely let me know I always want to find ways to definitely like educate you a little bit more but yeah. This is definitely been fun, as you guys can see, everything is really really tight flawless and I will be sawing this up. The hair is very messy right now, but yeah. This is what the inside looks like, really really nice and neat professional, looking and yeah it'll pretty much last for a year or longer, depending on how I keep up with it. But I love you guys so much stay pretty and I will see you in my next video make sure that you subscribe bye, guys

Comments
Lolade Fashola: Tell me why I needed this video yesterday LOL I finished my first wig this morning but I will definitely be coming back to this video when I make my next wig!!!
DeDe Mandy: Thank you so very much! You enjoyed making this and I'm glad you did! It's detailed and I really needed to find a secure sewing method Love you
Deja Davis: this is probably my current fav wig tutorial . love the technique !!
Nash _: Thanks for offering this- especially for showing us how to thread the needle at the beginning... (for not assuming everyone knows how to do this). Very helpful and detailed. ❤️
sonya reed: Thank you, thank you!!! You made this tutorial just for me Oh how I needed this... Stay bless & continue teaching me, I will be waiting & watching.
Crystal Brown: Definitely needed this video! Thank you ❤️❤️ but one question, did you sew over the flaps on the sides of the cap? I see other youtubers cut it off sometimes and this is my first wig I’m making so I don’t want to mess it up
Nikki Marie: So when you loop the thread around the needle, does it secure the tracks more?
IAm Destiny: Thank You Girl I was Skeptical about this Weaving Cap and This Video Sealed the deal! Great Video!
tahyari morris: Can you do a story time of your life and the steps or choices you made that brought were you are today?
Jasmine Exton: Best wig tutorial video! Thank you much!
M Lo: You doing a great job I just want to learn thank you so much keep posting
Lisa L: Loved this! Thank you
Kayla Cassumba: yes !!! my goal this summer is to make a unit as seamless as this lol
Alicia Baker: Love it
Abia.kyarna: honestly so helpful thank you
Its _Chx: What do you use to record while sewing?
Tiffany Davis: Where have you been this was perfect
imanni96: You explained this so good
Yinka Sadiq-Lexton: Loved the video it helped so much!!!
Tiffany blair: Do you sew the hair onto those side flaps on each side of the wig cap?
Victoria Mensah: When you were seeing the closure and you started on one side and went to the next did you cut the thread. And if you didn’t how did it not scrunch up?
Lisa Masango: Gosh it's well detailed I love it I enjoyed it I'm finna not buy wigs anymore I'm gonna purchase combs wig cap etc.
Dahlene James: Loved the video I just wanted to see it on someone in the end
Kersha Beaver: Back to back tutorials nice
STYLESBYLIFEBEAUTYNMORE: My struggle is the top the wig meeting the tracks with the clousure I think I’m not curving it right are your curving up or down
Sandra Sullivan: Is sewing double weft at a time better than single layer? And how come?
Jen Jones: Do you take orders?
Chelsea Kilgore: what do you mean by curve the tracks?
starr platt: So u need the combs with that cap?
modelericanicole:
Selena Betts: I know your not supposed to sew on the elastic bands towards the bottom, but the were two black lines towards the middle of the wig going vertically. Can you sew on those two lines? I see some YouTubers doing it and some don’t.
shanelle Wilkinson: I like the easy wig tutorial do you make wigs with glue like this
Lele Boss: Dang I’ve never been so early