How To Dye A Wig Blonde
- Posted on 14 February, 2018
- Color Lace Wig
- By Anonymous
I will take you step by step in dyeing a wig from a #1b to a #4 and # 27 and #30. Also and a #613 to a Golden Blonde color. I hope you enjoy.
Haith Johnson the Wig Expert
You will be learning How to take your game to the next level.
Use 20% Developer Peroxide.
If you want to speed up the process quickly, utilize your microwave to warm up the developer.
Totally saturate the chemicals within the developer. Variations of blondes will give you dimensions.
Use hot water to open the cuticle.
Start depositing the colors on the #613 blonde.
Start making low lights. If you’re not going for pure platinum, you actually want to make sure your roots are darker than your ends so the color looks natural and grows out nicely.
Begin cutting and coloring your closure to get dark roots.
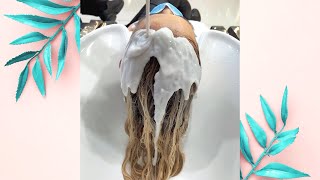
Wet the Hair Down
Finish coloring the roots
Shampoo and Condition the wigs
Style using the Spray Laminate.
Find all our Products
From your Beauty Industry Expert
Spray Laminate: http://www.lehosthair.com/product-cate...
Paul Mitchell Developer and Color:
Redkin Blonde Idol:
https://www.redken.com/products/hair-c...
VISIT LEHOSTHAIR FOR HAIR, WIGS, AND PRODUCTS
SUBSCRIBE FOR OTHER VIDEO TIPS AND HOW-TO VIDEOS
SUBSCRIBE TO OUR EMAIL LIST
#Lehost #wig #dye
LET'S CONNECT!
Facebook: https://www.facebook.com/LeHostTheHair...
Instagram: https://www.instagram.com/lehosthair/
Google +: https://plus.google.com/+LeHostHair
Twitter: http://twitter.com/lehosthair
You can call us at 248-546-4247
Hi everybody I'm so excited that you've joined me today. Listen it's gon na be worth your time! Trust me how you want to stick to Facebook. So so, not only are you gon na be learning from a beauty industry expert, but I'm gon na educate you on how to take your game to a whole. Another level today today we're gon na tie these 1b bundles in anybody that deals with its Universal color. So listen, we're gon na take these funders and we're gon na turn to so how do we turn those colors into a beautiful wig stay tuned, let's find out you're gon na pour in maybe about 1/4 to 1/2 of a cup. The reason why you want to make sure you have enough, because you want to saturate that bun the next thing that I'm gon na teach you is the color going pretty fast. Leave it in there no more than about for 30 to 40 seconds, depending on how thick the peroxide, when you first start, but for the most part you don't need to leave it in that long. Okay. This is just where I want it. Okay, so what's next now you got to get some gloves, because that peroxide is a chemical and you do not want to irritate your fingers, so you want to make sure that you wet the bundle down completely before you put it in the peroxide bath before you Saturate it you want the hair to absorb the peroxide and because we're removing the color it's going to get lighter and lighter okay, so we're gon na. Let that sit for about I'm gon na. Let it sit for the first hour and then I'm gon na come back and check on this for your legs. Now I'm going to take our Indian hair. This is our luxury Indian brand here at Lajos and I'm actually all the pigment has gets all the color is out. So now I'm gon na put color in the reason why I want variations of blondes. Is that now it's going to have dimensions? If you want your game to go to, maybe you're selling your wigs for 200, 300. 400. 500. 600. I can keep going people your wigs up there. You got ta be able to put the work in, but you got ta be educated on how to get the colors on his actual Dan's here the plastic bands. The reason why I normally keep them on if I'm gon na color hair one color, but because I'm using this bundle and I'm gon na get three different colors out of it and I'm gon na cut the bundles because he can be a vent brush right by The side, as you can see this time now, this one bundle here, which is one for platinum, highlights because again remember we're giving the wig dimension so listen. So I'm gon na take that I'm gon na make that seven in and then this one one here is going to be the 7g with the reckon blonde idols line it up so that each box, I don't get these confused but which color goes. Let'S get ready to color so with the reckon I'm going to use just a regular 20 cream peroxide with the two Paul Mitchell's I'm going to use the number 30 clear, developer, it's definitely or and turn it into a 30. So the get as much peroxide out as I can: okay, okay. So now, let's get started with the bundle. Remember that blind piece that I cut over and laid over to the side, so I saturated nature, is completely wet down. To find to come. Is I'm gon na put a towel straight across like this, because I have to flip it this way to make sure so we're gon na cover just the part that has the the coffee bean color on they're going to take large parts of the hair you want To flip it this way, because now the hair is going this way, you don't want the blonde hair to bleed into the with that color. Okay, so the I'm going to take large pieces because we just want to add a few low lights into this one. So what I'm gon na do now is I'm gon na fold my coil up and make sure I don't have any color on my hand, okay, so I'm actually going to fold it one more time, so I make sure that that blonde hair stays out of that. I don't see any color, but listen. I rather be safe than sorry, so I'm just gon na kind of rub off you're gon na let this sit overnight. So I don't want to make sure. Take it. I'M gon na flip it over is a sea of frontal teeth, but I don't need all of this for my wings a lot. The thing is what I'm gon na do just like the other way. I want to make sure that this has dark roots, so I'm going to show you how I did so, I'm still working with color. So I'm gon na keep my gloves on I'm going to take a piece of aluminum foil and I'm gon na put the needle or the pin right at the area where I'm going to cut this off. So it doesn't matter if I put a hole in there. Okay next thing, you're gon na do is you're gon na take this portion hold this part down, because I want to see where this net is, and I see that it's right here, I'm gon na line it up with the aluminum for okay. So here's the big reveal for the blonde weeds. So so I'm just going to show you the variation, so I always stop at the dark. Okay go with the dark and by the fourth track up are going to work a blonde. This was the this is what the closer look, the color turned out: absolutely phenomenal, meaning it wasn't too too dark now. What I'm gon na do is now that I got this this brown tone here. What I'm gon na do is I'm gon na put almost a very dark brown right at the root, so I'm gon na show that's it after that. It'S just ready for cutting style, sausage. Okay, so I'm using the prom Mitchell, five and B, which is a light natural bronze using the thirty peroxide okay, so I've sectioned off the hair and as you see, I had to wet the wig down again because whenever you're doing color, it really is best for The hair to absorb all the color that you wet the hair down first, so I sectioned off just where the closure piece is - and I section it off in five sections. So this is one two three four and then five snap to break it up in so many sections, because I really really really want to be very extra neat, so I'm gon na start now with the color. This is the closure, and then this is the wig and I'm just going to darken the roots right where the wig ends and where the closure begins, so that you can have perfect, precise color around there. Now I'm going to go into the closure, I'm going to take small sections, because so this one is my final. So I'm going in really slowly and I'm going down about an inch using my last color that I dark get my roots with I'm. Using that almost as a guide to. Let me know how far to go up and how far to go down as well as what I need to recolor. So I'm going to just clip this part back here, because I really want to make sure that I color the front of that closure. Okay, now I'm at the very end getting it on the wheel as well as the closure. So there's the weed and here's the closure. Everything looks to be very, very nicely covered, so I'm covered all the way in the front. Yep everything is covered colored in the front, also in the wig area. It'S all covered, I'm just going to comb all this part up to go upward and then gon na twist it, but the other thing what I want to do is I want to put some aluminum pole. Okay, he's ready for the dryer nine. You got to make sure you put it in a nice on a nice mannequin here, so we can drive properly okay, so I got in this morning. I read: let it dry and I love it. Look at this closure. It'Ll. Add I darken it now. The only thing that I am gon na do because, if you see the back the back of this week, there is a little bit it's heavy in the blinds more so in the back than it is in them. So what I am going to do is I'm just going to take one of the darker pieces. That'S a chestnut brown track in there. Just the tone is down just a little you're gon na have heavy highlights it's always best to have the highlights in the front, because that's how the Sun shines. So the Sun shines this way. So it looks more uniform when it's it's a little heavy in the back other than that. I'M gon na fix that I'm gon na curl this you okay, now that I'm done curling all I'm gon na do now is cut off the Ballet's of it, and I never go just straight across and move my scissors like this, so it won't have a straight Cut okay, wait a minute what y'all play too much come on now. Stop this back to the video. It actually looks a lot yeah, so the makeup in the hair. We know it's there and we know it's makeup in just. Can we stop doing that for 2018? No more makeup in the head stay tuned. I got videos coming to show you how to blend your hair into your scalp and don't put no more makeup people. We know you don't think we know, but we know okay, so somebody's didn't want to tell you. They told me to tell you so I'm telling you love you. Thank you so much for tuning in and watching this video. I really hope that you enjoyed it. I hope you learned something. Listen, if you have any questions, make sure you leave them in the comment section. I promise I will answer and get back with you as soon as I can as well as please let stay connected me and you. Why don't you push the subscribe button as well as don't forget to push like, and I promise I'll keep you well-informed I'll, keep you on top of your game and I'll see you in the next video push the link, I'm sure, there's more for you to learn, See you in the next video, but I got ta say this wig is lit. I don't think they say that like that, but anyway I just gave my age away. But anyway, even though I look like I'm 21, I'm not. Nevertheless, this week is amazing and if you like it and want to learn more of us learn more about cutting and coloring and styling. Please you got ta press the subscribe button, so me and you can stay connected. I love teaching and if you love learning this is the place you want to hang out press the subscribe button, push the like button and I see you in the next video push. The link is right up there. I am hey Johnson, I'm your beauty, industry, expert and educators.


Comments
LongHairPrettyNails: I love how detailed this video is. The final result is gorgeous!
Letitia Skelton: I really enjoyed this tutorial!!! I would love to see you dye a wig using different shades of brown! I'm not a big fan of blonde, but it looks great on you
Dominic Reyez: Wooowww these Videos are EVERYTHING ❤❤❤ THANK YOU SOO MUUUCHH !!! YOU ARE THE BEST STYLIST IVE SEEN ON YOUTUBE!!
skippy One: OMG you are a magician a master of colour. I would buy that wig in a heartbeat. how can I get you to make one for me?? Seriously!!! I want one
L S: Great video!
Jacqueline McReynolds: thanks i learned something new
Rebecca Renée: Nice