Dye Your Wig Jet Black In 10 Minutes (Water Color) + Plucking, Install & Reinstall Ft Yolissa Hair
- Posted on 15 January, 2022
- Color Lace Wig
- By Anonymous
Dye Your Wig Jet Black In 10 Minutes (Water Color) + Plucking, Install & Reinstall Ft Yolissa Hair
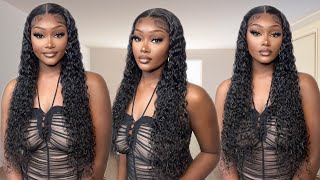
Hi guys! In this video i will finally share with you guys how to dye your wig jet black in 10 minutes using the water color method. I'll be taking you guys through the process step by step and tell you how to do it without dying your lace. I also did an updated plucking tutorial plus the install and reinstall. I did a cute 3 part look using Yolissa hair's 24 inch Water Wave Wig.
●▬▬▬▬▬▬▬▬▬♛Yolissa Hair♛▬▬▬▬▬▬▬▬●
Direct Hair Link:➤https://bit.ly/3qzEoyd
Hair Info:#yolissawaterwave 13*4 HD Lace Front Wig 24inches 180% density
❤ #yolissahair Official Website:➤https://bit.ly/3Fsw1Je
Best Discount? Join in Our FB Group:➤https://bit.ly/3momOuu
#yolissahdlacewigs Buy 1 Get 1 Free:➤https://bit.ly/3qTbxoL
Best #yolissa613wigs :➤https://bit.ly/32ixrYv
Follow Yolissa Hair On Social Media
Instagram: https://www.instagram.com/yolissa_hair...
Facebook: https://www.facebook.com/yolissa_hair/...
✔Wholesale Contact +86 15803834514
*
Connect With Me
SNAPCHAT - @beautyinfinity
TWITTER - @omoolewaa https://twitter.com/home
INSTAGRAM - @omoolewaa https://www.instagram.com/omoolewaa/
*
HI GUYS! My name is Oréoluwa, Oré for short and I’m a 22 years old college student from Houston, Texas. Originally born in Lagos, Nigeria. I hope you guys like my channel and support me. Make sure you’re subscribed, so that you can see more of me and turn on the bell so you can be notified whenever I upload. ;) I post videos every week. Hope you keep coming back to real ass bit*h lmaooo love you guysssss.
Business & Collaboration
I Film A Cannon 80D
Jet black frontal wig, wig install no bald cap, how to free part wig, waterwave hair, start to finish wig install, start to finish install, wig install for beginners, wig install, how to dye hair jet black using water color method, dark skin makeup tutorial, ore o, ore otun, black girl, black girl makeup, frontal wig install on dark skin, how to install a frontal
Hi guys so remember this tutorial, where i dyed my wig jet black, using the watercolor method, and i said, as you can see, everything is very much jet black, except for the frontal, because i did not want to take that risk. Maybe another time i'll experiment and actually dip the lace in there too, but today is just not that day, not today, not this install not today. Well today's the day. We'Re doing that again, except this time, i'm actually gon na dip the lace in the water and i'm gon na show you how to do it properly without dyeing your lace, along with a plucking, tutorial, styling and, of course, the install the hair i'm going to be Working with today is from yolissa hair. The package came with the hair, of course, a little scarf, an edge brush lashes, a hair wrap with their logo on it, a wig cap, an elastic band, a silk bag for wig storage and their company card. This is their water wave, 13x4 hd lace, frontal wig in 24, inches and 180 percent density. The lace looks great on this wig and the hair is actually pretty long for 24 inches. The hair is really soft and very full, and it just looks really really nice right out of the pack, i'm using my same holy grail jet black die from cream of nature and you're going to need three boxes of dye to dye your wig, i'm in the Bathroom now and i'm mixing the dye, which is very easy. You just pour the color into the developer, so here's the hot water and we're going to set a timer for 10 minutes, because that's how long we're going to leave the hair in the dye water. So i stupidly forgot to record the most important part, but it's okay, because i can just tell you guys how to do it. So now, i'm just going to be taking my got to be glued free spray and spraying my lace. What we're doing is building a protective layer using the freeze space i like to spray at least three layers to make sure that you know. If there's a nice amount of build up on the lace closure. However, you can definitely spray more. So what i'm doing is just going in and spraying and then letting it dry in between, so that i get that nice hard layer on top and then mix it very very well and let the dye dissolve all the way into the hot water. So now we're dipping the hair in the die, and i like to take my time when i do this: go really really slow and start dipping from bottom to top. I also like to brush the hair as i dip so that the dye can really penetrate the hair for the first five minutes. Don'T dip the lace in just yet just continue to dip and brush the hair and try to avoid dipping the lace. But it's honestly. Okay, if you dip the lace, i'm just saying not to for extra precautions, especially for a beginner, so once the timer hits the five minute mark now, you're going to dip the lace into the water again make sure to dip gradually. Once all the hair is in the water we're going to leave it in there for the rest of the five minutes once the 10 minutes are up, i'm just going to take the hair out of the water wash it and all of that stuff, and i'm also Going to bleach the knots - and i suggest bleaching the knots after dyeing it because if you bleach it before and then dip it in the water, the knots are going to be black again. So just do it. After so moving on to plucking starting off we're going to tighten the elastic band in the wig, so that it fits perfectly on the dome head next fold, the frontal in half and mark the middle just so we know where the middle is so here's my dome Head it's a 22 inch and i'm putting a white paper towel on it, because it will help us to see the knots and the hairline more clearly. Now i'm placing the wig on the dome head on top of the paper towel and the very first thing i always do when i pluck a wig is press the frontal back with my hot comb. This is probably the best hack for plucking hair that i can share with you if you're a beginner. This is a great hack because it'll help you stay organized and be able to see the hairline better. I'M parting out those first few rows of tiny baby hairs, because those are already pretty small and separated and, as you can see from the hairline, it doesn't start to get thick until about the seventh row. We don't want to pluck those baby hairs, at least not yet so we're going to concentrate on the seventh row and back to thin out those parts where it gets kind of thick. The first round of plucking is basically to thin out the hairline really fast, and i always do the sides first and go back and forth when plucking to make sure both sides are even or as close to even as they can get just move around. So you don't thin out any areas too much if you plug three times in one spot, plug three times in the next spot, so just try to like be consistent with it and you shouldn't have any problems. So now, moving on to the middle section and again, i'm parting out those baby hairs in the front and for the middle section. I don't like to pluck it too much, because i don't do baby hairs in the middle and the middle section of your hair is already naturally the thickest so to mimic a natural hair line. That'S what i like to do again, like i said, make sure to move around where you're plucking and another thing you want to do - is pay attention to the depth of your plucking, i'm not going to plug super deep into the frontal because, like i said, i Want this front middle part to be a little thicker, you want it to have a natural gradient effect. So when you pluck pay attention to that you, the middle, is done now moving forward to the sides same thing, except i do pluck the sides just a little more, especially the price that's going to lay on my temples. I plucked that part the most, because your temples are usually naturally more thin, and that's also where i place my baby hairs, which you guys obviously know that baby hairs are usually thinner. I really didn't pluck this wig much because i wanted it to be a free part style and i wanted it to look really natural. So here's the finished look, let's move on to the install starting off with some cotton rounds and rubbing alcohol i'm going to clean the perimeters of my head. It'S raining outside! I really hope you guys don't hear that, but i'm going to clean the perimeters of my head just to get any oils or dead skin off, so that i have a clean canvas to lay the wig and lay my glue showing out the hairline again, because it Looks so good a purr, so i'm putting the wig on now just to make sure everything looks good and i was obviously feeling myself so this isn't my actual technique. I prefer cutting my lace before installing, but for the sake of making this beginner friendly we're going to cut the frontal into three sections to make things easier so for glue, i'm using ghost bond and this glue application was so messy. I'M actually embarrassed. I should have put on a ball cap too, but i think because i thought oh, i'm bald like i didn't really care about my hair at the moment, because i knew i was gon na be shaving it again. So please just don't pay attention to me. I was also in a rush when i was doing this so just yeah. I did three layers of glue and i also marked my head as you can see. I have those lines on my head because i was so scared of making the install lopsided here's when the sections come in handy. You place the middle tab on first and then you do either sides. So once the lace is placed on properly, i'm going to melt it into my skin, using a plastic rat tail comb to melt the lace even more, i'm going to lay it down with my silk scarf for at least 10 minutes, then i'm going to cut the Lace - and i think we all know this by now, but when you cut the lace you want to do a jagged cut instead of cutting a straight line. This will help your lace blend better. If you want a detailed video on how to properly cut your lace check this out, look at that it was perfectly cut on both sides, so the pieces that i cut out literally match perfectly before i lay the baby hairs, i'm going to glue down all the Little pieces that didn't get glued down moving on to baby hairs, i did sideburns and temple baby hairs when sectioning out the baby hairs. Do it in a triangle shape after pulling out the baby hairs, i'm going to cut them and curl them using my flat iron. So, to lay the baby hairs, i use eco styler gel and to keep the baby hairs in place and melt the lace a little more, i'm going to spray the fantasia mega hold spritz and then wrap it again with my silk scarf. So i forgot to show the finished look on camera that day, because i was going to a party this day and pretty much did this all in a rush. But i did take pictures at the party. So there's that and of course i always install my wigs more than once so here's me reinstalling the wig. I don't want to go, i'm a i'm a mad cause. You had a chance, i'm a i'm a! I don't call it. So that's it for this video guys. I really hope you guys enjoyed it if you did make sure to give me a thumbs up, leave a nice comment and subscribe. Thank you guys so much for watching and thank you to yolissa hair for sponsoring this video i'll, see you guys in my next one bye, bye,


Comments
Tiffany Stellar: The Editing goes crazy
Yolissa Hair: The curls look really great on you!! Love your video~
Porshanna Brewer: Hey girl install is bomb per usual but is there a reason that you use that spritz instead of the freeze spray or any other hair spray?
Anjola O: Hey do you have a link for the tripod and block head? I’ve been looking everywhere for one
Grace Rebekah: Loved this
E. Lang: Do you have to wait for your hair to dry before you bleach your knots?
Aussiejake: When do you bleach knots before or after dyeing?
khalilahah: do you tint your lace ? & if so, with what?
Dwayne6864894e: A girl can't be anymore beautiful
Ayomide J: What lace??? another great tutorial
SYSY DIOR: Hello please can you tell me the name of the artist for the 2 music in this video and if possible the title thanks ♥️
Chika Onyia: Ayyyyy let’s get it!
QueenKoneTalks: Oh okaayyy somebody said scallpppp
She’sTheMVP: She’s so pretty for no reason
Sammy Da Goat: Third Comment Let's Get It