How I Colored & Created My Kinky Straight Wig Feat. Hergivenhair
- Posted on 10 January, 2017
- Color Lace Wig
- By Anonymous
http://www.hergivenhair.com/kinky-blow...
Kinky Blow out Weaves || 18" 18" 20" Bundles
http://www.hergivenhair.com/kinky-blow...
Kinky Blow out Closure II 18"
Hergivenhair natural hair extensions
http://www.hergivenhair.com/?y=Tomecia...
HerGivenHair Contact Info:
Blog:http://www.hergivenhair.com/blog/
Instagram::http://instagram.com/hergivenhair
Facebook:https://www.facebook.com/hergivenhair
YouTube: https://www.youtube.com/c/Hergivenhair...
Mannequin Head: http://go.magik.ly/ml/39uh/
Spandex Dome Cap: http://go.magik.ly/ml/39uo/
T-Pins: http://go.magik.ly/ml/39ur/
Revlon Colorsilk "Light Caramel Brown" - http://go.magik.ly/ml/39uv/
-------------------
NEED A WIG MADE?
Send your request to [email protected]
http://hairdelacreme.mayvenn.com/
-------------------
Products I Currently Use:
Scalp Massaging Shampoo Brush by Vanity Planet: http://vpwow.com/hairdelacreme
Use discount code ‘hairdelacreme’ to get 50% off. Originally $40 now $20 with code.
STAY CONNECTED WITH ME:
Tumblr: http://hairdelacreme.tumblr.com/
Instagram: @hairdelacreme
Snapchat: @hairdelacreme
Twitter: @hairdelacreme
For business and sponsorship opportunities please contact
my BUSINESS EMAIL - [email protected]
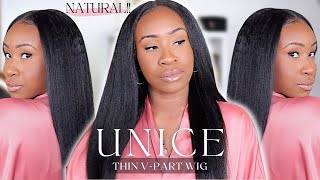
Hey guys, it's me Tommy and I'm back again with another tutorial I'll, be showing you guys how I colored and created this beautiful kinky straight Union for unit from her given hair. So let's get right into it. So her given here gave me three bundles and a closure of their kinky straight hair. The hair came in this beautiful black sturdy box, as well as a brochure that has step-by-step information like everything you need to know about your hair in this. In this booklet - and I love it - they show you what to do as soon as you get out the box washing instructions how to take care of the hair before installing it. And then, when you turn to the back of it, it's gon na show you what to do after you install it how to maintain it, how to wash your extensions, how to prevent, shedding how to color it? What to do about coloring it! What products are really good with whatever here you port from them like this Brooke? It'S this booklet has everything you need to do so I will send over an 18-inch closure. This closure is so beautiful guys. I love it. It'S so thick and full. It gives me that nice, beautiful natural texture to it - and I love always having a border on my closures as far as my bundles are concerned, they're very intact, there's no beards on the wefts like the hair. It'S super super soft and nice and thick all the way down to the end. So I was sent over three bundles. The interests are one in one bundle of 20 inches and I also got two bundles of 18 inches, as well as an 18 inch. 18 inch closure I'll, put all the product information below I'm gon na color the hair, this nice beautiful light caramel Brown from Revlon color soap. I use three boxes of this. So when I come in my hair, I like to put it in a plastic bag. So I will place my bundles one by one, putting a bundle in it: coloring it bundling it coloring it and then massaging the color into it. So this is a different angle of how my bundles look in a plastic bag. I know that when I'm coloring the entire bundle, I don't need to just lay it out, I'd like to keep it intact. So it's nice and easy for me to color and then once I'm done with that bottle I'll just fill it up with water, shake it up and pour it on to the rest of the hair in the bag. This was the old old trick that fibre glas.t is needed like a way long time ago that I always loved doing so. I just color it and process the hair in a plastic bag, massage just the color into it, and then just let it sit and process for 30 minutes now when it comes to the closure kind of do something a little similar. But this time I'm gon na tack it on to my dome head that I have so I'm gon na tuck the closure on to it. So it's nice and secure when I am coloring it and I'm just gon na go a line-by-line doing section by section coloring. The hair, so I'm just going to the first section gon na, add the color to it next section add the color to it. I found it a little bit easier for me to just miss a little bit of water with the hair, because it makes the color just spread a little bit better when you're dealing with this thick thick texture and then I'm just going ahead to perceive color in The hair um, I didn't color it all the way to the lace of the closure. I left a little bit of brown, so it's kind of like a ombre, that's sort of kind of like a ombre, but at least the roots are dark and then it gets eventually gets the liner towards the head. So after applying of the public to the hair again for the three bundles and the closure, I use three boxes of color the last box. I didn't use the whole thing, so I had a little bit of color left over, so I'm just trying to use all the color. I can't on the closure so after saturating the closure of a color, I'm going to take the plastic bag and I'm gon na flip it so that the closure is inside the bag and then I'm just gon na tack it up and let it process for 30 Minutes as well - hopefully I'm not going through these steps really really fast. I mean this is a long process and I'm trying to density you guys in a nice four patch. So after letting the hair sit for 30 minutes and letting it air dry now it's time for me to make my unit, I will have all the information on my mannequin head, as well as the spandex dome cap that I'm using the T pins all the information. I will have below so I'm going to tack my closures, hacking, it at the front first and then the back and that I'm gon na move my weight to the sides. I like to make sure that my closure is nice and flat whatever I am creating my units so that it fits as well as possible. So I start with the back and then I work my way to the front. I'M gon na take the rest of my hair. I'M gon na make it into a nice little bun and I'm gon na clamp it and then I'm going to begin sewing my closure. So here's a nice close-up shot of how I sew my closures down. I'M going to hold the extra lace and I'm going to begin sewing my closure down, holding my extra lace down. Let'S the lace just continue to lay flat, as I'm sewing alongside the closure. Now one tip - I definitely would tell you guys - is not to sew through the elastic band. That'S around the spandex dome cap, but through the fabric and I'll show you guys exactly what I'm talking about and my next shot. I'M gon na do a close-up. You guys can see so I'm making sure that I'd go through the fabric, so make sure those needle is all the way on the top through the fabric and not through the elastic band. If you sew through the elastic band, it's gon na be hard for the last advance of stretch. So that's why I sold the needle through the fabric, I'm gon na twist it right around and then I'm gon na pull the new two through to create my knot. So I'm gon na continue doing this sewing method all the way around the closure until it's completely done so I start with the sides work my way to the middle, so one side I do, then I take another needle. I do the other side and then I work my way all the way to the middle, and this is the final look on how your closure should look once you're done. If you want a more detailed video, I definitely will like how I make my wigs in detail very, very detailed video on the top. You guys check that out that methods a little bit different from what I'm doing here. The next step, I'm gon na, take my 20-inch and I'm going to put it around the perimeter of my unit. The reason why I'm doing this is because it gives me a better illusion or what the way blows. You won't see my my wife's, so I'm slowing it down. First all the way around the perimeter and then I'm gon na proceed to so my the rest of my bundles going horizontally. So I'm showing you guys how they look stacked around the side and I'm gon na begin to sew horizontally across my dump cap. Now I don't cut my whoops at all. I always like to do the bolt method so to do the fold method which you'll do is you'll. Take the thread and you'll put it outside of your weft you're gon na. Take your the end of your weft and you're gon na fold. It. I keep my thumb place down, then I take my peep in and I push it in there so that that fold stays there and then I'm going to pin the rest of the weft. Alongside my dome cap, I'm also going to show you guys the distance that I use when I'm sewing it so about that much space. I use to tack it across. So I'm gon na proceed to put my tee pins into my my mannequin head, just so that it lays nice and flat and showing you the distance between it and then I'm you're going to continue to sew across now when you're working with the edges. When you're doing the fold you want it to lay as flat as possible, so I'm just gon na keep creating nice tight knot holding the fold down. So it's nice and flat. You can tack it down as much as you want to so that it lays really flat, and then once I get it the flatness that I want that I'm gon na proceed to continue to sew across the hair. So that's the method that I'm gon na be doing with all two-and-a-half bundles that I didn't use all of the three bundles just going right across back and forth, folding it back and forth folding it I'm just going to show you guys. This is the end of my second bundle and that's how much space I have left, as you can see like this unit, like you, don't need three, four bundles. You can use two and a half and it should be perfectly prime. You can see the thickness of the unit and it's only two bundles 1.8 inch or 1 18 inch air, so I'm gon na sleeve in the last bit of my other 18 inch into it, and then I am done. I sew all the way to the top. Once my unit is done, then I'm gon na cut the lace off the closure. I like to find the sharpest scissors I have so I used the scissors that I like cut like my eyebrows here, it's good because I feel like it's really sharp and precise. So I cut the lace off the front of the closure and then I'm going to remove my unit from my dome cap and I'm gon na cut the fabric. That'S underneath the closure as well, and that's how you look so that's, basically how I create my units, guys I stay tuned for my installation and my styling I'll show you guys in another video. The reason why I haven't part of up is because I've learned you guys can see in detail how I create my units so be on the lookout for that video. I'M gon na show you guys how much hair I have left with my third bundle. Just a lot of hair that I have left with my third bundle. So again, guys don't forget to subscribe, make sure you click that Bell to notify you when of new videos up and I'll see you guys in the next video bye, guys.


Comments
Aeija Blu: I love how nice and neat your stitching is, it drives me insane to see stitching that's not so neat. It takes me a little longer when I make my units because I love for my stitching to be neat and uniformed even tho no one will see the thread.
Rena Labeaud: Do you sew the whole wig down to your head or do you use clips? Im scared for my wigs to be rubbing my edges and possibly cause breakage.