How To Bleach Your Curly Wig Without Damaging Your Curls | Ft Curls Curls
- Posted on 20 October, 2021
- Color Lace Wig
- By Anonymous
--------------CurlsCurls Hair Info-------------------
Link to the wig: https://www.curlscurls.com/crystal-p-1...
Wig: Crystal
Curl Pattern: Kinky Curly(3c/4a)
Length: 16"
Cap: Medium
✅Protective style for the edges.
✅Most affordable human hair wig
✅Natural and popping style
$5 off coupon code "Thandi"
More CurlsCurls Affordable Wig Options:
https://www.curlscurls.com/machine-mad...
CurlsCurls Official Contacts:
https://www.curlscurls.com/?yc=Thandi5...
https://www.instagram.com/curlscurlsof...
Bleach and developer:
https://instagram.com/teenotch_wigtool...
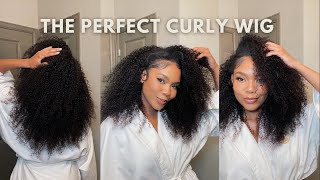
Hello, beautiful people welcome back to my channel. If this is your first time my name is tandy gala. I do hope you like it here and stay and hit that subscribe button somewhere down below and if you are a returning subscriber welcome back tg gang okay, guys. So in today's video i'm going to be showing you how i got my naturally like curly hair, this color, so i bleached my hair, but the most important thing is that i used a technique to ensure that i don't mess up the curls. So when i started out um over here, i noticed that this technique was going to damage my hair because it is curled anyway and obviously we want them to last. So you will see throughout the video that i changed the technique and i'm showing you everything you need to know and all the products you will need to get your hair from black to this color for the summer. I absolutely love this hair and i hope you enjoy the video okay. So, to start, i'm going to be using this 30 volume developer some bleach powder and this petri dish and the brush, i necessarily didn't - need the brush. I used three scoops of this powder. In total - and it does come with the scoop in the actual package now this is the technique that i was talking about when i started using the brush, i noticed it as applying too much bleach onto my hair, so i started with the top, because i wanted To get some great highlights at the top, if you work with bleach, you do know that the place, the areas that you start with are going to be the most brightest because they start it literally starts working as soon as you apply it. So i wanted the top part of my hair to sort of like be lighter, because i mean, if this is summer hair, it really will stand out in the sun if you're wearing this on the sun. You can really see this, i'm here developing over there. So later on, um, i noticed when the hair was developing, that okay, this might be too much. Let me try a different technique with my actual hands. You will see it slowly like surely just any minute now like, if you can see like the brush, is just applying too much product. So i noticed that i was applying too much product and i started using my hands because when you spread out the bleach with your hands like this there's less bleach on the hair itself and it prevents stripping the hair, i didn't have any like hair loss at The back there, but i just had like a strand or two in the one place that i told you guys that i felt was like too much you can see. The curl pattern is starting to look a bit different at the top than the bottom. My hair, that's because there's too much bleach concentrated in that one spot. So if you like bleaching, curly hair, you really have to pay attention with how much product is on the actual hair, because this can damage the actual hair in the long run. And if you are planning to wear this for a very long time, you want to ensure that the hair is not damaged and it's easy to still moisturize and get it looking brand new, so yeah. This is the technique that i followed and obviously you guys will leave it out um so because the hair started developing, as i was already applying, i probably left the bleach on for an additional 10 to 15 minutes to sit on its own. Before i decided to wash it out so because i don't want it to be too bright, i still wanted to have like loose natural sort of like color. I didn't want it to be too much. I wanted to be a little more natural, so i only left it if you want it to be brighter. If you want your blonde to be much brighter, i would definitely say: leave it for up to 20 minutes an additional 20 minutes, but not longer than that, because then the bleach does get very hot and starts breaking and damaging your hair. So if you don't want to damage your hair, do not leave this for more than 30 minutes, especially if this is your curly, hair and you're still trying to maintain that curly pattern you'd rather like moisturize. This and bleach it again some other time if you're still trying to go, lighter, don't try and go in like very light at one goal. So that's the best way to maintain your curls, so i then went under the sink and rinsed out all that bleach um. So you just want to make sure you keep turning your wig around just to make sure you get the all the bleach out and then i went in with a clarifying shampoo um. The clarifying shampoo that i used is from dis kim and the brand is called arrogant secret. Okay, so this just makes sure that your hair is fully clean. I mean like bleach, tends to like sort of like stick around somewhere, especially the fact that this is curly hair. So you know just getting like the water in between all the hair strands, usually won't just work. You need a good shampoo that'll, make sure your hair is extremely clean and i absolutely love this um for when i bleach my hair or when my hair is extremely dirty. So you want to rinse that out and then after rinsing it out. This is a step that i didn't show because the floor was like everything was just too wet and i just put my wig outside, but i did apply this curl main defining cream that got my curls to look like this. So this is what my curls look like um i was talking here, but my mic was also. I then decided to do a voiceover. So sorry for that, so you can see how defined these curls are. So the one thing that you want to do when you take it off um the drying spot, is that you want to just shake your wig. You know like shake it off like i wouldn't shake it on my head, because that will give you a headache, but you just want to shake it around and um finger comb it if i can say so yeah. This is what it looks like and then, after that i am just going to show you how many clips it has so it has a securing comb at the back of the wig. It has two in the front on the sides just to hold your wig down, and it is an extra belt that, like two extra belts that you sort of like clip behind your head, so one thing i can say is that when you place this wig on Your head, it is very secure um, so that at this point i was just showing you guys the pattern on how they sewed the wig down, since it is a fringe um. So that's what it looks like guys. I love this color. I love how it came out, and i love how different that is. So one thing about the fringe is that it also is quite long, so i think they left it like that, because i mean we are all very different and we prefer, like our fringe. Looking very very different, so i am going to take a pair of scissors and trim this by myself. So, firstly, you just want to make sure you get all the hair in the right place, so you know where you're cutting um. If you can see the direction i'm cutting in i'm sort of like trimming it slowly, and this is just a technique. I'Ve learned from like hairstylist, you know i'm not a professional hairstylist, i'm not a trained head hairdresser or anything like that. So you know, don't judge me if i'm doing it wrong, i'm sorry, so i feel like that looks good. Then you just want to sort of like finger comb, your hair and give it a little bit of body and direction, and that's it okay guys. So this is what it looks when it's done. I absolutely absolutely love the color. Sorry, there were parts where my mic was off when i was cutting the hair. I hope you could hear everything i was saying, but if you couldn't obviously do a voice over so i love the color, i feel like the color is a great for summer. I mean like look at that blonde over there um. This is where i highlighted a bit more just to give the hair a little bit of definition. I feel like i might do the same on other side just so that there's sort of like a balance with the hair, but this column is a great color for summer absolutely love. It would recommend to anyone. You guys should definitely use the same products that i used. Obviously they are linked in the description box down below for you to purchase from the lady that i purchased from and wow guys i'm impressed and i feel like this is now my easiest get up and go wig, because i literally just throw this on. I don't have to make sure a parting is done. I just have to make sure my curls look: okay, spray it with a bit of water, curl, enhancing cream and i'm good to go. So if you absolutely love this hair, everything you need to know will be linked down below for you guys to purchase your new wig


Comments
Christine Gama: This hair looks soo good on you
Vumile Motsa: The hair and the colour looks great on you
Precious_j: It looks amazing Thandi. YOU look even more AMAZING❤
Sarah LaBella SA: Love the hair ❤️❤️❤️, stunning!
Linda Jeanette Usikpo: Lovely, looks fabulous for summer yes
Thobile Mankanku: That colour♥️ Gorgeous.
Thulisile Gumede: I love the colour❤️
For Girls Like Us: Oh wow! Needed this!
The Exclusive Kueen: Loooooove it.. Thank you for sharing TG.. Where can I get that bleach powder?
bulelwa ntondini: Will be dying my curly wig thank you T
Nkgutliseng Legodi: Hi Thandi How are you? Beautiful colour thanks for sharing
Thembi Nxitywa: ❤️
Lutricia Ramalepe: Love the hair... How much is it?
Shadi Segale: That colour is beautiful. ❤️ #hotgirlsummer
Sipendulwe Mfenyana:
Nomvula Mimi Kompela: SiyabongauMuhle kakhulu looks good on you the hair and color
Pum Pum: Am looking for good synthetic hair afro wigs
Vuyisile Modise: Hello beautiful