Burgundy Fall Color | How To Dye + Customize + Style Wig Full Lace Wig
- Posted on 18 October, 2021
- Color Lace Wig
- By Anonymous
PRODUCTS USED:
L’oréal HiColor 2 MEGENTA
L’oréal HiColor 4 RED
Bw2 Powder
30 cream developer
#roadto1k ❤️❤️❤️
Don’t forget to like and subscribe if you are new here!
If you are returning make sure to turn on that So you are notified every time that I post!
K E E P U P W I T H M E
IG: https://instagram.com/teeonjra?igshid=... @teeonjra
HAIR PAGE♀️: https://instagram.com/oreoniastyles?ut... (oreoniastyles)
Email:[email protected] (For Business Inquires Only!!)
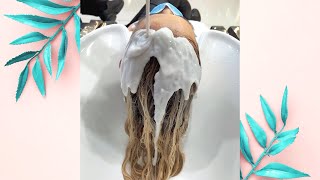
Hey guys welcome to welcome back to my channel it's tanjoriana and i'm back with another video in today's video. I will be showing you how i customize my units, meaning bleach, pluck and style, but first things. First, i did alter the color of this wig. I dyed it myself and i didn't get that many. Actually, i didn't really get clips at all of me dying. I thought i was recording, but i really wasn't um. If you want like a full, in-depth detail of like how i apply the l'oreal high colors, then i have a video that i recently posted on that so yeah y'all can go check that out, but i will give you the details on the hair color so like I said it's the l'oreal high colors and i use four boxes of red and two boxes of magenta and i use the 40 developer by clairol. So i feel like that's what altered the color to make it like a dark kind of red instead of a bright burgundy, so yeah. So i like to use 30 developer instead of 40 developer, because it's less harsh, remember anytime, that you're bleaching, the knots you are weakening them. So just keep in mind. You know with that, if you're using 40 developer, so i'm bleaching a full lace unit. So i use about two scoops of that bw2 powder and for the 30 developer. I really don't have measurements on that. I just add a little bit and then, if i need more, you add a little more because if you add a lot of developer, it will make it very liquidy. And you do not want that because it will seep through the lace and you'll have to keep adding more powder and that's just a waste of product, especially if you're just dyeing a frontal. But, like i said, i use two because i'm dying a full lace and if you could flip it over like that, that's how you know it's ready. I like to do like a toothpaste, kind of consistency and it's good because, like i said it can't be liquidy or it'll seep through the lace. So i like to start at the back of the wig, because um the knots in the bag tend to take longer to bleach instead of the front. The front ones are always thinner. So i like to start from the back and work my way up. I slowed down the video clip just to show you that i am being gentle about it, because if you are too heavy-handed and rough like i said again, it can seep through the lace and then cause um like the knots to over process, and then your roots Will get all blonde it's just extra stuff that you don't need room all right so, like i said i am bleaching a full lace wig, so i already started the bleaching process for the frontal portion. As you can see, it is laying on top of aluminum foil, and i already have the timer going for that. I like to let my knot sit for about 25-30 minutes, but you should always just watch out for them like it's kind of really no set time, because every wig is different, not too different on every wig. So you really just got ta keep an eye out for it, but i do not like to let the bleach sit on there for more than 30 minutes. If you have to bleach it one more time, then you do, but do not let it sit on there for more than 30 minutes. I'M gon na incubate it with some more foil and i'm gon na flip it over, because i was scared that the bleach might leak onto the portion of the hair because, like i said this hair is already pre-dyed. So that's why i flipped it over like that and i just let it sit on for the rest of the 25 to 30 minutes and after that, as you can see, the knots are bleach, they're, invisible. They look good and i'm gon na wash that out. So, as i wash out the you know bleach, i usually like to use purple shampoo for the knots to take out the brassiness, but since i pre-colored the wig, i don't know how that would have turned out like i don't know if it would have messed up. The purple shampoo might have messed up the color, so i just washed it out, and i used the silicone mix y'all. If y'all don't have silicone mix, get that you need that a step. It is so good for bleached or like any kind of dyed hair or even if your hair isn't dyed. It is so good for your wigs, like i love using this as a conditioner, deep conditioner, it's so good. It brings it back to life and, as you can see, those knots are invisible. It looks like scalp right on my hand, and it just looks good alright. So now for the plucking proportion, i like to make sure that my frontals are dry. I do not like to plug my pretzels when they're wet. I just feel like you - can give yourself a bald spot by accident, but you know two inches on is, however, you do it i'm using the angled tweezers. I got them from the hair store and the angled ones so yeah i like to press it out with my hot comb and then after i do that i pull out the baby hair section like those are the pre-cut baby hairs that the company gives you, and I just like to pluck behind that, and the motion that i do is like plug plug skip plug plug, skip, try not to stay in one spot for too long, because you will give yourself a bald spot and yeah. That'S that's really what i do. It'S just a plug plug skip motion. Um wig came pre-plugged, so i really didn't have to plug that much off. This is the last time that i am going to plug. I took some more hair after taking out those baby hair like that little section that i did and after that i'm done. Um always be mindful of that. You know, depending on the company some some companies they have their frontals being like pre-plugged and then other companies say that they pre-plugged the wig, but it's mad boxy and like dense and doesn't look plucked at all. So yeah just keep in mind of that and after i finish that i use my wax stick and i'm about to style this wig and i was thinking about doing like a deep side, part like a cut like a c part and yeah. As you can see, it's really deep. You can do that with a full lace, because this lace all over is no tracks, so that is what i'm doing right now do all right. So, unfortunately, i did curl the hair off camera. Sorry about that y'all. I think it was that important, but you know if y'all do want a chronic toy. I will do one and yeah i'm just getting everything unified and like cursed and everything. The hairline looks very good. That parting looks amazing and it just looks good. So after i do that before i actually comb out the curls, i'm gon na use the sebastian hairspray. This hairspray is so good because it gets the curls to stay in, but it doesn't make it crunchy like. If you use some gossipy spray, it probably would make the hair crunchy, not probably it would make the hair crunchy and yeah the curls are just soft. The hair is soft and it just looks good and i don't know why, but on camera it looks really dark. Like on my camera, it looks dark, but it actually is like a little lighter than what it appears to be. I think it's one of those colors that really pops in the sunlight or, if you're, under certain light, so the next clips that you'll see you will be able to see how the color really looks and yeah. It looks really good. It'S cute. I love the color. The color definitely gives me like a fall kind of feel i love it. This is super cute. I love the way that it came out. I hope that y'all enjoyed the video and that y'all learned something don't forget to like and subscribe. If you are new here, if you're returning don't forget to like follow me on all my socials and i will see y'all in the next video bye guys, oh um, you


Comments
Cherish Love Beauty: omg you are so good at this you took your time and it came out bomb
Wynekia Holston: Hello your wig came out nice. You did a good job. Where did you purchase your wig and what inch is it?