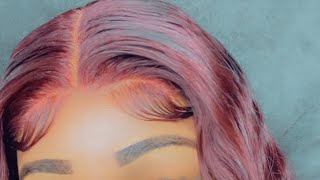
99J Burgundy Pre-Colored | 24 Inch Kinky Curly Frontal Wig | Start To Finish Install | Ft. Kemy Hair
- Posted on 10 March, 2022
- Color Lace Wig
- By Anonymous
Hey sweeties, welcome to or back to my channel. I will be doing a star to finish install on this 13x4 kinky curly 24 inch frontal wig. I will being showing you everything I used and I how I got this flawless install. I hope you enjoy the video. Feel free to ask me any questions you may have below. Don't forget to subscribe, like, and hit the bell.
●▬▬▬▬▬▬▬▬▬▬▬▬▬▬▬♛Kemy Hair♛▬▬▬▬▬▬▬▬▬▬▬▬▬▬▬▬●
Kemy Hair Website: https://bit.ly/30B6BpQ
Hair in the video: https://bit.ly/3Hrzb0l
13x4 Lace Front Wigs:https://bit.ly/3HBPmtm
4x4 Lace Closure Wigs:https://bit.ly/3y78FWn
Human Hair Wigs With Bang:https://bit.ly/3kZEsoj
Human Hair Headband Wigs:https://bit.ly/3iPnR3J
▬▬▬▬▬ 3.8 Queen's Day ▬▬▬▬
Over $199 Save 15% Off Code: VIP15
Over $99 Save 10% Off Code:VIP10
Secret code for new customers all the time
Add these code when you check out to save $.
♥ Youtube - Kemy Hair - https://bit.ly/2CNXlGN
♥ Instagram - @kemyhair https://bit.ly/3ha7nUo
♥ Facebook - Kemy Hair Fashion - https://bit.ly/3dy9y20
➜To be a Kemy Hair girl - Snap a quick pic and post photo in Kemy Hair on your Instagram with #kemyhair
●▬▬▬▬▬▬▬▬▬▬▬▬▬▬▬♛Kemy Hair♛▬▬▬▬▬▬▬▬▬▬▬▬▬▬▬▬●
Instagram: @kemyhair
Youtube: kemyhair
Facebook page: kemy hair fashion
Kemy hair website: https://www.kemyhair.com/
Instagram: https://www.instagram.com/sincerely_su...
#kemyhair #kinkycurly #frontalwig #humanhair #24inchfrontalwig #24inchhair #24inchwig #99jlacewig #burgundylacewig #redlacewig #starttofinishinstall #frontalwiginstall #howtoinstalllacewigs #wighowto #howtobleachknots #baldcapmethod #quickwiginstall #bighair #affordablelacewigs #precoloredlacewig #howtoplucklacewig #curlylacewig #waterculrs #affordablecurlyhair #howtoflatironedges #99j #99jhaircolor #maroonhair #meltlace #howtomeltlacefront #musthavehair
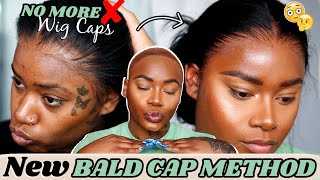
Trouble blues welcome sweeties in this video we're going to be doing kimmy hair they sent over a nice wig for us to try inside you, get wig caps lashes, an edge brush, slash comb and we're going to be using the bw2 by clairol, i'm also using their 40 developer, i always wash out the bleach with a neutralizing shampoo and i just get this from the beauty supply. So for my clarifying shampoo, i just use this kind. I get from walmart it's about four or five dollars and it works great and you will need an applicator to apply the bleach so on to the wig. This is a 13x4 kinky curly 24 inch wig. It is super soft by the way, like straight out of the pack. It'S really pretty and it's really thick. So here's what the frontal looks like and you get your normal weight - construction, two combs in the top one in the back and the adjustable straps. So this is the frontal and how the knots are very small, very pleasant. I really like it so on to the bleaching part. What i usually do is take two full cups, meaning the powder is not even with the top of the cup. It'S kind of mounded up. I take two cups like that. I take one cup of developer and i start mixing that into the powder. Now that's going to be a little bit! Chalky! It'S not going to be all the powder is not even going to be in the developer. Okay, you're going to then pour like half a cup and you're going to ease that in until you get a good, thick pasty, consistency like toothpaste, okay, then you start to apply. You see! That'S chalky after the one cup you're going to either put in that whole half cup or you're, going to start just pouring in a little bit until it gets to the right consistency - and i left this on for 15 minutes. So when you're applying the bleach press it in, but don't press it in, so that it's like seeping through and it's like a good portion on the hair. It needs to be just on the bottom of the lace, with a little bit of pressure. Okay - and i didn't really care about getting inside of the cap because it couldn't hurt anything so i'm going to just show you really quickly my process of plucking, you see, i just pulled down a very thin bit like baby hair is almost right and then i'm Just going to plug back straight into the hairline straight into the hairline and then you're going to see me part off a slither more of hair and i'm going to do the same thing just pluck into that hairline we're trying to get a good gradient effect. Okay, now after i part it off, maybe three or four times you're, going to notice that i turn those tweezers sideways because now we're not as close to the front and it's getting a little bit thicker and i need to take out a little bit more hair Than i was when i was pulling straight back okay, so, as you can see once i part off the third and fourth time, i'm gon na turn them sideways, and that's just gon na help me get the same gradient effect, but a little bit quicker, because now The hair is getting thick as we're going back deeper into that frontal, and i just keep doing that and then you'll see me comb it back and then i basically start all over kind of pulling back into that hairline you're, going to just kind of keep repeating Those steps until you get a good effect, one of the major keys of plucking, is to keep moving, do not stay in one spot too long. That'S why you see i'm plucking just keep moving down line, keep moving online going back and forth because you do not want a bald spot that will blow everything, and another thing is, as you can see, i've been doing it for a while at this point - and I was tired of doing it. That'S how you kind of know that you're doing right when you don't see bald spots but you're getting a gradient effect and you're getting tired, because it's a repetitive thing to get it kind of going in the direction it needs to go in, and i just gave You all some bits and pieces because i was tweezing for a good 30 to 40 minutes, at least, but this is kind of what it looks like in the end. So on to my ball cap, i just start off by putting two little holes for my ears. Start with a small hole, you don't want to cut it too big, because it will start to rise way too far up so just get your ears through to make sure it's flat. All the way around you can easily use got to be, or anything like that. If you choose to, but i find that my ball cap looks the absolute best when i use glue, so i go ahead and glue it down, because every time i use got to be it just i be fighting with it. It ends up lifting and just don't look as good. It doesn't look as bald as it should so now, i'm going to take my foundation and foundation brush and just start blending that out kind of meshing it with my skin to give it a really good ball head effect. So when i cut it off, i just cut it down as close to my skin as possible. Please do not cut yourself because that is possible too, and the little bits in the back. I just take them together and tie them in a knot, and that's that so just take the foundation and the foundation brush again and hit that lace blend it out real good, so that the lace will be good and tinted, because you can see that lace. On my skin would be looking crazy, so just make sure you're also going a little bit past the hairline. So any lace you may leave, it will still look good so now we're getting into the application phase, i'm just putting my glue on so with the first layer. I just put a decent amount, not too much put it on the cap. Put a little bit on the skin blend it out real good and even and then you'll see me blow dry it until it's clear, okay, not completely dry, though, but it's clear then i will move on to my second layer. Same amount blend it out a little on the cap, a little on the skin good, even layer. Now, when i blow dry this one, it's going to be clear: it's going to be tacky, but in some spots it's okay, if it is still maybe white or whatever color it changes to you know, and then i'm going to go ahead and put my wig on Top of the glue press it down really good and put on my elastic band, and i also want to say before you even put the glue on your head and all that cut the ear tabs off. I usually do, but it slipped my mind, but just make sure before you put your elastic band on that they are gone, because if you don't, then your wig will not be properly laid down around that ear area and that can lead to lifting and it just Won'T look as good, so now i'm cutting off the lace. You pretty much know how that goes. Cut into three sections use a little jagged motion as you're cutting it and voila. So after i cut off my lace, i go in with got to be, and i just spray around my hairline really good and it's just to kind of get rid of any last minute cast that you might see or maybe um it's some lace. You didn't even notice was like kind of lifting it's just the last minute security. It'S like final cement of everything. Now this step is, if, like you're installing a wig like i am, and i already have on makeup and i've been playing around my forehead, wiping it off. You know messing it up, i'm just going to go back with my foundation and i'm going to tap onto my lace and skin. At the same time, and then you see me come back with my contour shades and everything and just blending everything back as if it was never messed up so really quickly. While i finish up styling this hair, i want to tell you my final thoughts. I really do think the company did a great job with this wig super soft. For it to be kinky curly was so soft, no bad odor um. They gave you the 24 inches. I feel like in the curly state, that's sometimes hard to find and when i stretch that hair out it's hitting my hip bone. So i'm just very pretty. I will be bringing this back again in the spring and do like a little reinstall and maybe um style. It in a wet styles, it was actually cold this day and i just didn't want to wet it because i had to leave and i didn't have time for it to dry. So, yes, i want to thank you guys so much for watching. I love you guys. So much if you enjoyed this subscribe hit like hit the bell, and i will see you guys in the next one captured trouble a little bit.


Comments
KellyJelly9976: this came out nice!!!! gorgeous color
Tama: have faith in JESUS CHRIST as LORD and SAVIOR for HE SAVES ❗️ *What is the Gospel?* The true gospel is the good news that God saves sinners. Man is by nature sinful and separated from God with no hope of remedying that situation. But God, by His power, provided the means of man’s redemption in the death, burial, and resurrection of the Savior, Jesus Christ Ephesians 2:8-9 For it is by grace you have been saved through faith. And this is not your own doing; it is the gift of GOD, not a result of works, so that no one may boast. Romans 10:9 9 because, if you confess with your mouth that Jesus is Lord and believe in your heart that God raised him from the dead, you will be saved. JESUS CHRIST can come anytime! REPENT OF YOUR SINS Just Believe ❤️ Love you and GOD BLESS