How To Colour Blond Short Pixie Wig To Beautiful Burgundy Pt 1
- Posted on 14 June, 2021
- Color Lace Wig
- By Anonymous
@Fernettays we coloured a pixie wig to help a client who had cancer and lost her hair, this wig is for her to help build her confidence and feel good.
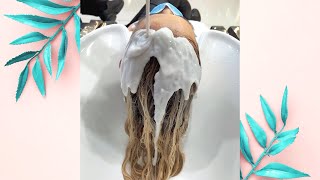
Hi guys youtube viewers today we're going to color this wig for a client who was a cancer patient. She lost all her hair, so um i got her a wig and the only color came in was this blonde, so um she wanted burgundy. So what i'm gon na do i went and got some hair color and i'm going to try to bring this up to a burgundy for her. It is kind of a light sign. This only lifts only about a couple levels. Instead, trying to go past a certain amount of levels, but we're going to try it anyway and see how we turn out. So i already got my color mixed and, as you have seen, i have done um in the past color wigs um or have done a wig for someone else. What i'm going to do is just put this right on i'm going to comb it through and i'm going to wait and see what happens so stay tuned. So what i'm doing, if you notice it's starting to look like it's starting to pick up, some color already has to put this oxidizing in the air and i'm just slathering this color all the way. Through i mean everything is like a light blonde all the way through even down to the netting. If the netting changes, that's fine too, it's underneath the bottom. No one's really going to see that part, but i'm hoping to make this a lovely wig for her and she'll feel good about herself. That'S what's important when someone after going through chemo and losing all their hair, they want to feel good about themselves. And that's that's girls! That'S how we feel and i'm just mushing it in because this is a nice short hair. So i can actually do it like that. You notice. I got my little mannequin covered up in all this plastic because we don't want to color her, as i have a daughter that does that she colors everything in her path. So i am going to continue working on this and getting this all the way through, and then you guys will see how it turns out just stay tuned. You notice how the color is really starting to take on here, i'll, find it very nicely getting it on there. I like this hair too, it's kind of cute. It has like a little little soft feel to it a little wave pattern, so it'll kind of make her feel good too, is that it has a little instead of a straight look, and i have a little body to it. So it's really starting to take pretty good, so stay tuned, we're just going to keep slathering this up in there and just getting it on as much hair as possible and trying to get it to cover every little bit of it, including what's underneath the bottom. Okay, you're probably wondering why am i using a paint brush when this came in a bottle and a little squeeze bottle? Well, what i did was i squeezed it out of that bottle into or actually pour it i didn't squeeze it. I poured it into a um into a bowl and squeezed the color into the bowl too, because i prefer to really work that way with it than trying to work from getting the bottle and plus i like to get every drop out of the bottle. And i don't think squeezing out of the bottle, you can get every drop. So if i have to cut that bottle and get all the droppings, i will so i like to just use a paint brush, because i know i can get where i want to. You know use every bit of that color because you know you're working on one bottle and you're trying to get all you can. But look it's already turning it's starting to turn out so once it continues developing and we'll be back to continue to show you how we're going along with this. But it's coming along pretty good! It'S coming on come along, so i'm just going to go back through and find spots that may have been missed and then let it sit for a little bit and we'll be back i'll. Show you how it's going! Okay, so now she's all colored, we'll let the colors sit on here. If you notice i put on for like an hour well because uh she's, not human, so to color a human about 20 minutes to color a mannequin on um, no heat, no body heat, i'm giving her a whole hour full coverage. So we'll be back to keep you posted see how she does. Okay, bye patience, i'll be back; okay, guys, i'm back checking on that color! So so far. This is what we got doing, pretty good, pretty good. It'S changing so far, so good, i'm just gon na peek through it and make sure we're doing well, and we still got a little more time on the click and we're going to continue letting it sit and rest going good going well. Using this color hoping we'll get that, let's see that's our signal, the alarm went off. This is where we're going to rinse out now. Let you know this is what the wig looks like now, since we rinsed it out and what i'm going to do is get her dry and we will come back and show you, i'm laying the hair hanging, the dryer and just air dry on a medium to Cool setting so the color um, the customer would like it a little bit more lighter. So what i'm going to do is um. I mix some a little cream bleach um some shampoo and some developer together and i'm going to take and mix up and just run that through here really quickly, just take some of that color down to bring her to something else she likes it. I want to be really comfortable so um. She thought she would look better in the darker color, but she changed her mind. She'S saying, can we go lighter so now we're going to play with some color. So let me mix this up, okay, so this is what i got. It'S just shampoo cream, bleach and um developer, and i'm just going to run this through this hair really quickly and we're going to just go over it real fast, lighten it up and take some of it off for her and we'll be back to show you how It turns out okay, hopefully we get what we want, so all i'm doing is putting this cream um, conditioner and uh bleach on here. Just to lighten this up, some just to pull some of the color out and most people call like a soap cap or a soap bath or a bleach bath or whatever um, but and it does, it does pull out some of this. This um color without damaging, so not that this is a human head, but it's just that's what you would do on a human head as well. You would use the same procedure to get you out. You know you know the same technique or so to get that to lift color out, so she seemed to like um, mostly the lighter parts of the hair. So i told her i can just pull it out. Just pull some of the color out for her and um just to make it comfortable for her. So what we're going to do is let this sit for a little bit just watch it, because we don't want it to be blonde. That'S why we added the um. The mix we did the mixture to keep it mild, so we don't get it blonde night, but we want to get it comfortably enough to look good on her okay, so we're gon na keep playing with this, and i'm gon na run this through with a comb Coming through and if you see if he knows what i'm doing, i'm just combing it right through and you see it's actually starting to lighten up a little bit. It'S actually lifting up some of that um, the darkness, so we'll just um continue combing through we're. Just gon na watch it watch it really closely, so it doesn't lighten up too. So this is what we got. We took some of that color off and it came up a little lighter now, so i'm going to give this a try again, okay, so what i did was i um. As i told you, i took the little cream bleach, some 40 volume and a little shampoo mix, those together to make it mild - and i just ran it through, as you saw with the comb, and this is what we got. So it came up much lighter and it actually looks like um if her natural, because her natural hair is um like a salt and pepper. So it looks like the color picked up the the white and the dark so which would be a normal look for a salt and pepper when her hair was on when she had her hair. So what i'm going to do now is just wrap her and paint the dryer and i'm going to use some mousse and let it just take its shape. So that's what we're going to do now we're going to wrap the punch, dryer and then we'll just comb. It back out, i decided to just um brush it around a little bit to give it like a wrap and i'm just bringing the bottom down this little it'll fall really cute and i'll be able to comb it out once it's time. So that's what we got so this is where we are now so i'm just putting some bumps in here. I put a little hair polish on there for shine and i'm just grabbing some of this hair and i'm just bumping it up with some bump in there. Just give it a little body and um, so then we're going to give it to her. So i will continue to bump this around. All i'm doing is taking the curling iron, and i'm just throwing some bumps in here like that. Just so you'll see that what i'm doing here i'll show you from another another angle, if you can see so just to show you what i was doing, just picking up some hair and i'm just making little bumps everywhere, just to give it some more body. After all, the shampooing and coloring and stuff, we kind of made it and flat plus, i wrapped it too took some of the body out of it, so i'm just going to put it back in just by giving it some bump, so we'll be flat. Okay. So what i'm going to do is, i will finish this up and then i shall be back to show you guys the finish. Okie dokie stay tuned. So far the color came out pretty nice. If you guys like it, you know. Let me know in a comment below and uh, hopefully positive thoughts, nothing too negative. You know the world's negative enough, but um. This is for a cancer patient, um client. I should say pardon me for a client that had cancer and so far did really well with it and she, her hair came out from the chemo treatments, so um i'm fixing his wig for her, so she could feel good about herself and the color she wanted Was burgundy, that's why you saw a blonde wig when we started off because she um i'll. Let her tell me the color she wanted. So that's why i went about got a bought, a blonde wig to make the color she wanted, because that everything she saw out there wasn't she didn't like so and so and it's a human hair, wig. Okay, so we're trying to finish up here. So this is the finish of um, the dyeing from the blonde to the it's actually like a mahogany burgundy color um, and it has a little bit of red and dark in it, which makes it look more natural than this one, solid, color, so um. This is again for a client, that's been um ill and so, when she puts the wig on, that's we'll shape this part around her face, but i just want to show you guys the finish of this, and hopefully she likes it. So i will keep you guys. Posted and thank you for watching and thumbs up bye from the house of glamour.


Comments
toughsuga2: Great work you do
jeff kennedy: Very well done video,
The Whole Story Sundays: You did amazing
Jason Henry: Nice video and a great work of colour
The Whole Story Sundays: Fern you look amazing