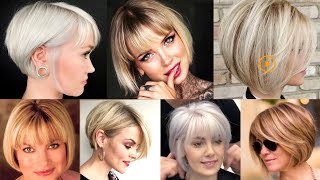
How To Dye Black Wig Burgundy | No Bleach Needed | Using Loreal Hicolor
- Posted on 21 December, 2021
- Color Lace Wig
- By Anonymous
Hey my loves! This video will be on how to dye black wig burgundy without using bleach. Super easy method for beginners.
❤️ PRODUCTS USED: ❤️
Hair Clips
Rat-Tail Comb
Protective Gloves
Mixing Cup
Loreal Hi-Color Highlights | Magenta 5 Boxes
Solan Care Developer | 40 Vol
After Dyed
Creme of Nature Argan Oil | Intensive Conditioning Treatment
Argan Oil of Morocco | Conditioner
DISCLAIMER: I am not a professional (yet). This is just how I colored the hair. Everyone does it differently and has different results
♡Subscribe for more videos♡
YOUTUBE: https://m.youtube.com/channel/UCwH9XgM...
INSTAGRAM: https://www.instagram.com/amubyciera
TWITTER: https://twitter.com/amubyciera
SNAPCHAT: @amubyciera
- - - - - - - - - - - - - - - - - - - - - - - - - - - - - - - - - - - - - - - - - - - - - - - - - - - - - - - - - -
SHOP WITH ME
MY HAIR WEBSITE: https://amubyciera.com/
FOR CUSTOM UNITS EMAIL: [email protected]
- - - - - - - - - - - - - - - - - - - - - - - - - - - - - - - - - - - - - - - - - - - - - - - - - - - - - - - - - -
⇢ For business inquiries such as company wig classes, sponsors, or reviews please feel free to email me at:
**I do not own the rights to any of the background music being played in this video. The background music is for entertainment purposes only**
“Always be joyfully and never stop praying.”
#colornobeach #wigcolor #LorealHi-Color
Hey my loves, welcome back to my channel for another video, so today i'm going to be showing you guys how to take the black all the way to this beautiful burgundy color with some highlights in the front so yeah starting off. I'M just going to show you guys how to like separate your hairs. I actually separate the front two pieces, so i can brighten that up also, i section off and kind of part where i want my part to be in my actual unit. So, as you can see here, i already bleached the knots i already did all that off camera. If you guys want to see that in my other videos, i have a video on how to bleach your knot, so you can watch that, but basically right here, i'm just sectioning off the two front pieces in a like a circle type of shape. So i have one side and then all i'm going to do is twist that down out of the way and yeah. So, under my lace, i've already put just like some vaseline on it, so i don't stain the lace and, as you can see here, all i'm doing is just twisting each side and parting off the hair that my client wants to be brighter in the front. Like a bright red, so i'm going to bleach these two pieces off off camera and i will show you guys how i get the color of the bargaining. So i'm going to use the 40 developer and i'm going to use the l'oreal magenta um and i'm gon na use four boxes of this and i'm gon na go ahead and apply. I already mixed everything off camera, so i have four boxes. I ended up using. Maybe, like five boxes total, i had to go back and get another one. So i used five boxes total and i used the 40 developer and i'm just applying it to the hair. You want to make sure you get it saturated all over the hair as good as possible, so you want to apply it to the top and then flip it over to the other side and brush it on the hair, like really really good, so that it gets All over the hair, so you want the color to be saturated through the hair, so yeah you just want to make sure it's all over the hair. It'S really really good. Once you have it saturated all through your hair, you want to let it sit for at least about four to five hours to get that really really bright color. I let mine sit overnight, just because i wanted to make sure that the hair was colored properly. I wanted to make sure that i had that bright, bright, burgundy, color, so yeah, so i'm just applying the color all through the hair. Make sure you guys like comment and subscribe below um. If you have any questions, leave them down in the comments and yeah. So continue to watch this video, i'm actually going to speed it up a little bit, because all i'm going to do is do the same thing that i'm doing right here, which i'm saturating the hair with the color. So as you're doing it, you just want to make sure that you're getting it good all the way to the ends of the hair. As well, and just rub your hands use your hands as you. Do it then make sure that it's getting on all of your hairs? That'S the best best tip. I can give you but yeah, so i'm gon na speed the video up and i will show you guys the ending results like i said. If you have any questions about doing this process, this wig is customized by me. It is a machine made wig. I actually made it for a client. It is 24 inches long. So if you would like to order, make sure you go to my website visit www.amu by sierra.com and you will find the ava unit, which is a 24 inch natural body wave and that's what this unit is. So, as you can see, i'm starting from the top and working my way down the hair, and i always start from the top of the hair, and then i flip it over and do the same, exact thing throughout the whole entire wig. Until i get to the front so yeah, so as you can see, this is how you would apply the dye to your actual hair, your natural hair or your wig, so just a tip as you're applying it to your hair. You want to just make sure that you're putting the same amount of dye onto the hairs. That way, you won't have some spots that are lighter or darker than each other, because if you do not use the same amount of hair dye on it, it will come out in lighter or darker spots in your hair. So that's why you kind of see me taking my time and like actually rubbing it through all over the hair, because you don't want that patchy look of dye. You want a flawless finish so, as you can see, i'm just rubbing everything in and then i actually sectioned it into different sections. I only do basically one track at a time because my tracks on the back are double weft, so i just pull this section down and i begin to do the same process throughout that. I just did before i'll start from the top of my track. Weft and work my way down and pin the rest of the hairs up, so i just take a part of that section and i'll start off with a small section and begin to work through that and then continue. So, as you can see, i parted off a section of the hair small, i'm just going to paint from the top of my left down. So i'm just painting the hair dye onto the actual hair and, like i said you just want to make sure it's saturated in the same amount that you did already before and then i'll just start on the top work. My way, through the back of the hair, i'll, lift the weft up and i'll just apply that dye and rub it in really good so yeah. This is the finished product. Okay, so the color came out really beautiful after leaving it overnight. It did turn out too bright, so my customer wanted it darkened a little bit in the front and darker roots. So this is the finished product. I darken the roots with the dark chocolate brown um, and then i put a little bit more red dye to darken. The front up, but overall she was really really happy with this wig, like i said it's our ava unit, it's in 24 inches long. It'S on our website i'll leave that down below comment down below which one was your favorite look, and thank you guys so much for watching.


Comments
Kelly W: Did good ❤️❤️❤️
Shay Evanston: Hello great video
Shay Evanston: New subscriber here