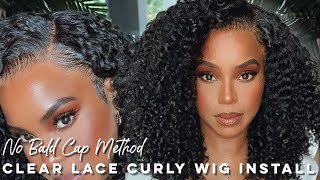
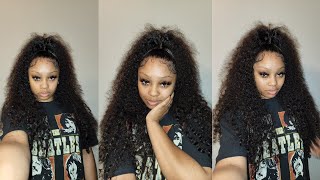
Watch Me Install + Style This Water Wave Curly Wig| It'S Giving Scalp |What Lace!!!
- Posted on 21 March, 2022
- Color Lace Wig
- By Anonymous
Hey love welcome back to my channel :)
please Thumbs up this video if you enjoy
Hair product used Shea Moisture Frizz free curl moose
●▬▬▬▬▬▬▬※ Tinashe Hair ※▬▬▬▬▬▬▬●
Hair Details: HD 13x4 Water Wave Lace Front Wig 26 Inch
Shop Now➤ https://bit.ly/3u3CoP9
Tinashehair Official Store➤https://bit.ly/3rGNhql
Invisible HD Swiss Lace Wigs➤https://bit.ly/2ZZgWzE
Lace Front Wigs for Sale➤https://bit.ly/3y2Jgxy
Colored Wig➤https://bit.ly/3osfgIy
Use Coupon Code"TSIG" to Save extra 15% Off
Tinashehair #lacefrontwig hdwig
Instagram @tinashehair: http://bit.ly/2Isud9X
Business email [email protected]
instagram @msroshposh
camera SonyA7sIII
Sony 50mm
Hey everyone, it's rochelle and welcome back to my channel in today's video i'm going to show you guys how i styled and installed this water wave hair it's from tinashe hair. I will link everything in the description box down below now. This is how my wig looks fresh out the box. Yes, i know she needs some love in this hairline needs some loving, it's a bit on the full side, but the good thing about it. The knots are actually not that big they're, very, very tiny. So i know it's going to be easy to be bleached and i bleached it off camera and i did most of the tweezing off camera, because i do have very detailed videos on how i do that. So i'll link those video in the description box down below. I will be going in with my foundation and i'm just going to apply this to the hairline of the lace. I kind of apply it all over the lace, but that's not necessary because you're going to cut off the extra lace. So i apply it on the lace that way it matches my skin tone and, as you can see, i'm already rocking my wig cap. So i'm doing the ball cap method today and i actually have a very, very detailed video on how i do my ball cap method, how i customize my wigs as well. I will link that video in the description box down below, so i'm going to go in with my scissors and cut off that extra piece of wig cap that i won't be needed and then i'm going to try the wig on just to see how it looks. How it's fitting on my head and the lace matches my skin to perfection, so it does look a tad bit darker, but once i put my foundation on it's going to match it perfectly, you guys and the hairline is looking great. So i'm just going to go in with my scissors and cut away any extra piece of lace that i don't need. I literally hate cutting by the air because i either mess it up or get it right and trust me. I made mistakes too, so i'm gon na do this in sections. That'S just how i prefer to apply my wig. I know some people just glue it and then just cut away the whole entire lace, but i cannot do that like i will literally mess up my wig all right. I got ta take a little water break drink my water in my business, trying to get my health right these days, guys because i gained some weight and i'm trying to get it off so trying to get back into the habit of eating healthy and drinking water. And working out but anyways, let's move on to gluing down this wig. So i applied a layer of glue onto my forehead area and you want to wait for that glue to dry clear before you pull that lace down once it's dry clear. You can go ahead and pull down the lace and it is literally melted. It looks good. I'M going to go in with my blow dryer again on a cool set in now. The hairline does go a bit low for me. So that's why i'm pulling out the hair at the front, because i want to cut away all that extra lace and that hair. You can do that. Don'T be scared to cut the lace, so it matches your hairline perfectly and i just have to add a bit more of that glue and then i'm going to press it down into my skin, make sure it blends. I really do like the hairline on this wig. It has a very natural looking hairline some wigs, they kind of go straight across, but this one doesn't so again, i'm going to cut away all the sections on the side, wait for it to dry, clear and then i'm going to add a second layer and wait For it to dry clear, i was kind of impatient here, so you can see a little bit of that white. But just don't do that wait for it to dry clear! You don't want to make that mistake and i'm going to cut away all that extra piece of lace that i don't need and i like really going up close to the hairline, because i don't like any extra piece of lace sitting on the forehead or the hairline. That don't need to be there. I find that using like a small scissors works really well to get up to the hairline instead of using the eyebrow razor like i still use it, but also when you're cutting the lace. You want to make sure it's like really jagged and not like straight across, so i'm gon na go ahead and add some more glue at the side, and then i'm going to i find like right by the ear is usually where it lifts. First. So i add a little bit extra more glue right by the ear, probably add like three layers of glue, and you guys the glue that i'm using is actually my very own glue. This is just a sample, so i'm just just trying to see how well it works and then obviously i'll you know make it available for everybody. I'M going to go ahead and glue down the other side off camera because i'm literally doing the same thing - and i did my makeup guys - this wig is not even melted yet and it looks melted like it really does. Look melted and now i'm gon na go ahead and you know go ahead and create some baby hairs. I know a lot of people, don't like them me personally, i'm not the biggest fan of baby hairs on me. That'S just my opinion, but when it comes to like curly, hair and deep wave texture i feel like baby hair is a must. It is a must so we're doing baby hairs. Today now i went in with my hair wax and i added to the side just to slick the hair and i'm going to go in with this little baby flat iron. Before i go in i'm going to create the baby hairs, so i was using a pretty dull razor. I just switched razors, so i'm going to go in with my baby flat iron and i'm going to curl the hair upwards. Then i'm going to take my edge brush and start to create the baby waves. As for products that i'm using on my brush, i'm only using the hair wax, so i'm not using any mousse. I don't want to use any wet products. I want this to be like really soft baby hairs, so i'm going to go ahead and go back in with that eyebrow razor and do the same thing once again with the brush. Listen, i'm going to be honest with you. I am no arrogant hey when it comes to baby hairs. Okay, i be struggling with this. It is not easy and i find that i get one side of my head like properly done and then the other side. The baby hairs are like what is this but, like i said i really do like them on wavy curly, hair texture. I think it looks good. It makes it look more natural looking, but i don't want them to be too big and obvious. I like to keep them really. You know small and plus. This is all i can do. Anywho we're gon na move on and i'm gon na try to attempt the baby hair on the other side as well before i do that. I'M just gon na make the center part look a bit more centered because it was looking a little off and i went in with my hot comb just to flatten it. So i'm going to repeat the same steps on the other side as well. So i went in with my hair wax and then i'm going to go in with the eyebrow razor and just cut some baby hair on the side. Listen like i said i always struggle with the other side. I feel like i get one side to look perfect. Like how i want it to look and then the other side, i'm like what is going on here, what is going on here, but i mean it doesn't look too bad it's coming out. Well, so again, i'm gon na do the same thing, but before i do that this side is a little bit on the bulkier side. So i'm gon na go in with my tweezer just to make that hairline look a little bit more realistic because i felt like i needed just a tad bit more tweezing and then i'm gon na go ahead and cut the little baby hairs and sleek it down. Now guys, a part of my video went missing because uh this is a new camera by the way and one of the video clips went missing. I don't think i pressed record, but i tied my hair down and i let it basically melt. Let the glue melt for about five minutes and then i'm gon na go in with a water bottle and some hair moves to define the curls a bit more. So it is water wave, and i find that with curly hair. You are going to experience a bit of shedding, so i did have a little bit of shed in not too much. I just want to. Let you guys know that, but make sure you always check out other reviews on any hair, that i do, because my video is mainly showing you guys how i install it, how i style it - and i hope these videos do help you guys, and i hope you Guys enjoy this video, so if you do comment down below, let me know - and i will see you guys in another video very very soon. I love you guys so much and thank you for watching bye.


Comments
Nyasha Perry: I bought this exact wig and it’s just as gorgeous as shown in the video. The only issue is the side of the wig does not have nearly that much lace. Outside of that it gives a gorgeous install.
Charmaine Keating: Great install, beautiful, love ❤️ it
Created By Nori Elan: So beautiful and natural looking!!
d b: Beautiful install as always
KaWanda Collectibles: Wow beautiful..that looks like your own hair. Not a wig..that looks really good. Its while how the difference of different brands of wig, can make it look so natural. Love it
Carlene Clark: Looking ALL Natural!
Shereese Blackman: This long curly looks gorg on you
Rene Hill: These videos are cute but I realized a long time ago normal people do not get the same quality of hair. I ordered a wig from Wiggins beauty that you reviewed/dyed and baby that wig was so bad it literally went directly into the trashcan and I never ordered from them again.
KaWanda Collectibles: My apology♀️I be watching these videos late after getting off work at night and my eyes be blurred sometimes. I have vertigo, so they get like that. I made a mistake and clicked thumbs down. I just noticed it today. But as you can see, I had two comments written about the wig. So apologize for my error. I will never give u a thumbs down. Because I really enjoy watching you and your family. Also I love the content you put out. Again my apology. Be Blessed
Kaylene: Does anyone know where she got her slick stick from? love the video by the way!!
Kerry Berry32: WELCOME BACK BABY GWWWURL WE MISSED YOU Love love the new video ♀️
Dee Luther: Great Video as always Lovely Thumbnail Tho Beyond Beautiful You are Ur Makeup always on Point Nice Cheeks Structure Happy MarvelouS Week Too STAY BLESS N BE SAFE ALWAYS
Diamond Jewel: Am I hearing you right? I wish I could take the time to get into wearing wigs I would purchase anything you come out with lbvs!
Jasmine Jackson: This is ‼️can you re do the peachy blonde hair nicki has been doing lately. Idk where to start
Elijah Delamere: Thus wig is everything
Emoretta Robinson: I'm convinced that Chilli from TLC has water wave textured hair. It's kinda like a looser curl. And congratulations on having your own wig glue! This install is flawless. You always do an incredibly good job.
Frazzled Haloz: Gorgeous
Shy Shy: Very pretty on you
TyeStylez:
Bushy Bashy:
Shauni Nickz: ❤️❤️❤️❤️❤️❤️❤️
BMediaHQ: Queen of wigsssssss henni
Amore Love: givinggggg
ULoveJanie: *Okay YES!*