The True Way To Dye 613 Roots Dark Without Staining The Lace + Making A Wig On A Sewing Machine
- Posted on 25 November, 2018
- Color Lace Wig
- By Anonymous
PROTECTING YOUR LACE IS VERY IMPORTANT WHEN COLORING YOUR FRONTALS AND LACE CLOSURES ESPECIALLY WHEN USING DARK COLORS. WATCH THIS VIDEO TO LEARN HOW.
SUPPORT : https://www.patreon.com/LashaiTriele
ALL WIG CLASSES: https://www.youtube.com/playlist?list=...
| PRODUCTS USED:: |
◾️613 FRONTAL (CLIENT PROVIDED)
◾️CLAIROL NATURAL BLACK PERMANENT HAIR DYE ( SALLYS BEAUTY)
◾️ION 30 DEVELOPER ( SALLYS BEAUTY)
◾️FINE TOOTH COMB ( BEAUTY SUPPLY | DOLLAR TREE )
◾️RAT TAIL COMB ( BEAUTY SUPPLY | DOLLAR TREE )
◾️22” INCH CORK CANVAS HEAD SHRINK WRAPPED ( WALMART | ALIEXPRESS | AMAZON )
◾️HOTSHOTS BLOW DRYER ( SALLYS)
◾️Related videos:
HOW TO WRAP YOUR CANVAS HEADS: https://www.youtube.com/watch?v=jkBm1X...
FRONTAL PLACEMENT: WIG CLASS 111 ~ https://www.youtube.com/watch?v=txdTsc...
◾️C SHAPE SEWING NEEDLES ( BEAUTY SUPPLY STORE | JOANNS | WALMART )
CREAM SURE LOCK THREAD ( WALMART | JOANNS )
◾️FRISKAR SCISSORS ( WALMART OR JOANNS )
1 Clean bowl && 1 clean color brush
Follow me on Social Media && REQUEST CUSTOM ORDERS @
http://www.instagram.com/artistrycoutu...
http://www.facebook.com/artistrycoutur...
I GO LIVE ON MY FACEBOOK PAGE ALOT
I ALSO DO PAID ONE ON ONE CLASSES!
Videos SHOT ON MY iPHONE X & are posted every Thursdays or Sunday!
Thanks for watching!
Wig maker
How to make a wig on a SEWING MACHINE
HOW TO MAKE A FRONTAL ON A SEWING MACHINE
HOW TO MAKE A LACE CLOSURE WIG ON A SEWING MACHINE
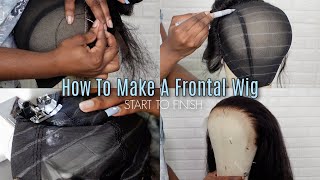
Welcome back is the shade tree. L, let's get a popover weight class 180. I'M gon na be showing you how to dye the roots without damaging the lace. Make sure you turn on your notifications and you subscribe hunty. Yes, so I did start with 6:13 hair and imagine frontal now. This is permanent natural black dye by Claire, I'm sorry I didn't own and on it, but it is permanent dye. I'M gon na mix. I had about a half an ounce of this left in the bottle, so what I'm gon na do is I'm gon na mix this with two ounces of 30 developer, and now it's not gon na make it black black is gon na make it like a really Really dark burn a lot more natural than just black, so this is a permanent color. I want to go ahead and mix all of the constants and everything to get there now. That'S nice, thick and creamy. How I want it to be go ahead and make sure this front Suez, pin all the way down. You don't want anything moving. I don't mean under this stuff moving mm-hmm while I'm trying to work out okay hunty. So what I were just want to go. Do I just want to go grab my clips and my comb of my other table, so you want to start pinning this off in really really small sections and I'm not using the color brush, I'm using a small, thin tooth comb. I'M gon na take the the dye and I'm going to very, very lightly comb. This through you want to make sure you are very very careful with Coleman is through. You don't want to stain the lace, as we all know, black stains, the lace a lot worse than most colors and it will not be able to blend in with your scalp or your client scale properly. If you cannot, if the lace is no longer transparent or the the roots are not transparent, so as you see, it is still a really really light. Gray color over time is going to darken up now. If you want, you can let the color sit there and let them change the proper color, but I mean it's gon na turn dark anyway, so I just started working. So I'm trying to get this as close to the lace as possible without putting any any of this color on here. My main trick that I like to do as I'm doing this is I'll put the color or I'll put the color on the comb about. I'M sorry I'll put the color on the comb and then I'll put the color onto the hair, a bounce, three-quarters of an inch away from the lace and then I'll start working the color downward. So I'm gon na go ahead and show you that right here, I'm putting it away from the lace, putting it away from the lace and then I'm working it downward I'm working at smooth to the lace. This is because, like I said you don't want any gloves on here whatsoever and using this fine to a comb, allows you to get all the way to the roots without actually coloring the knots and I'm also taking a clean, a clean rat tail comb and I'm Combing a little bit into the dime combing, the edges of the dye and bringing that down into the hair, to make these dark roots a lot more natural, instead of just a big glob of black thorn there. So you want to have those colors cascading down into the blonde, just a tiny bit with different variations of black running down into the blonde, not like literally running down into the blonde, but you'll be able to see when I'm talking to my eyes and I'll. Be able to show you once I'm I'm pretty much done, but if you ever bought a 613 frontal with dark roots, and you can pretty much see that that color is not just splashed onto the roots. It'S pretty much very, very natural looking and if you had blonde hair and your hair grew out and you had natural dark roots and your hair grew out, so you we want to pretty much make it look like fat. You don't want to just slap it on there in the colorblock fashion. You want to make sure that is really really natural, so I'm gon na go ahead and finish doing the rest of this, and you can watch me work. Okay, yeah now. As I said before, you want to make sure you're doing this in very, very small sections, and this does take a lot of time and patience. It took me about a little bit over an hour to complete this test, but, to be honest, is very, very well worth it because you won't stay in the lace. You'Ll barely touch any of the nuts. If you use this method, I don't think that I got any of the nuts dark on this. I don't believe so, so I'm all done I'm gon na. Let that sit down here for at least about another 30 minutes, because I want the other side to process. As long as I want the the right side, the process as long as the left side in so I did watch this out, mm-hmm and I'm gon na put this on on high low heats, and I want to go ahead and blow-dry this all the way through You don't want this black sitting here with this blonde, because although it's washed all the way out - and I did use color for safe shampoo - you just still don't want it to be sitting on there. While it's wet to mess up any of your perfection that you just did you don't want any of your good efforts going to waste, so I'm gon na go ahead and blow-dry this and then I'll show you guys what it looks like on top of the length And up under the lace, once I'm done, not everything is all dry I'll part this a little bit and you can clearly see the lace all the way through. Don'T have any dark spots and, let's zoom in on the underside, yes auntie. Yes, it's no no's things whatsoever. I'M gon na go ahead and pick up my mesh dome cap, I'm going to put my cap onto the block head and this is a 22 inch, a 22 inch block here. My client had a Evers head size, so I'm gon na put the top. I'M gon na pin this front part on the zero and I'm gon na pull the back down to about a 13. Now you guys, when you are measuring your caps to the proper head size, Universal Universal rules apply so you're like I said you want to make sure that you have that chart handy now. Well, I'm gon na interact really really quick, but, as you can see, I did pull that down about an inch just because I wanted the camps to be fully stretched so that it's not bulking up under the frontal. But Universal rules apply when you're, pinning and you're measuring. You want to make sure that you have that chart on hand. Here'S my frontal. You want to make sure that you have that chart on hand, so she can know the proper measurements that you have, that you need for you either you or your client. So I'm gon na pull this front so down about 3/4 of an inch in front of this cap. You want to pin this down really really nice and flat. So I don't like to put one pin in the front output to one on the left side and one on the right side really really close together, so that this front two is not moving or tugging from one side to the other. I did penny in the back of the front two and I'm gon na go ahead and lay this front so really really flat to this canvas head into this camp and I'm going to pin it on the end of the frontal to the cap, preferably to the Band so, in addition to pinning the front row down to the cap, I'm gon na also pin the front so down on to the cameras here, because I guess I want this to like really really flat. I don't want this front to a movement as I'm gon na sew it down in a minute, so you don't have to have too many pins on here. Only use of our six two at the top one on each corner and then one in the middle of both those parts, so one in the middle on the right one in the middle on the left. The next thing I'm gon na do is I'm gon na go ahead and part this hair. It doesn't have to be a even part, but I'm gon na part the hair, as I'm going to bring it down. Now you can braid the hair or pin it out of the way with clips I like to braid mines down just because it keeps all of the hair from getting messed up, as I'm sewing it on the front. So if you don't pin it out the way properly or if you don't braid it, your hair will get frizzy and tangled and stuck into your machine as you are working with it on the sewing machine. So, as I said, I'm gon na go ahead and braid to pig tails down each side of this frontal cause. Like I said, I want my hair to be out of the way. Okay, I am using this cream thread. I want to sink this 3 because it's really really thin and I'm going to I'm not gon na double it. I'M gon na triple this 3. I wanted to make it as thick as the thread that you use for like sew, ins or whatnot, and I'm doing it specifically because it's too thin for one string by software, you just double it once it's just it's just not it's just not um durable enough. It'S really really great to use one. It'S really really great to use on the sewing machine, but it trying to use it by hand it'll break. So I'm gon na thread, my needle and as you see it's really really thick. It'S going to make sure that this thread does not break as I'm sewing it through the front. So now I do so my front so down in two parts. You watch that in any of my earlier videos actually I'll put the front to a placement video at the top, and that explains that explains how I do that task. So you can go ahead and click the link at the top, and then you can see how I do that now I did use choose crankbait because I'm going to be using lighter colors in a later video, I'm gon na be coloring. This hair so stay tuned and see turning notifications all right, so my next test is always to cut off the excess cap. I always do this after sewing my front tool down and I'll do sew it onto the on to the sewing machine. Before I cut off the excess cap, I'll show you that in with class 119, but for any of you who have watched any of my earlier videos - yes, you know I do sew it down by hand and by sewing machine to make sure that it is 100 % secure to that cap, so yeah hunty, once all the tracks are on here, she'll be able to lay flat flat flat to this canvas and she'll be good to go Hansie. Okay! Yes, no babes! Thank you! So so much for watching! I appreciate you bear so much. I love you babes, so so bye see you next time.


Comments
Kartrina Davis: If you had a used frontal and want to make a unit, how is the frontal placed on the cap?
Robin McMillian: Do you sew in elastic bands for your clients wigs?
angela phillips: Hi LaShai girl you Brave I ordered the dark roots