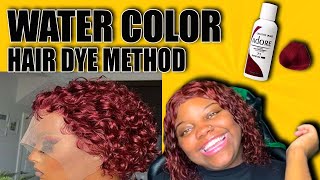
Easiest Honey Blonde Highlights! No Bleach | Water Color
- Posted on 03 November, 2019
- Color Lace Wig
- By Anonymous
●▬▬▬▬▬▬▬▬▬Ali Annabelle Hair▬▬▬▬▬▬▬▬●
Straight Blonde Wig 18 inch
Direct Link➤ http://bit.ly/33TKA5X
Straight Bundles & Closure ➤http://bit.ly/33RHvmW
Top Selling➤http://bit.ly/35T1tiI
Follow Store + Add Hair to Wish List ↓↓↓
●Get $$$ off on Aliexpress AliAnnabelle Hair Official Store➤http://bit.ly/2Myux7v
Whatsapp: +8615936310987 (Wholesale Price Provided)
Want to promote AliAnnabelle hair???Contact: [email protected]
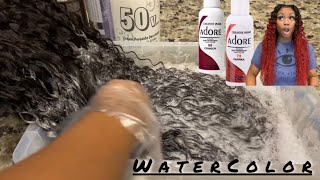
Hey Girlfriends! In this video, I'm showing you the easiest method of achieving #blondehighlights ! Using #AliAnnabelleHair ! This is a #WaterColor method and the products used are listed below!
#DarkNLovely :
#AdoreHairColor : Spiced Amber & Honey Brown
#Clairol : Crème Soda
GLUELESS INSTALL VIDEO: https://youtu.be/1eHP9U1mnFg
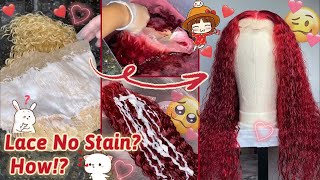
Hey girlfriends, I meet welcome back to my channel, so if you would like to see how I got these honey brown and blonde highlights using no bleach in under an hour, then just keep on watching. So the hair that we'll be using today is from Ali and Nabil, so I do want to thank them for sending me this hair and sponsoring this video and we'll be using the six 13 18 inch frontal unit. Now this is a thirteen by six front. So, as you guys will see, I love that because the parting space is very versatile and you can move it around so for this look we'll be using the dark and lovely dazzling Brown and I did do a good screen recording of all these colors. So you guys can see we'll also be using the adorn honey brown we'll be using the adorn spiced amber and clear oz cream soda. Now we're going to start with that dark and lovely and we're going to go ahead and get that mixed together now. This is just strictly gon na go on the roots of the hair. It'S going to give us a brown tint on the roots, because it's gon na make it easier once we start to dip the hair with the water color, so yeah we're gon na. Take that we're gon na mix it together and we're gon na start getting that applied to the roots only and maybe about an inch out. Not too far I mean unless you want to go a little further, but I just want it enough to where all the roots are the same. Color - and here I just took a triangle section and I parted it out where the middle part of the hair would be - and I just did this to pull out the two pieces that I'm going to make sure are lighter in the front. So again, this is totally optional. You don't have to do this if you don't want to so I'm actually putting the dark and lovely on an applicator brush and putting that directly on to the roots of the hair, and this just gives me a little bit more control, as you guys can see. This is kind of a smaller size, applicator brush, so I'm just going to do that all throughout the roots of the front of the hair, a little bit in the back in all on the sides as well. Now, in the back, where it's really not that important. For me to be super precise, I'm just putting that color on there and smoothing it out with the applicator brush. You don't have to be super neat in this back part, but you do want to make sure that you're super precise with the front and that you get every section of that hair of those roots, because when you part the hair, you don't want to have a Little bit of blind root here and brown root everywhere else, so here I'm just showing you guys how it looks once the hair is processed, and I believe I let this process for about 25 minutes now. It looks super dark on this mannequin, but once I get this shampooed out, as you guys see now, it is not super dark at all. It'S just a perfect little root touch, so I'm gon na go ahead and start sectioning out my hair. This crown part I am sectioning out. I want it to be the all the same color. Now you can section your hair, how you want to, but the reason why I'm doing it this way is so that when I comb the hair down over the top, I still get kind of like a highlighter effect. But it's not enough where it's not covering up the other colors like. I really wish that I could explain it, but if you do this wrong, then you'll see exactly what I was talking about. So yeah I'm just going to take off this top crown section and I'm going to braid that and then I'm gon na start working on the other sections. So here these two thin strips that I'm sectioning on the sides. This is because I want it to be the same color as their top crown section and that's because it looks more uniform there. You don't have this top section like honey brown and these two sections like blonde or something like that, because it's not gon na look as uniformed. If you do it that way. So now, I'm gon na start sectioning out the back sections. Now, on these back sections, I'm braiding them so that I know what section is supposed to be what color and you guys will see as soon as this clip is over, but yeah, I'm braiding this first section, and it might be like three rows in this first Section three roles in the next section because all of these sections are going to be different colors. So this first braid I'm braiding down the next braid, I'm going to the right and the third braid I'm going to the left and then I'll repeat that process. So I'll know, all the braids that are going down will be the same color. All the braids going to the right will be the same color and all the braids going to the left will be the same color. Now. As you all know, this method is clearly optional, but this is just easiest for me to see exactly what I'm doing and what sections are supposed to be. What color! Now, if you know it easier method for you, then just do that or share it. In the comments below so other people can know, but as you guys can see right here, this is what I was saying. These two braids going down will be the same. Color, the one's going to the right will be the same color and the one's going to the left will be dipped. The same color as well, okay, guys so now that we're all section that we are ready to do our water color. Now it is super imperative that you do the darkest color first, in my opinion and I'll, explain why, later on in this video, so now I'm just going to take out this back section, because this is again the darkest color. So I want the entire perimeter being the front two pieces that top ground piece in this very lowest back section to be all the same color, so that is uniformed. So now, I'm just going to dip that section and I'm going to use my towel dry. It off if your towel dry it in it to the point where it stops. Dripping it's not going to get on your other section, so you'll be completely fine, and then I'm just going to move on to the next sections that are going to be dip. This color as well so now, I'm just gon na go in and dip this mix section and, as you guys can see, I split it in half and the reason why I did that is to get some more control over the hair, and this is another reason Why it's really important to go in first with that root tin is because, once you start dipping the hair now you don't have to feel like you have to dip it all the way down to the root and possibly get the other sections wet or color. At the wrong color, because now all the roots are uniform, they're already the same color, so you don't have to dip nearly as far so here, I'm just dipping that honey brown color on the top crown section and I'm also gon na, do it on the two Side sections, as you guys, will see in a little bit but yeah, I'm just gon na. Do that make sure you're at our drawing between each section. That is super important so that you do not transfer the colors onto the rest of the hair. That has yet to be dipped, so I didn't want to bore you guys by showing you the exact same process of me doing the spiced amber. But I just went the next row that had been dipped and I went ahead and I did it on the spiced amber now, as you guys can see. This is how the hair looks with me just doing honey brown and spiced amber now. I'M gon na go in with cream soda and, as you guys can see, the hair is like brown and then you have this crazy dimension with the blonde. Now I usually like that, but because of my skin complexion, I did not want that on myself, so I did go ahead and dip the entire wig in the cream soda, and this is why I said that it was super important that you start with the darkest Color first, because if you do the lightest color first you're not gon na be able to dip the entire week in the dark color at the very end, because now the whole entire wig is dark. So I'm going to take that super bright. 6:13 blonde. That'S leftover! By just dipping the entire wig in that cream soda color, because it's super light and it's just gon na kind of put a tint on it's not gon na make it like super dark brown or blond or anything of that nature. Now, even after all that entire color process, I really love how this wig is still in pretty good shape. You guys would be surprised at how many weeks are just in shambles after you put any hint of water or hair color, or anything on that. So shout out to Aldi Annabelle, because this wig is still in wonderful condition. Now this I'm just installing the wig, I'm not going to talk to you guys through this process, because you've seen it a million times already so yeah. Thank you guys so very much for watching. I love you guys so much. Please do not forget to Like comment and subscribe and share this video as well, and also please do not forget to watch my previous video with me installing my wigs glueless I'll be sure to leave that in the description box below and I'll see you guys next Time, bye,
Comments
Becky Bre: Great explanation!!! Thank you for this tutorial!!! I’m going to try to do this!
Selena Davis: Girl, you slayed that. Never seen this method done before and can’t wait to try it. Thanks for sharing. New subbie
The Chosen Ninja: Awesome job on the coloring love it
Pretty Molly: This looks great
Everything Sunny: love the method you used! thanks!!
Selena Davis: You slayed that color. Thanks for sharing Sis. New subbie
Sissy Lou: I have to do this now it’s so pretty
Christina Chanel: How do you keep the lace from getting colored??
Naeemah Mccants: I love this ❤️❤️
Sha Arthur: Currently watching with the exact same robe on
Efiyaa Neh: Amazing turn out
Kimberley Lyons: Love this✨❤️
Nelly Dinero: What color dark & lovely did you use?
Kennise Marchè: This color
Chamiya Beaty: what was first used at the beginning for the roots ?
Shante Dixon: Did you wash it with a purple shampoo before doing watercolor ?
Sincerely Simone: Hey what color is on the two pieces in the front and is that the same for all the lightest blonde shades I see ? I would like to color my 613 hair but still have it kinda blonde not really brown so I’m think that color I see in the front two pieces and that nice blonde that’s going thru the rest of the hair
RaveeneJonelle: