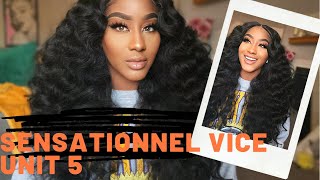
18Inch Bodywave Wig + How To Dye Hair Without Bleach | Ft. Nadula Hair Company
- Posted on 17 February, 2021
- Color Lace Wig
- By Anonymous
Hi everyone ! I pray all is well with you! I hope you guys enjoy today's video! Before you leave, be sure to LIKE, COMMENT, SHARE, and most importantly SUBSCRIBE! Love you!!
NADULA WEBSITE: https://www.nadula.com/
NADULA AMAZON STORE: https://www.amazon.com/stores/Nadula/p...
DIRECT WIG LINK: https://www.amazon.com/gp/product/B08M...
IG: https://www.instagram.com/_tori88/
TWITTER: https://twitter.com/tori88_
TIKTOK: https://www.tiktok.com/@_tori88?lang=e...
BUSINESS: [email protected]
I DO NOT OWN THE COPYRIGHTS TO ANY MUSIC USED IN THIS VIDEO
Hey guys and welcome back to my channel, it's your girlfriend toy simone, who else and today your girl is reviewing another wig, because why not it's like every day who said you got ta wear one wig who because you're anything like me, i switch my wigs up. Multiple times a week, just for the simple fact that i like looking different switch, my wig make it feel like okay anyways, if you're new here make sure you guys press that subscribe button, also that post notification bell so that you're notified every time your girl makes A post, and if you're you know true to the game, then welcome back today we are reviewing this beautiful wig from the doula hair. I was i'm not gon na lie. I was very intimidated by this week. I was intimidated because this is a tea party wig and i've never done a tea party. Wig, i've never bought a tea party wig, but i just knew that you know it's this little slither of parting space and you know you have the full hairline, but it's kind of like really thin as far as like, where the track is and where the laces. I just knew it was going to be a little challenging and a little different, and i think it turned out really really cute in today's video you're gon na see i'm gon na do a little unboxing for you guys. I'M gon na show you how the wig was when i first got it. It was this beautiful body, wave texture and even after i let this hair air dry y'all, the curl pattern was bomb. So i definitely see myself in the future, washing this hair and just wearing it air dried, because the curl pattern was definitely still there. This hair, it was soft when i got it, but i think after dining y'all, i think it's even softer than it was l'oreal high color. Does it for me every time so you're gon na see in the video the process? I did. You know to get it to this color. This is a 18 inch, wig, 180 density without further ado, let's just get into the video, so i can see how i got this done: okay, okay, y'all! So of course you know the doula sent over this beautiful unit. They also sent over two wig caps in this really cute: silk egg scarf. I really love it and i, like literally use it every time. I do my hair now so like i said they sent over a two-part unit, um, not thinking about it. I probably should have bleached the knots, but i mean we're here now, it's whatever at this point um. I always use two boxes of l'oreal high color, so i have two boxes of magenta as well as a 50 volume developer, don't be like me, wear gloves during this part too um i mean i just really don't think to wear gloves anymore, because i've been using L'Oreal high color and just dyeing hair in general for a while, so i really don't use gloves until i get to the point where i'm actually dying the hair, also to make things easier, just cut open the bottom of the tubes instead of having to squeeze it Out i was just trying to be cute for y'all, but just cut open the bottom and it's a lot easier. I also use about the whole bottle of 50 volume developer by the end of this dyeing process. So when it comes to the consistency of it, you kind of want it to be kind of like a soupy. Consistency also keep in mind the higher the developer, the brighter the color will be. So i pretty much always use a 50 volume developer, just so that i know the color will show up well, i've never used anything higher or lower than that. But if you don't want your color to be as prominent, then you can use maybe a 30 or 40 volume developer to make things easier. You most definitely should just take the hair and put it in like four sections. That way, you can help easily distribute the product on each strand of hair. That is usually what i do, but it was really really late. Y'All and i honestly wasn't thinking i had like a brain fart, but i usually take it and i put it in fourth string, four sections so that i can get each strand. But, as you all saw at the beginning of the video, the hair color still turned out really good. It'S just that it saves time and sometimes saves product if you're able to section it off and go that way. Instead of doing like me and like wasting a lot of product but like i said it still turned out really cute so so so i pretty much just kept this going going row by row with the wefts i'm covering it up and next i'm just going to Show you what the hair looks like once i had all the product on it and i literally had just enough product for the whole wig and what you're going to do is you're going to let this sit on your hair for at least 40 minutes. But i think i let it sit for like an hour, so you can, if you want, let it sit as long as i did. I don't think it'll really change the outcome of the hair, but after letting it sit just make sure you wash it out, really really well and use your favorite conditioner and then you'll be good. So here you'll see me um, finding the part and re-parting my hair because, like you know it's a teapot wig, so you can only part it where the tea part is so here i am parting, the hair off really good and then i'm going to use my Hot comb and wax stick to make sure i flatten the hair, really really good and then i'll begin the plucking process now with the tea party unit. You don't want to pluck too much, because if you over pluck, then you will definitely be able to see those tracks. So i just plucked just a little bit and of course, since hair sheds over time, the parting will probably get a little bit thicker. But for now i think the parting is good enough and you always can add a little powder in your part so that it's a little bit more realistic. So so, to be completely honest with you, i honestly could have skipped this step all together, because y'all that wig was so tight on my head. That i didn't even need this step at all. But if you get this wig and find that it's not that tight on, you, then definitely use this step to get the wig to stay nice and snug on your head, so so y'all. This is so funny to me, because i call myself giving myself really tight. Curls because i wanted like the pin curl look, but i ended up looking like a little bow peep or i was giving wendy like y'all. It was. It was really tight. Curls but um you're gon na see me just work with it and play with it to try to get it in the shape. I wanted. You'Re gon na see me put a few layers in it um just to help with the thickness of this unit, because it is 180 density and it's really really thick, but i'm just going to add some layers in it. Shorten the bang part. You'Ll also see me put in some slight baby hairs, okay, so this is the part where i was talking about. I wrapped it. While i did my makeup to help loosen the curls up, and then it's also the part where i was telling you like. I didn't even really have to glue it down, because i ended up being able to shift it and everything because it was so tight um and i did use the combs on the sides to keep the wig extra snug but um. I think it ended up really being really really cute. I really like the outcome and it's definitely a week that i'm going to throw on when your girl's got to go somewhere and she want to look. You know a little presentable, but i'm just going to let y'all finish watching me customize this unit and put some more layers and put some more curls in it just play with it. So i liked it so so all right y'all that is it for today's video um. I hope you guys enjoyed it. As always. I really enjoyed creating this video, for you guys make sure you click down below for all the details on this wig doula hairs website. I'Ll also leave the direct link to this week. I definitely think it's a great week for someone who's a beginner and wanting to get into the realm of frontal wig. It'S not a frontal and it's a lot, less maintenance, but it's still something that'll open you up to something new, because it's not just you know a closure wig, but i really really love this hair. Thank you. Thank you. So much to nadula for giving me the opportunity to review their beautiful hair, make sure you guys subscribe if you haven't already join the family, make sure you follow me on all my other social media platforms, because when i am not here daily, so if you have Any questions leave them down below in my comment section follow me on instagram, follow me on twitter and follow me on tik tok, but without further ado i love you guys so so much. Thank you for the support. I hope you have a good day. I hope you have a good night, whatever it is wherever you are, i hope you have a good one and come back and see me bye, guys be blessed.


Comments
Kaylah Arnae: Love the color