Watercolor Method & Peekaboo Highlights Pt 2
- Posted on 11 January, 2019
- Color Lace Wig
- By Anonymous
this is pt 2 of making a wig and customizing. in this video I will be dying the wig using the watercolor method and adding some peekaboo highlights to the back as well. this wig will ne going up on my poshmark for sale as well as more that I will be making on this channel. so make sure you go follow me at the link below! dont forget to leave a like and subscribe while you are here.
poshmark
http://poshmark.com/closet/@arnelleras...
want to help me help you? if you'd like to donate to help keep my channel going follow the link below
cash app
cash.me/$PrettyTraphouze
#watercolormethod
#peekaboohighlights
#HIDDENRAINBOW
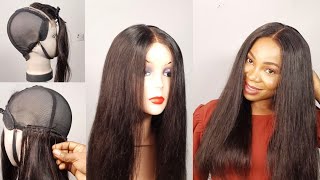
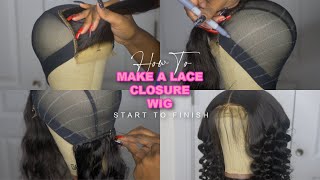
Well, everyone welcome back if you are not a subscriber go ahead and stop and subscribe right now, please and thank you. We are now entering part two of my making a wig and customizing I'm going to use the watercolor method. So what I'm doing right here is filling up this pot with boiling hot water. Then I'm gon na go ahead and put the color in and keep testing it until I get the desired color. So this is what you'll see me doing: enjoy the music and select come back? Okay, now that I got it my desired color, which is this rosy goldish, Salman orangish color, I'm going to go ahead and part off the front section and put it in a rubber band, because I don't know why I did this. I was aiming for something else, but it turned out totally different. So that's, okay, what I'm going to put in a rubber band and I'm going to submerge the rest of the week into the water. I was constantly adding more color throughout this dyeing process, simply because the wig was soaking it up so much so if you need to do that, then go ahead and I did end up taking the rubber bands out and just submerging the whole wig into the water And this is the color that it gave me and then I'm going to squeeze the wig out and proceed with the next step. Now I got my wig back on my mannequin head. I'M just gon na go ahead and comb it out a little bit and clean up my part and get every hair where it needs to go before I start my routing process after I got my part straight. What I am doing now is using a little bit of that orange blaze, along with the sapphire pink and I'm going to mix that together and I'm going to use this to dye. My research you're going to paint it on in regular motion and then I'm going to go up and down long ways with the brush just to make sure it fades a good gradient effect. You know now onto the back of the hair. I have my I'm sectioning out here right now, I'm taking this layer right here. I am not that far from the top of the head, because I want these people who ha like to show so I'm gon na take this layer of tracks and I'm going to diet. The sapphire pink color, the Pesta it'll be a pastel pink. Now I like to put it so, unfortunately, you won't be able to see this, but I'm dying, this leur, pastel, pink and then the layer under it. I'M going to use the orange blaze and dye that orange now I'm taking the chi silk infusion, and I rub that all over the wig and flat-ironed it - and this is the results right here and I'm gon na go in with the razor and I'm going to Cut it with a razor again just to give me a long bob, you, okay! As far as styling goes, I'm done styling it as you can see, it has lots of body and movement in it. I'M gon na show you what the peekaboo highlights look like. If I move them around, you can see, you can see the rose gold, you can see the pastel Pink's, you can see the orange blaze, the style main colors, so yeah, that's pretty much. What I did with that now, I'm going to just turn it back around and put some mousse on it and get all the flyaways tamed and we'll be back. We'Re just gon na go in and cut the lace in a zigzag motion straight across I'm also gon na cut the edges of the closure that have that fabric on them that are sticking up. It just makes it lay more flat. I should say, but this is my finished visa - the transparent lace. I do believe so. This is what it looks like on the mannequin head. I'M gon na slap this baby on and let you see what it looks like on somebody else's head. I'M not gon na have on a wig cap, though, so keep that in mind. If you liked this video don't forget to give it a thumbs up if you're not a subscriber thumbs up and subscribe down below, you can follow me on Poshmark and Arnelle Rashaad. If you like this wig, i'm going to start selling wigs and yeah thanks for watching hope you enjoyed this video come back next time. Don'T forget to comment comment. What other colors! You would like to see anything like that pasted up and if you didn't see part one of me customizing and making the wig then go ahead and click on it. Right now.


Comments
Mahogany Coy: I need the details on that tea kettle! Where and how much?