How To: Ginger/Copper Wig Color & Install (Watercolor Method) - Beginner Friendly | Goldynaps
- Posted on 04 February, 2021
- Color Lace Wig
- By Anonymous
Hey guys!!
This tutorial is all about this wig I dyed and installed myself. The watercolor method is honestly foolproof, so I highly recommend it if you're a beginner like me!
The wig I ordered: https://www.tinashehair.com/product/bl...
Hair dye I used: Adore Semi-Permanent Hair Color in Cinnamon, Cajun Spice and French Cognac
This wig glue I hated is called Ghost Bond; It's not beginner friendly at all, and you're kind of screwed if you make a mistake or use too much. Just use gorilla snot to install instead.
______________________________________________________________________
♡ F O L L O W M Y S O C I A L S ♡
◦ Instagram: https://www.instagram.com/goldynaps/
◦ Contact: [email protected]
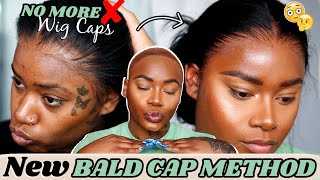
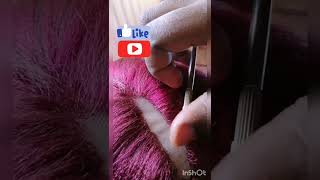
What'S up you guys, it is your girl, goldie knops, welcome back to my channel in today's video, i'm gon na be showing you how i dyed and installed this little wig, and i think she turned out real cute. So please keep watching and check out the rest of the video i'm starting off by washing this wig from tinashe hair. I bought it in 6 13 because i didn't want to deal with the bleaching process and potentially messing it up. I bought the 13x6 cap size and the 12 inch length, i'm just washing it in the sink with some dove shampoo. I don't know if you have to wash it if you like the color out of the box, but i don't know it was kind of sitting around in my closet for a minute. So i was like. Let me just go ahead and wash it off once. I'M done shampooing, i'm going to tone and hydrate the hair with the verb purple mask and i love this mask. I use it on my natural hair, it's great because i'm like a purple shampoo. It gets rid of brassiness without drying out your hair. This wig was basically yellow when i got it not like a true platinum, so i was worried that once i added the color, it wouldn't be the true shade that i wanted, if i didn't start off with like whiter hair and i'm not a professional or anything And this is like my first time ever dyeing any hair. I was just like winging it, but it turned out kind of cute. So i might know what i'm talking about or whatever. So i let the mask sit on the hair for like five minutes and as i'm rinsing it out, you can see it's more silvery than yellow now, once i've rinsed it out, i'm going to spray some got to be glued spray on the lace just to protect It from getting tinted by the dye that i'm going to use here's the colors i'm using today, a lot of the videos use the spread of dye. So that's what i went with i'm using the colors french, cognac, cinnamon and cajun spice french cognac is the really orangey color. The other two just help tone it down. So it's not like neon orange when you're watercoloring make sure that your water is hot. This helps the color take to the hair properly. I actually boiled a pot of water and then added tap water for the rest, when you're building up the color for the watercolor method, you can customize it based on the tone that you want. So if you want more orange, then add more french cognac more on the brownish side, add more cinnamon! I patch tested it on a strand of hair to see if it's the color that i wanted it to look like and then altered it. Based on that, the more water you have, the less pigmented the color is going to be. So keep that in mind in some videos, people do this in like a plastic bin. But if your sink is stainless steel, you can just do it directly in the sink. It didn't tint or anything, make sure you mix the dye into the water until it's completely dissolved, because it will make your wig patchy. If you don't do that, when you get the color, you want start dunking the wig into the water and make sure you detangle, as you dunk. This will ensure that the color is coating all the strands. The last thing you want is to finish dyeing your wig and then pull it out and half of it is still blonde once you've dunked the wig and coated all the strands you can just let it sit in the water to get your wig pigmented. I left it in there for about three minutes when i took it out. This was the result and i loved it, but keep in mind the hair will be slightly darker when it's wet than when it's dry. This is really the color that i wanted, but when it dried it was a brighter orange which is fine, but just take that into account when you're dyeing my hair. So after dyeing, i went ahead and blow dried, the hair and flat ironed it just to get it prepped for customizing. This is my first time customizing a wig, but straight out the box, the hairline looked really unnatural. So as i was plucking, i just tried to keep in mind that i wanted it to look less like it was made in a factory and more like a natural hairline, and this is kind of how it turned out. Now i'm beginning the installation process, i've already cornrowed my hair and i'm going to be doing the bald cap method. Here, i'm just putting on my wig cap and spraying my hairline with got to be glued, then taking my blow dryer to make sure it's completely dry. Before beginning to cut the cap, also you'll notice that i cut out little ear holes and from the videos that i watched. That'S the easiest way to make the sideburn area of the wig cap stick down after i've cut the cap, i'm going to add some powder foundation to the cap to make sure it blends more with my skin. Hence the name of bald cap method, you're, really just trying to make sure that the wig cap looks like your scalp, i'm also adding powder foundation to the inside of the wig. Before going ahead and customizing the ear area, i was kind of nervous that i was going to cut too much of the lace off, but it turned out. Okay, i decided to cut tabs into the lace just to make it easier for me to see and make the process of cutting the lace easier later. I'M also marking out with some eyeliner, where i'm actually going to cut the lace. So i don't cut too much or too little. I have a really tiny forehead, so i actually ended up having to cut way more off than i expected the way i dotted it out. Initially, the wig was sitting too low on my head and it just looked weird: i'm applying my wig glue on my hairline and, let me just say i will not use this glue again. I don't think it's beginner friendly at all. If you apply too much of it, removing it around the hairline area is really difficult. I made that mistake and tried to use alcohol to remove the excess glue and the whole wig came off the glue also made putting on makeup a struggle because wherever there was a little excess glue, my makeup just started caking up at the hairline, which, like looked Gross so that being said, i only used the glue the first time i installed the wig for the rest of the week. I installed the wig with gorilla snot instead, which doesn't have as much hold, but i was able to just take my wig off at night and clean off any makeup thoroughly and then reinstall it in the morning really easily. That glue will hold your wig in place. For like 50 years, but correcting mistakes and cleaning out the hairline isn't as simple so now i'm starting to cut off my tabs with an eyebrow razor. This just gives the hairline a more natural appearance than cutting it with scissors. I definitely did cut my forehead multiple times, so definitely be careful with that. Then i'm going ahead and creating subtle, baby hairs. I didn't want to do too much. Just keep making the hairline look natural. Now i'm styling the wig and i highly recommend having a hot comb, because that helps the hair lay as flat to your scalp as possible and makes it look like less wiggy. I also added some concealer to my part to give the wig the illusion that it's coming out of my scalp and i added some ors olive oil foam to slick down any flyaways. And here is the finished. Look all right. You guys. So, after literally doing all of that, this is the finished. Look, i'm super happy with the color um, the install. You know it was kind of hard for me, i'm not gon na lie. I did cut my little forehead a couple times um putting on makeup. That'S a whole challenge. I'M gon na have to learn how to figure out because it can get real gunky, real, quick, uh right next to where the laces, so that's something i'm gon na have to practice at, but overall for my first time doing anything last through the wig. I am super happy with it, so i hope that you guys enjoyed this video. I hope you learned something from it and try to experiment with wigs on your own. So please, like comment subscribe. Um come hang out with me whenever i post a video which is hopefully every week um and i will catch you guys in the next one. Bye
Comments
Jaazz Mary: You killed this look sis the color came out PERFECT!!!
Euleetha Pringle: This looks so pretty on you!
Ellenmarie: came out so good
Damaris Agurcia: Can you do a video on how you cornrow your hair?