$50 Amazon Prime Bob Install Tutorial On Long Hair | Affordable Amazon Wigs |31 Days Of Hair|Day 10
- Posted on 22 December, 2021
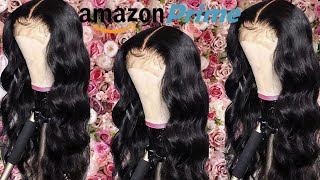
- Fake Scalp Wig
- By Anonymous
Hey fran !
In this video, I am showing you a video on how I did this $50 Amazon Bob install on long hair tutorial
Enjoy and remember to like, comment, and subscribe!
Social Media
❤️Facebook : London Tayy
❤️Instagram Hair page :@thelondontayy
❤️Instagram Personal page: @londontayysway
❤️ Amazon Storefront : https://www.amazon.com/shop/londontayy...
❤️ Business email : [email protected]
Location: US -Columbia, SC
————-
Hair used: West Kiss 4x4 bob wig length 12" https://amzn.to/3EkHZnm
Products used:
got2b spray:https://amzn.to/386S6hP
got2b glue cream: https://amzn.to/3pCziRB
elastic band: https://amzn.to/3GgMrWo
jamaican black castor oil :https://amzn.to/3DzgypJ
ghost bond lace glue: https://amzn.to/3FmiaEA
lustrasilk wax stick: https://amzn.to/3JcUl4E
aphogee mousse: https://amzn.to/3po4XFX
Tools used:
needle and thread: https://amzn.to/3p4eJwS
wig cap: https://amzn.to/30bweky
edge brush:https://amzn.to/2WgCypc
rat tail comb:https://amzn.to/2UHPp3h
conair blow dryer: https://amzn.to/3DBxYC4
hot comb:https://amzn.to/3iSaC35
babyliss flat iron :https://amzn.to/3ChGkOZ
------------
Music by A$H. - Well Wishes - https://thmatc.co/?l=6BA7478C
Music by Ok.Oso - Tags - https://thmatc.co/?l=9A8D78AE
-------------
keywords
amazon wig,affordable wig,amazon hair,short bob,bob wig,cheap wig,affordable lace front wigs amazon,bob wigs for black women,amazon wigs,amazon prime,amazon prime wigs human hair,$50 amazon prime wig,$50 amazon wig,affordable bob wig,best affordable bob wigs on amazon,affordable wigs under 100,affordable wigs under 50,west kiss hair review,west kiss hair review not sponsored,west kiss hair wig,west kiss hair straight wig
Know what type of time i'm on smoking fighting so my mind is gone bust out. Ap clarity been feeling like the man, so so i must be yeah told him to put 55 on pump three yeah. You know i'm really guessing i'm something yeah feeling like bojack. All of the horses will make you go back like hey y'all. What'S up welcome back to my channel, this is linda tay, coming to you today with another video girl in today's video. I'M going to show you guys how i got all her hair into this bob. The bob is from west kid's hair. This is not a sponsor video um. I just wanted to show you guys this video, like i said i got all her hair into that bob. The hair was only the wig was only fifty dollars y'all fifty dollars. You cannot beat that for the bob okay, so it was a closure bob um the length i'm not too sure about, but i'm pretty sure it was 10 inches only because i do hair a lot, so i'm pretty sure it was 10 inches now. This is her. Second time reusing the wig the first time i did not install it, but um the second time, as you can guys, can see. I am installing it so um i'm going to give you guys some tips and tricks on how you will get all the clients hair into a bob and make sure that the bob is flat. Okay, so guys the key to flat installs with anything is small braids. I'M okay. I know you guys probably do not want to do small braids. I know it takes way longer, but guys you just kind of have to do it. I'M gon na be honest with y'all. Now um. I don't know how many braids i did. I think i did like 22 braids in her head, so i did a lot of braids. I wanted to make sure everything lay flat, especially especially especially since she has a lot of hair and it's thick. So if you guys um have another client, and maybe the hair is not as full or as long, then, of course you don't have to do this, many braids, but guys i'm showing you how to do it. With someone with super long hair, okay, she has lower back length hair and is very, very full, so i'm going to have to do all the braids and kind of connect them together to make sure everything's lying flat. Okay, now she does want a wig cap. She always kind of wants a wig cap, but with closures i only leave the wig cap for the for the closure part. Okay, the other parts i just kind of let b i do not consume it with the wig cap um. She likes to lift her wigs up and or her scalp underneath um, so i'm not gon na sew the wig down either. Now, if your client likes a stable, you know wig install everywhere, like from the front to the back to the sides. Then you're gon na want to sew the back of the closure on the back of the wig down. Okay. So yes guys! So that's all i'm doing just kind of um braiding her hair and then i'm going to or her scalp. That is very, very important as well. It just helps stimulate growth. It helps provide nourishment to the scalp moisture to the scalp. It just creates a healthy environment for growth, all right y'all. So now that i am done, i'm going to use this crochet needle and guys that hair that braid, that i have left, i'm just going to crochet that braid through the braids that i have braided down. Okay, make sure you kind of pull it and lining it flat against the hair the head. So that way, you know it's not bulky underneath the wig either. So that's what i'm doing, i'm just kind of pulling it and folding it and kind of crocheting it through the other braids to make sure that it's lying flat as well. Okay, so that is all i am doing right here, um after i do that guys. I, like i said i am going to oil, the scalp everything that i use will be in my description box below and a link will be provided. So that way you um you can purchase it. So i'm using this jamaican black, castor oil. It'S dye fill the brand is diphyl. It'S premium black, jamaican, castor oil. I like to use this because it helps with growth. It helps with thickness. It also helps with moisture it keeps moisture in for a longer period of time when it comes to the client. Now, after that, guys, i'm going to use the guy to be blue cream, i'm going to use the edge brush and i'm going to brush her edges out now. One thing i really really like to do is when it comes to closure. Wigs i like to have the clients edges out where it's it doesn't have that closure piece, so um she's getting a middle part right, so the middle part i'm going to brush back and not the way, but the size of her um the size of her head. Where the closure will not be, and i'm going to leave out so, as you guys see, i'm just measuring where the closure stops on both sides. So that way i know where to kind of put the edges up and where to leave the edges out. Okay, so um yeah, so i'm just going to kind of mold that back and use a blow dryer to dry it up and yeah, i'm just going to leave the edges out so that way i can do the edges later and that way it looks natural. You know when you have the closures: it's not a frontal, so the parts where the closure is not touching, i always kind of like to leave out and gives it a more natural look. That'S why i love a good closure, because you have you: have the ability to have some of your edges out. You know, so i just really. I just really love a closure and girl. Just just love it! Okay. I love it here so guys. I'M gon na get a new cap now, since she is so light. I'M gon na get the lightest wig cap that i have um yeah. I'M going to do that and, like i said, i'm going to measure once again, i'm just trying to see where to close your size, because i'm just going to sew that spot down. So i'm going to sew where the closure ends down when it comes to the wig cap, because everything else i'm going to cut off. So i'm just going to get a needle and thread i'm going to sew where the closure is going to be and then um. She does want glue, so i'm either going to get the glue. Sometimes i get the glue and then sometimes i get just like a little bit of a got to be blue cream or something like that. I'Ve got to be glue spray and i'm going to spray. The front of that closure down and then dry it and then cut everything off. Okay, so right here, i'm actually getting some got to be blue cream and i'm just going to put it where the edges at where the where the cap is going to stop and i'm going to kind of smooth that in my finger and i'm going to dry With the blow dryer and when that's dry, then i'm going to proceed to cut off the excess cap. Hey guys so now that everything is dry and i cut off the extra cap. Now i'm going to just do a little bit of um makeup, just to kind of where the parts going to be her middle part just to kind of make sure that it's not too light okay, so i did put a little bit of that same color at The front i didn't put a lot because i didn't want it to be like too dark. So that's what i did and then i cleaned the forehead with 91 alcohol and a cotton swab. So now i'm done with that now put the lid back on guys and i'm just trying to figure out where i want to put it um, make sure that you know it's lined up to where i want it to be, because it's already apart, because this is A reused wig, okay, so after that guys, i'm going to put the wood back on and now i'm going to proceed to start gluing it down so um, i'm using a different um glue. This time i'm going to use the bold hold glue and that boho, what's not the boho glue, the ghost bomb? It'S not great. It'S not really a great hold or anything like that, but this is all i had and she's not going to wear it longer than a week anyway. So so i did one layer and then i smoothed it in with the rat tail comb just to blend in that cap further and now i'm going to do another layer and i'm going to kind of smooth it out and any extra i'm going to kind of Put it on the back of my back of my hand just to make sure that it's not too much product. You want to make sure that the application is smooth. You don't want like gunks of product on it, because it's just not going to be well, like you know it's just not going to blend well, so i want to dry for like 10 seconds and do another layer i'm going to use the extra that's in the Back of my hand for another layer, so i did about three layers when it comes to that and i like to just use a rat tail comb because it just smooths everything out the way. I want it to be. Okay. So after that guys, i'm just going to kind of install the wig. Now, when it comes to the edges of her wig, like you see the edges, you don't want the edges to kind of get stuck, so it's important to kind of get a little bit of that got to be cool spray or some mousse and kind of brush. Those edges back into the hair and then, when you're ready to use them, then you can just kind of take them out. You know so that is what i like to do, but here i am going to put it on. I told her to kind of lean. Her head back a little bit, so i can make sure that that part is lined up with the middle of her nose and then i'm going to kind of you know, shift the closure and kind of press it in and then kind of comb it in further. When it comes to that red tail comb, okay, so as you guys see, i'm kind of brushing that part back brushing into it and then the front i'm kind of brushing it forward, but i'm just making everything kind of flush into the skin, i'm using the back. I'M using the front i'm using it all now, honestly, i this wig wasn't great, because the lace wasn't great. I like a good thin lace, but you know sometimes it's just not that way: um yeah! So i'm just going to kind of hold the baby hairs brush everything in making sure that everything is flush to the skin and any spots that i miss, i'm just going to add more glue. Okay! So now i know where the closure is going to be. I pull her little edges out and then i'm going to kind of swoop them a little bit with the guy to be glued cream, and after that, i'm going to use the guy to be glue spray and i'm going to spray everywhere. The closure stops um, like the the where the baby hairs is and where the you know, the lace is so i'm just going to reinforce the layers, okay and reinforce the melt, so i'm going to spray some guys with spray and then i'm going to tie it Down with this elastic band now just make sure you tie it pretty tightly and line it up when it comes to. You know where the lace is going to be laid at okay, and this feather melts in the glue with further melts in that spray. Just further melts in every single thing, so i'm going to do that, tie it down and then i'm going to use this as an opportunity to have everything melt together and dry and then i'm going to use that opportunity to style her hair further blended, further melted. Whatever i feel like, i was going to do. If i wanted to curl it. If it was long hair, i would have curled it. You know if it was anything else, i would have did anything else. So it's a bob. All i have to do is kind of straighten it back up over again and then kind of further melt. The roots is, i don't mean so after i basically flat everything out, i'm going to use this wax. Stick i'm going to use it on the roots and i'm going to use that as an opportunity to use my hot comb and i'm just going to literally kind of press everything down press everything in place. So that way everything lays really really really really flat. Another way i like to reinforce the flatness is use that same got to be glue spray on the parts and then use a blow dryer and kind of press everything flat just helps with flyaways, and this also helps with the flatness and kind of keeping the roots Flat, no matter what weather and things like that, so i really like to use this stuff as well all right guys. So now i'm stuck i'm done with styling, so i'm just going to take that band off now, i'm going to use some apogee mousse now guys whenever you reinforce with that spray, sometimes the spray may drip down a little bit, so it may get the baby hair Stuck to the forehead, so you're going to use that that moves to kind of loosen everything up and that's going to have the baby hairs movable once again. Okay, so you know once you move the baby hairs in place, you can go ahead and reinforce it once again and it can be really really stuck, but i'm not going to do all that, i'm going to kind of leave it where it's at but, like i Said i'm just going to brush the hairs and i'm going to have out i'm going to brush the hairs and i'm going to have in okay, so um yeah. So i'm just going to brush everything forward with that mousse, like i said, i'm using the apogee mousse and it kind of loosens everything up and then i am going to combine the guy to be glue cream, as well as that mousse together, um put a little Bit of mousse and then i'm going to use that got to be blue cream and i'm going to mow the baby hairs. Okay, so yeah. That is basically what i'm going to do when it comes to styling this part and girl. She was talking about something girl. We was, we was having a good old combo, all right y'all. So basically everything is done once i molded everything together, i'm going to use a blow dryer and dry. It all the way down. Once it's already dried, i'm going to just get a comb and i'm going to kind of calm the hair back down. I don't need any type of kind of like color or anything. Now you do see a little bit of that lace only because that lace is kind of thick, but everything else is pretty blended. I think that's the part of the lace i probably should have like cut a little bit but yeah, that's neither here nor there guys. I'M going to comb it with the rat tail comb comb it down. She wants like a slight bum, not even like a bump bump, just like a little slight bump. Okay, um, but yeah hope you guys enjoyed this video and i'll talk to you on my next video bye, guys everything, but i'm right back at the market to return.


Comments
Lil Sam: You did a great job install the hair ❤
Pretty LoKee: Not me running to Amazon to buy this wig ima install I’ll myself cause you explained everything so easy and it kept my attention
West Kiss Hair: You look so good with our hair.
Naseyah Williams: did the wig come preplucked & knots pre bleached ?