Clip-On Wig Tutorial Ft. Unice Hair
- Posted on 04 July, 2019
- Full Lace Wig
- By Anonymous
CLIP-ON WIG TUTORIAL FT. UNICE HAIR
Hi Everyone,
In today's video I'm doing a combined wig review and tutorial. I'm showing you all how I created this easy-to-apply clip on lace-front wig, which was provided to me by Unice Hair. The wig is so beautiful, soft and the wave pattern is naturally gorgeous without doing anything to it. All of the details on this wig as well as the products used in this video are noted below. Hopefully this video is helpful to some of you who, like me, struggle with applying lace wigs. Thanks so much for watching!
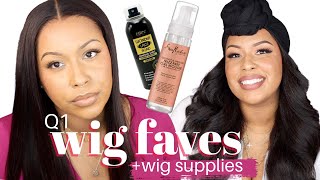
GIFTED ITEMS: Lace wig featured in this video.
FOLLOW ME ON SOCIAL MEDIA:
Instagram: https://www.instagram.com/tenwaystowea...
Pinterest: TenWaysToWearIt
Facebook: Tenwaystowearit
Business Inquiries: [email protected]
UNice Official amazon website: https://amzn.to/2Mb0voz
Hair in video: UNice 13x6 body wave lace front wigs 22 inch
Coupon Code:UNICE0005
UNice Hot Selling Wigs:
13X6 lace frontal wigs curly hair:
13x6 water wave lace front wigs:
13x6 lace frontal wigs straight hair:
13x6 lace frontal wigs kinky straight
13x6 lace frontal kinky curly wigs:
UNice New ArrivalS:
Brazilian Loose Deep Wave:
Want to Promote or wholesale UNice hair?
Contact:[email protected]
Whatsapp:+8613290756878
Follow Unice Amazon Instagram @unicehair_amazon to get special coupon code
https://www.instagram.com/unicehair_am...
Hi everyone welcome to my channel ten ways to wear it, I'm Alicia and on this channel I take one fashion, item or one fashion trend and show you guys ten different ways to wear it. Now in today's video I am bringing you a very awesome. Wig review is the first on my channel. I haven't really done any wig reviews. This wig was sent to me by you, nice hair. I'M not sure if it's you nice, are you nice, I'm gon na go with you, nice, because I love you know little nieces. I love this hair. You guys, I made this wig into a clip-on wig, so I know a lot of you guys were clip-ons you've been asking me for a video on how to make clip-ons and style them. I got that coming for y'all, but I went ahead and made this wig into a clip-on wig by installing clips inside of it I took out the combs. I'M gon na show all of you guys that in this video, but I'm just loving this hair, you guys this is 20 inches of body wave, hair, it's a 13 by 6 frontal and I'm so in love with it. This is gon na, be my summer getup for real for real, like this hair is so bomb. I could you see myself wearing it with all my cute summer: hats, my baseball caps and just rockin that cute sexy Instagram, daddy, look y'all, so I want to show you guys how I made this clip-on wig and how I installed it. So if you want to see all this awesomeness you guys it looks so natural, as you can see, it looks so good stay tuned for the video. So I wanted to show you guys what the hair looks like straight out of the pack. This is the box that they sent it in. As you can see, it's you, nice hair, and it's called the Betty youth series. I guess that's a certain series of ways that they have, but you guys I've already looked at it and I love it. This wig is so stunning: it came inside of this bag. They usually send a little gift, so they sent me these lashes, which are really cute. I like those - and they also sent me to wig caps, but this is the big straight out before I've done anything to it. I definitely want to show it to you guys, so you can see what it looks like straight out of the package, because I am gon na wash it right now. But I just want you to see how gorgeous this wig is. Look at the wave pattern in it and I know that might change a little when I wash it, but I'm so pleased right now, but what I'm most pleased with is the hairline look at that hairline you guys. That is a good start! Okay, you guys. I am NOT in a week expert, you guys know I'm more into half wigs and clippings and so on, but when I see a hair line like this, I really feel like I can work with this. It looks really natural already. I can see that it's very thinned out and it looks good you guys. It looks really good. But, as I mentioned, I am going to be trimming off a lot of this because I'm gon na have leave out with this wig. So you know, because I'm gon na have leave out the baby, hair and stuff. It'S not really necessary. Another thing, like I told you guys, I'm going to be installing clip-ins styrofoam here, I'm gon na be installing clip-ins inside of the wig. So, as you can see, it comes with combs inside it has two combs on the side, a comb in the back and the adjustable strap. I'M gon na be sewing in. It looks like there's a fourth column in the middle, but I'm actually gon na be removing these combs, because I'm gon na be sewing in some clip ins inside of the wig and that's what's gon na. Allow me to secure the wig and it's not gon na slide. It'S not gon na move, I'm not gon na have to do a bunch of gluing down and all that I'm also gon na install an elastic band inside of this wig. So I'll show you guys how I do that, but yeah this is gon na, be such a great wig, because I'm gon na be able to just clip it onto my head and go you guys like literally, so I can't wait to show you guys what I'm Gon na do with it now I am going to wash her I'm trying to think of a name for her. What should her name be? She looks like a Karen. I don't know anyway time to get her washed up and then I will show you guys how I install the clips as well as the elastic band. So in this clip I basically wanted to show you guys how I remove the combs from the wig. It'S really easy to do. I just take a straight face razor and I cut the beginning of the comb really gently and I go ahead and pull the thread. It'S usually sewn pretty loosely, so it's pretty easy to cut off. You just need to cut both ends of the comb, be careful not to cut your lace, because if you cut lace, it's really hard to repair, but you just want to do it really gently and then pull out those extra threads. I went ahead and cut out all the combs this way, just basically taking the straight razor cutting the beginning of the comb and then pulling it apart from there and then cutting the end of the comb, and this made it really easy to remove all of the Combs and as you can see, it was just a really easy process to do again. Be careful not to cut your lace. You don't want to go too deep on that and, as you can see, I've removed all of the combs really easily, and so now the wig is ready for me to go ahead and apply my clips and my elastic band really simple process. You guys be careful not to cut the lace and there you can see all the cones from the wig are out in this next clip. I'M showing you guys how I sew on my elastic band. I use a two inch elastic band that I purchased on Amazon. I'Ll link that below for you guys, I like a really thick band on my wig, because I find that they're just much more secure. But what I like to do is just go ahead and use nylon thread and sew the ends of the elastic band and I find a place inside of the wig, that's sort of like reinforced to so my band on. I try not to sew it on too thing of lace, so I find a reinforced area inside the wig and I just basically so it really simple. I don't do the extra knots and things like that, because I find that these bins are so thick and well made that I don't have to worry about the thread slipping or anything like that. So I use the lighter thread, so you guys can see it better, but I just go back and forth, sewing it through nice and tightly to make sure that the band is really secure and again this is a two inch band that I purchased from Amazon. I use the same band in all the wigs that I do wear when I occasionally wear them so really simple process. You guys to attach your elastic band. Some wigs come with bands, but if they don't, this is a great way to get an elastic band and it makes the wig so much more security, guys really easy to do. Now that I've sewn on my elastic band, I'm now ready to attach my clips to the wig, and what I do again is try to find reinforced areas inside of the wig to attach my clips to so I don't want to attach them to the thinnest parts Of the lace I try to attach it to the edges of the wig and also the reinforced inner parts of the wig and you'll. See that when I show you guys later, but I just go ahead and sew using the holes on the side of the clips. In and out really tightly again, I use nylon thread because I find that it doesn't break, it doesn't start to unravel like other yarns or that yarn type of thread. So I prefer a nylon thread and it's really good after I sew it on there. I just basically knotted your standard sewing, not nothing spectacular, I'm not like an expert sower, but I find this to be secure enough. So here's another clip of me sewing on a clip-on onto the wig. Like I said, I just basically use the three holes on the sides. I sew into all three of them to make sure that it's really secure and that my wig last me a good long time. So I go ahead and go through each hole. Three sometimes four times to make sure it's nice and secure. So as you can see, I'm just going through those holes really good making sure to pull the thread nice and tightly and going out of them. So this is a good way to secure your clips and make sure that your the wig last year, you don't have to worry about them coming off. You don't have to worry about them breaking or anything like that. So I really loved and I really really love using the nylon thread, and I will also link the thread that I used below. I do use a lighter brown because when I get weeds and things like that, I find that it's sometimes hard to see the thread when you're trying to cut it out. So I like to buy a lighter thread. So that's why I have like sort of a reddish-brown thread, but it works. You can't see it under the wig. So definitely think about that. If you're a person that gets wheeze use a lighter thread because sometimes you're trying to cut out the black thread and it matches your hair too well and you end up cutting your hair. So again, I'm just throwing that on really simple easy. You guys know how to do this, I'm sure you do so. The last thing I wanted to show you guys is the fact that I do sew a clip on to the elastic band. I think that this is a great way to secure the band and keep it in one place like if you like it lower to the back of your head. This is a great way to keep it in that place, because I find that, depending on your braid pattern, sometimes the bands move around and you definitely don't want that, because that will cause the wig to slide in other places in the front. It'Ll slide back. So you want your band to be nice and secure, and this is a great way to do it by sewing a clip on to the band. So that's what I'm doing here. I wanted to show that to you guys I haven't seen anyone do that, but this is definitely something that I do even if I'm not creating a clip-on wig, I always sew a clip onto my band to keep it in place so that it's not moving around. You know, as I'm moving around throughout the day, so another great tip for you guys, alright guys. So I know I'm looking real cray-cray right now. You do not have to tell me okay, I already know I'm looking crazy, but I wanted to come on and show you guys how I'm gon na apply the wig. I'Ve already cut off the lace, and everything like that. You guys saw that I put the clips in there, so I have one two three, four, five, six seven clips inside of the wig and I also put a clip on the elastic band because sometimes the bands slip or whatever like I said, but I also went Ahead and tinted the lace - I did not bleach the knot, so I'm not doing all that honey. We just know ain't gon na happen, so I went ahead in tinted. The lace by spraying on this Sally Hansen airbrush face makeup. I used the color 240 soft honey. So it's like a scalp color to me it's a little light, but it's a sky come to me and I just sprayed that on the wig and use like a makeup brush to push it in a little bit and I went ahead and blow-dried it dry. So I got this technique from a youtuber named. Miss naturally marry you, a lot of you guys, probably already follow her mists, naturally marry. She actually is the person that I got this idea from to spray this spray onto the lace to Tennant. Instead of bleaching the knots and doing all the extra stuff so cuz, I definitely don't have time for that, so I'm gon na go ahead and apply the wig. As for my braid pattern, as you guys can see, I have some leave out. I'M just not the best at like the got to be gluing all that stuff. So I left some leave out in front of my head. It'S probably about half an inch of leave out just my edges. Really. I went ahead and straighten those, and the back of my hair is just braided into four cornrows and I kind of pinned up the ends of them. So you guys can see really simple easy, braid pattern and it's gon na be great, because the clips can attach right to my braids. So I'm gon na go ahead and open up all my clips. So all the clips are open now, if you guys can see that hopefully my camera is focusing y'all, I'm gon na get some better equipment real soon, but that's what we working with right now, but I'm telling y'all I'm gon na come up on my equipment. Y'All gon na be like dang girl, I'm working on it, but anyway, hopefully you guys can see. The clips are all open. Now, I'm gon na go ahead and apply the wig. The first thing I like to do is get my elastic band on, so I'm gon na push the weight forward. I'M gon na get my band in place and use that clip to kind of snap the band in place on the back of my head, because sometimes the bands they slide they move around. Now I'm gon na go ahead and slide the weight forward, and I'm doing this pretty much with no mirror you guys. So I don't know how this is gon na really play out right now. I did apply it a little bit ago. So I kind of know what I'm doing, but I can't see what I'm doing right now, but I love these particular clips because they have like the little comb inside of them and they're just really good to like push down inside of your hair without like creating Too much tension, so I love these particular clips over the ones that are like the little you klipsch I like the ones with the comb, so I'm pushing them into my hair. Now I'm gon na go ahead and push the ones in the back upwards into my hairline trying not to create too much tension. I'M just gon na feel and make sure all my clips are snapped closed and that the wig is in the position that I want. It to be in so I kind of want to move it forward a little bit, so I'm gon na snap these in the front, I'm just kind of push them forward and snapping me closed again, just making sure all of them are snaps. So the wig is on when I tell you how this going nowhere, it ain't going. Nowhere like I can calm it. I can do whatever I need to do to it at this point, because it's so secure on my head right now, I'm like with the clips. It'S super super secure like really secure when you got the clips and the band and the band has a clip on it, I'm not worried. I'M not worried. I can jump in the pool if I wanted to. If my edges wouldn't revert back, but I'm gon na go ahead and try to so you guys can see, you can see the lace back there, but once I go ahead and kind of push, my leave out back a little bit. You'Ll see that it's gon na blend in really good, I may even put a little bit of mousse on the part avoiding my hair, because I don't want my hair to revert back, but I may put some hairspray or some mousse on the part to kind of Make it a little bit more visible and I'll be right back after I do that, because I can't do that on camera, I'm just not that good, yet I'll be right, back y'all alrighty guys, so I went ahead and finished applying the wig off-camera. Like I said, I went ahead and kind of slipped. My edges, all I did was put some hairspray on my edges and kind of tuck them under the wig a little bit and because of the elastic band, everything is nice and tight and secure. As you can see, you can't see where my hair is tucked under there. You can't see any of the lace or anything like that, and I also put a little bit of concealer on my part just to kind of make it a little more prominent. But as you can see you guys, this hair is so beautiful. This wig was so easy to apply with the clips installed and the elastic band installed definitely get this hair. You guys all the details are below the link to this. Hair is below. Mine is a 13 by 6 frontal and the inches are 20 inches. So it's pretty long. You know I'm fine 6. So this is a pretty good length here. It goes past my boobs, so this is a great week for the summer y'all I feel so sexy in this, like, I feel like Instagram Betty right now. Ok, she's, a bottie, ok, real bad! No, I'm just joking, but I'm just loving it. You guys. I love the natural curl pattern in this week. I watched this week. I did not curl it, I didn't do anything to it and, if y'all know anything about me, this is what I need when messing with these wigs this this this. What I need, I can't be doing all the curling in the Wanda and the you know, I'm old I get hot. You know what I'm saying I can't I can't with it. I need simple easy and you nice you guys this here, I'm so for every with y'all y'all got me for real for real, like when you see me real good products that I can show to my subscribers. You got me so I'm just happy to share this hair with you guys and I really hope, y'all go out and get I'm gon na be rockin all my little cute hats this summer with in my baseball caps. It'S so long! I love the pattern. The wave pattern in it, it's just such a great wig, it's not too full it's not too skimpy, it's just perfect, and when you install the clips, you don't have to worry about it. Sliding back when you move when you're laughs you got ta keep pulling it forward, making sure it ain't slid back. No leave yourself a little leave out like me, if you're not into all the gluing down and the ball cap and all that leave a little leave out slick it down. Put the wig on you know close the clips and you're good to go. This sucker ain't moving, it is on my head like secure, SF, okay, so I'm just loving this. I really hope you guys like the video. I hope this is something new. I hope this is something you haven't seen. You know I haven't seen anybody make a clip on wig, so you know if they have. Let me know in the comments cuz I'd like to see how they did it, but I'm loving it I'll be rocking it all summer expect to see it in all. My upcoming videos anyway, thank you guys so much again for watching and I will see y'all on the next video bye, y'all


Comments
Beck Davis: Love the density and wave pattern on this wig and it lays so flat
ASE390: I have two clips in wigs now and I love them thank you for this video
Devera Robinson: I don’t wear wigs anymore and never wore a lace-front, but I enjoyed the video anyway, lol. I’m waiting for the tutorial on the hair clips on the natural hair pieces. Enjoy your day!
Miss Chris: You are an amazing artist! Your hair looks gorgeous and I Thank You So Much for this wonderful video! God Bless You and Yours Each and Every Day. Much Love From New Mexico <3 <3 <3
Shawn Plus One: Love this video I’m going to purchase a few wigs and I like seeing options on installing clips on lace front wigs etc thanks for sharing.
Sandra Walker: Simply Beautiful!!!⭐
Neesha Shakeera: Love it! Your makeup is poppin too.
Mary Sims: Loved the video the wig is beautiful looks great on you # TWTWT
jonesl83173: Very pretty❤️❤️
Lashonay Wiley 🌎: Keuuute sis, I'm glad your back! You we're missed!!
Greta Gay: You make me want to wear a wig.
ThiChicThrifts: Ok kkkk bomb af !! So we should name her kiki she ready another great tutorial Sis keep banging them out and if u can help a sister out with lash installment? I’m struggling lol ♂️
Jessica F: Great idea!
Gerona Jamison: Gorgeous
pas4466: Great job very helpful. I’m also glad that you are speaking for all us older girls cuz.. no we don’t have time for that..
Ilse Reyes de Belle: Gorgeous ❤️❤️ ❤️
E Customs: Here from prettybreemua channel...subscribed..love it❤❤❤
Denise Griffin: That wig is very becoming on you makes you look fresh & youngernot that you look old or anything you know you drop beautiful
delia esclavon: You should call the wig Maloni the hair looks Hawaiian , love the video.
Jackie AQ: No glue. Yayyyyy. You better copyright that method .
karetha bass: What's the lipstick/ lipgloss you have on? I love it
Wandrea Russo: Yessss hontey!
Suilen Bryant: Hello I love it
Natasha Tibbs: Can you resend the link please I can’t find it on the description box… I don’t see well and my screen reader is not picking it up thank you
Ronda Cope: Where can I find the clips and band? Help
Queen-lee Mi...: #newsubbie...prettybre sent me... I wanted to ask you a question I have a wig that's synthetic that I loveeeeee but that part is not working its called Christy by instant couture sensationel in drk blue I kind of want to slice open the part and clip it in or add a lace closure to fix that part can you snag it and show us ......ten ways to wear it lol.
Heather Smith: Hey Girlie, where you been? We missed you.
Ronda Cope: What clips were those again?
English Bulldog: Are you from Ohio ?
🌈✨Krafty✨khai✨🌈: Can u wear those kinds of wigs on roller coasters