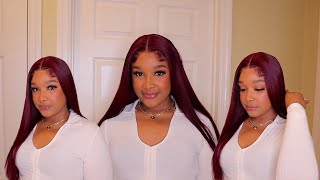
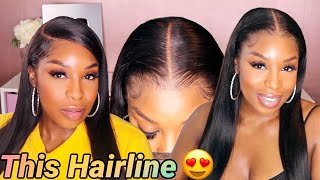
Wow! I Turned My Old Wig Into A Headband Wig
- Posted on 13 November, 2020
- Full Lace Wig
- By Anonymous
Hey Loves,
For todays video I'm taking an old wig and turning it into a headband wig. Yall should know by now I love a good DIY challenge and that is exactly what this was. Headband wigs have become really popular and I wanted to try this out at home prior to purchasing my own. With this technique you can transform ANY wig into a headband wig. So if your curious about revamping an old wig and completely transforming it into something new then watch this video. I have a few grab and go units and this will be added to that collection. So take a moment to watch this video on "How to turn a wig into a headband wig" and then try this out at home.
Hair Link: https://amzn.to/3eNKpzA
Edge Control:
Band: https: https://amzn.to/3lmunzl
Velcro: https://amzn.to/38C24Js
Wig Combs: https://amzn.to/3pjtCcC
Condtioner: https://amzn.to/3eNV79n
Heat Serum: https://amzn.to/2GXc58Q
Spray bottles: https://amzn.to/38xoNqb or https://amzn.to/36pgVEl
PREVIOUS VIDEO:
At Hair Growth Oil for (RAPID HAIR GROWTH): https://youtu.be/JClDrFQQgLM
__
SIMILAR VIDEOS:
OMG ? No Lace DIY Headband WIG
Butterfly Faux Locs (Jumbo) - https://youtu.be/JClDrFQQgLM
Another Pixie Wig - https://youtu.be/RF0omIqiQRE
__________
Social Media:
Instagram https://www.instagram.com/gabbysqueend...
For business please use my email:
#headbandwig #RevampOldWIg #DIYheadbandwig
Hey love, so, let's dive right into this do-it-yourself kinky headband wig. As you can see, the wig has been sitting in my closet for quite some time, so it is very tangled, very matted and in desperate need of you know, just a revamp and you know to give it a fresh look. I want to do a different style and try something new, so i'm going to completely transform this wig. As you can see, i cannot run my hands through it's very tangled, let's get into it alright, so i use this olive oil heat protectant and i also use this water bottle as well as some aussie moist conditioner. All three of these products combined is going to help you detangle this unit in its kinky state, all right so after that this is the unit completely detangled all around and i've just parted it kind of from ear to ear so that i can go ahead and Cut the unit, because, with the headband unit, you want to make sure that it's sitting back a little bit from your forehead. So that is why i'm going to cut this unit straight across. So i'm just going to use my scissors and kind of cut from ear tab to ear tab all right. So, as you can see, i've already cut it halfway, and so i'm just going to go ahead and finish it off with cutting the other side. Now, with cutting the unit, you are going to have a little bit of shedding, but you can definitely brush that out once you actually comp complete the units, so i did experience just a little bit of shedding, but it wasn't anything too crazy, all right. So that is the piece that i removed and i'm just going to throw that to the back and focus on the construction of the rest of the unit. So i did have this two inch elastic band that i figured would make a good headband for this unit. So i'm going to go ahead and sew that, just like you see here so i've connected those two pieces together and this just brought the entire headband wig to life. For me, based on everything that i've seen online, this definitely mimics that method very well, and now i'm just going to brush the unit out again, i'm looking for any shed hairs within this unit. I want to make sure i get out as many as possible before i actually try on this unit, all right, okay, so i'm finally done constructing this unit, we're going to go ahead and try it on in just a moment as far as what i'm using on My edges here are the two products, so i'm using the edge booster along with the yellow, gorilla snot, and i combine these two products together. Now. As far as my hair, i just have four jumbo cornrows going straight to the back and with the cornrows i decided not to start them in the front because we are doing a headband wig. So the starting point for the cornrows is back here. I also have the ends tucked into this dome cap. Okay, so when it comes to the calf construction, this is how the wig looks in the front. So, as you can see, i joined these two pieces together. I used a two inch elastic band to make the headband of this unit and you'll see a little bit of my stitching, but once i put a headband on top of that, you won't be able to see it. I extended the headband all the way down to the bottom and i attached some velcro to the back. So you've got a little flap right here. That'S going to connect at the end and i'll be able to have a little bit more security with this unit. So, as you can see, there's velcro on the other side as well. Now i added the two combs that you see right here, one on this side and one on this side. There is also a third comb right here that came with the unit and then, of course, it has adjustable straps as well for a more secure fit alright. So with all that being said, i'm just gon na throw it on here all right. So what i'm gon na do first, is i'm gon na tuck, the combs under my dome cap, not so much into my scalp and i'm gon na do the same thing on the other side, all right, so i've got the two combs in the front end and I'M gon na focus on the comb in the back. Okay, all right, so the last thing i have to do is take these two velcro straps and connect them together all right. So this is a lot of hair, i'm just going to pin it to the side. Real quick, real, quick pin it to the side, i'm looking crazy right now. Okay, let me grab this velcro snap, okay cool! So now i've got the velcro in there and i'm just going to take these two clips out there. We go all right, make sure it's flat all right so so far. This is how the wig is looking now i am going to brush it out just a little bit with the kinkiness of this unit, although i did detangle and blow dry it. It'S still synthetic hair, so it's still going to have you know kinks in it, but i actually love the way it's coming out all right. So now all that's left is for me to go ahead and throw on a headband. Now i don't have an official headband. I just have some fabric that i cut off of an old dress that i cannot fit so i'm gon na wrap this around and i'm gon na tie it in the back. Okay, all right! So now i've got it tied in the back and i'm just checking in my mirror in my viewfinder to make sure everything is good. Okay, y'all! So now that i've been able to revamp this unit, try on this unit and show you that you can turn an ordinary wig into a half wig or halfway a headband wig. I can definitely say i'm glad that i decided to go through this process because for one revamping a wig is just a whole process in itself. It takes time, especially with a kinkier unit, and you have a lot of kinks and tangles. This wig had been sitting in my closet for like 10 months, so it was very matted and very tangled, and it was a whole process to get it to what you see right now. But looking at the finished result, i am not mad at the fact that it took so long because i know this is a wig that it that is going to stand the test of time. So i applied heat to it. You know i applied a bunch of products that i probably shouldn't have been applying it to it. To be honest, you know, but it definitely held its own, so you're going to have synthetic wigs that will last you. You know a couple months, maybe a month, a couple weeks with proper care and you know storing them in a good place. This one is going to be stored on a wig head and it should definitely still be able to. Last me at least a year all right, so that is my plan, and my goal for this unit is to make it last forever so yeah. When i initially purchased this wig, i knew i was going to do something different after the initial hairstyle. I just didn't know that it was going to be this. You know a headband wig that looks bomb amazing. Now you are going to have various styling options with this wig, i'm not going to style it in the video just because i don't want this video to be too long. But if i'm looking to do an updo with this unit, i am going to have to kind of fix up the back, because this is a do. It yourself project it's going to take a little bit of prep work just for me to get everything laying correctly. If i want to do an updo, however, you still have a bunch of styling options with this hair. So as long as you put in a little bit of work, you can definitely get whichever style you want to achieve alright. So i'm going to show you one of the go-to hairstyles that i do plan on doing right away, though, so, if you want to do, let's grab the hair all right. So if you want to do a ponytail like this, this is obviously possible. As you can see, the ponytail is really full and that's what i love the most and so as long as i you know can get a ponytail holder, which i wish i i wish. I had one right now but yeah. This is a look. This is really cute. Okay, so i am going to show you a quick length check just in case you are interested in seeing how long this unit is. Now i am five seven and a half okay. So this is how long it is on me. So let me get it ready. Okay, all right! So that's how long it is all right. So that's pretty much it guys if you have any questions, feel free to leave them down in the comment section below subscribe to my channel. If you haven't already - and i will see you guys in my next one bye guys - you


Comments
Mayah&Me TV: I am definitely going to try this . Especially since I learned that lace glue isn't the best for my skin. Once my skin is healed I will be wearing headband wigs for a growth journey. I'm excited to try it on my old wig
Kanyin’s Tv: Quick inspiration for you all - Remember that God placed you where you are at this exact moment for a reason. Your current struggles and challenges mean something. Whatever your going through , God loves you to much for it not to work out
Pretty Tonya 2: That’s what I’m talking about. Use what you got . I love that you revamped and old wig and used a piece of fabric from an old dress. Yes sis !
Elaine Royal: She has BEAUTIFUL BROWN skin! ❤
Rebecca Grabowski: Thank you so much. My headband wig came out BOMB
Valentine August: this was so great! thank you ❤️
Asha Linton-Lee: This is soooo smart! I’m about to save some money and slay in the process
Ann-Marie Joseph: Great video! I’ll definitely be trying this
charisse thompson: Love your video, probably the easiest and most efficient, especially for someone who can’t really sew! Quick question! When you made your cut, did you basically just cut off the frontal?
bumbleBzandjellybns Me: Thank you for uploading this. It was exactly what I was hoping id find
IshaMoy Williams: Love the quality of the video so much also I’m about to try to cut my frontal off and try this wish me luck
L’ Dougoux: That was awesome!.. I will be trying this.thanks!
Tonya Poole: Great video! Thank you for sharing!! I love your wig! Can you please post the link where to buy it?
Zemeka Williams: Wow pretty girl and great work!... Thisbwig actually madenyounlook younger! ❤
sacha may: You are a genius! And I am going to to this! Thank you
Chelle B: Beautiful
Real Talk: Ty so much for sharing cuz most wigs r way too big for my head swy I never wear them But if I can just cut about 1/4 of it I can probably wear it.
KeeKee: Wow, found this video very helpful and was definitely shocked when I recognized your face from middle school even though I first said "this girl look like Kendale" lol ☺
Mary J Flanagan: I don't have any wigs,but have been shopping on Mercari. They have new and used human hair wigs and I'm going to find a couple to use to try this! Thanks very much.
Pearl O: Hi how are you. Love this video. Are you cutting the lace part off when you parted them in two?
Belinda: best tutorial so far
Kayla Johnson: This is great did you cut the entire frontal off ?
Kelly J. Munroe: What's the best way to freshen the curls on a synthetic unit? I have three ready-to-go wigs...you just put them on your head like a bonnet. The curls are a bit tangled and some of the curls have gone lax.
A W: Do you absolutely have to cut the wig first? Where did u get elastic band and Velcro?
Dollhousexoxo: Love love love ❤️
J May: Did you hand stitch the elastic band or machine sew it? Did you get the elastic band in the sewing section of a craft store or at the beauty store?
Pretty Queen: Exactly the video dat am looking for thanks
Britney Jae: Could I do this with a closure wig?
Fay Rain: I. Will. Try. This... I. Thank. You. Very. Much.
Be Lit: Would have helped showing the cap structure before cutting and adding the band
Sweetlady1916: I have a big head, how I do make adjustments? Should I make the elastic band bigger or cut less off, when cutting the wig?
MyWay: Awesome
Deelkas Jones: I thought you was going to show how you made it smh click bait
sweet honey bee: And you have a closure frontal topper with the piece you cut off .
FleurRebelle: You could use that part u cut off to make a ponytail
Bethany R: you don’t need to cut the lace off right?? can i just sew the headband into the lace and that way make the wig longer
Jada B: U didnt show us how u actually sewed the band on u just told us..i wanted to see how u sewed it on..
Lois Sally: What was that black rolll to headband. Where can you purchase at
MyWay: Nice Ankh