Diy || How To Make A Lace Frontal Crochet Wig With Braiding Hair
- Posted on 22 August, 2020
- Full Lace Wig
- By Anonymous
How to make a lace frontal wig using kanekalon braiding hair
Please watch in 1080p for high quality
Items used
Latch hook
Wig cap
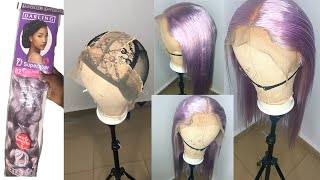
Purple braiding hair
Instagram @www.instagram.com/__maameabena__
Snapchat @maame.abena
Facebook page @maame abena
Business Pages
Instagram @www.instagram.com/evyglow_makeover
@www.instagram.com/evyglow_hair
Email: [email protected]
For sponsorship/product review
Email: [email protected]
#crochetwig #crochetfrontalwig
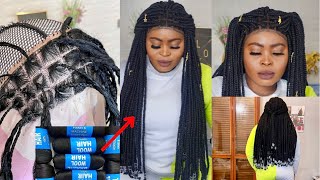
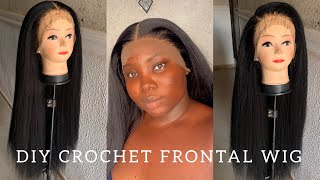
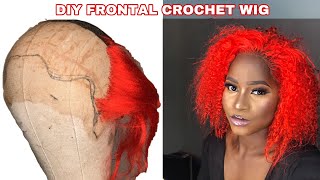
Hey guys welcome back to yet another tutorial. If you're new here make sure you subscribe to this channel, my name is mommy abner. I make hair videos and more diy videos. So please stick with me in today's tutorial i'll, be showing you guys how to achieve this. Crochet frontal wig cap, so if you are interested, then keep watching so, let's run through the things that we'll be needing for this towel. You first of all need your hair, any hair. Would you i just found this on the market. It'S 35 inches here it comes in four in a pack. The hair feels so soft, like really really soft, but i don't know if it's it will be good for heat. I have no idea, but we would see you need a crochet hook, scissors and, of course, a rattle comb. So this is me showing you how the wig cap is. I just went ahead to sew my enclosure knife on this wig cap. So this is me showing you how soft and flexible the hair is so before we start, i'm just going to go ahead to remove the rubber band that came with the hair, and this is me showing you how i section the hair to crochet. If you've been on this channel, you know how you would know how to do this, because i have a lot of video on my channel on how i do crochet wig caps is basically simple. First of all, you need to make sure that your latch hook or your crochet hook is opened slide the latch hook through the nets. As you have seen, it could be one. It could be two. It could be three depending on how you want it and then attach your hair when you attach your hair close the latch hook and then pull it through and then, when you pull it through with the loop on the other side, tie it up to make a Knot just one and you are good to go - no need to tie it twice because the hair is not slippery. I'M going to go ahead to repeat the process till i get to the top. So let me first of all tell you um. The struggles i went through was filming this video or was doing this hair first of all, with this crochet cap or weak hair that i use, i have never used it before and i'm not really a fan of these type of caps. I always prefer stocking caps. If you watch my videos, you would know, i always use talking cup, but i was like. Let me just try this particular one, because i've been seeing people using it and um. It'S not good, like after the video the card doesn't fit on my head. I have a very very small head and these type of caps don't really fit my head, so i'm just letting you guys know if you have really small head. Please don't use these type of caps because it won't fit stocking caps will be perfect for you. Okay, so when that was done, this is how the hair looks like, as you may see like it's so long and nice, so moving on, i'm just going to go ahead to repeat the process shoot so that i get to the top and then, when i get To the lace closure side i'll show you guys how i was able to do that either so so just enjoy the video do so now. Moving on to the closure side, as you may see, i've already started doing the closure side already or the frontal side. Already. My knots look kind of huge and versatile right here, because i'm not using a ventilation or ventilating paint, i'm using a normal crochet hook, but in a smaller size. So it's not able to pick the hose um one like it should with a ventilating needle. I don't know if you understand what i'm trying to say and also with the closure nets that i'm using it's not good at all. Like this whole video, i like, i wasn't expecting so many things to happen, but such as life, so i just had to make my way through. I tried to pick the holes in the hair like two holes to two strands of hair, but when i did that the neck started ripping off, you may see, i have a lot of holes in between the nets. I just had to make my way around it to kind of make it visible you see. So if you have a ventilating needle try to loop the hair in one or twice, that would be perfect, but with this i wasn't really counting now, just picking it in smaller section. That is how come my knots are huge like this, but anyways. It'S a cheap hair, it's a crochet hair for this particular hair. It cost me 25 seconds for the pack, that's about four dollars, so it's really cheap. So i'm not really bothered, but just that the time that i wasted on this hair, it took me a whole month to finish this ventilation side. Yes, it takes a long process if it was to be closure just at the front. That would have been easy, but this is the whole frontal ear to ear 13x4. So it took me a whole month. So if you are doing this - and you know um, you would want to wait for a long time. Please try and get human hair or better still, conical, on hair. This hair is not conical on, so it will not. Last you like a kanekalon hair would so here i was halfway done with my ventilation and at this point i was really tired, so i just had to pause the video and finish offline, so yeah. So here i was done with the whole crochet ventilation whatever, and i was so happy. This is how it came out, even though the wig doesn't really fit properly on my head, but i'll show you pictures of when i wore it. The next step is to dip the hair in hot water, because i didn't want to spend time in you know straightening this hair, it's pretty long, and it's really full. I didn't want to straighten it at all. A subscriber actually told me to do this dip. My hair in hot water, so this is my first time trying it so, let's see how the results will come out, i'm just pouring the water on the hair and then i'm going to dip it in for some few minutes and then bring it out once the Hair was dry. This is how it's looking like. I'M not really mad, though the hair looks really nice, so um i'll, give it like a 60 out of 100 okay. Thank you so much for watching. If you found this video helpful, please give this video a huge thumbs up and i'll catch. You guys all in my next tutorial, bye,


Comments
Karen Anderson: You are awesome!!
Nasa Emerald: Nice video
Bernice Kwofie: Where did purchase the lace material for the frontal in Ghana
Larissa Zogo: Good job sister . Go ahead
Priscilla Abaale:
MsNike A: It look good
thandi witola: Were did u get wig cap did it cane with lace or not
Fatima Abdallah: Pls MA what's the durability of this type of hair
Lawrencia Okantey: Very nice.... where did you get the hair?
Braids Queen: Hey beauties, this is BRAIDS QUEEN OFFICIAL ACCOUNT. And if you guys have any questions about wigs, leave us a message, we`ll reply to you ASAP~!
Khadija Mahmud: Please haw much is the price
Akua Pokuaa: Hello sis, please the lace how many for 25gh...Thank you
Vital Ango: Félicitation
quin bernice hair: Where can I see such a strong lace net d one I bought was tearing