Diy Straight Crochet Wig Using Braiding Hair /No Closure/No Hot Water
- Posted on 09 February, 2022
- Full Lace Wig
- By Anonymous
Hey Loves,
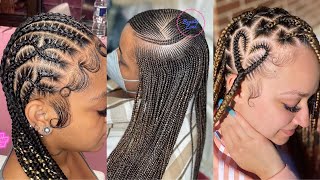
Here's a detailed tutorial on how to do a curly crochet wig using braiding hair
It's a DIY loves
Please dont forget to like,share and subscribe
I LOVE YOU
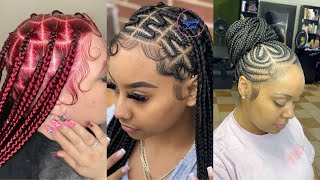
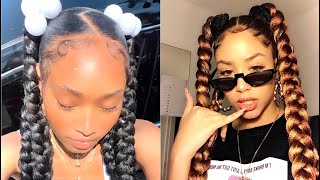
Afro wig, afro, wig, bangs, fringe,Bun,naturalhairstyle, 4minuteshairstyle, crochet wig, curly crochet wig, outre, expression hair extension, braiding hair
MY SOCIAL MEDIA HANDLES
[ ] INSTAGRAM @Simplyalbie_
[ ] TIKTOK @Simply Albie
Crochet, curl, synthetichair,braiding,curls,
More videos
DIY Bone Straight Using Braiding hair
Diy blunt cut using braiding hair
How to get smooth and nice lips
Lace closure using braiding hair
DIY bone straight using braiding hair
How to easily do your eyebrows
DIY curly crochet wig using braiding hair
How to Tuck and grip roots
Sleek down fluffy ponytail on 4c hair
How to gain weight in the right places for skinny girls
Curly crochet wig using Braiding Hair/How to curl braids
Easy natural Hairstyle
Men braids
How to Pre Stretch Natural hair without heat.PART 1
Products for long healthy hair
#braidinghair #xpression #outre #crochetwig #bonestraight #straight
Hey laughs, welcome to my youtube channel, so it's our bedside here again to my returning subscribers i say: welcome back to the channel and if you are new here, hello, i'm all better or you can just simply call me i'll, be so in today's video. I'M going to be showing you guys how i made this beautiful straight crochet wig using braiding hair. I know you guys are going to enjoy this video. I know just look at how my girl is just laying the way, so, if you're interested then keep on watching laughs, so these are just the items i'm gon na be using for this week. So first i just went ahead to cut the braiding hair into three different sections and then, after cutting it into three, i just stretch each of them. So right after stretching the hair, i just started crocheting, but first i placed my adjustable wig net on my mannequin head and then secured it onto the mannequin head with some t-pins, after which i started crocheting. So with the crocheting. I just take some section of hair. Some little section of hair and then secure a family onto the adjustable wig net, just like this, so just take some section of hair, just some little section of hair and then crochet firmly onto the adjustable redness and then after doing that, just tie it like this. To secure your love just to find somewhere that finally feels like home, i hate all this overthinking, the more i swim, no more! I'M thinking take me through a world of silver. Take me somewhere of unfamiliar okay, so, as you guys can see, the lace or net in the front has very little holes in it. It'S so fragile. So when crocheting this pad, i made sure i took very very little section of hair very, very little because if you take it in big sessions, you might end up tearing the net and don't want that. So i take very little section of hair, sorry and then crochet it onto the knits just like this. So all i did was to repeat this process throughout okay. So with this parts you can see that i'm applying a little bit of concealer here. This is to help me see exactly what i'm doing to like create a line to help. You see exactly what i'm doing, because you know my mannequin head has almost the same color as the hair neck, so i couldn't really see so i just used that as a guide to to continue working, so here, just like i did previously when i got to The the front part just crochet gently crochet gently to make sure you don't tear the hair net, i'm so much in love. With this final look, so your will should look like this. When you are done, the closure part should be intact and then just like this and the whole wig should look nicely and filled just like this. So here i'm just applying some hair serum to just give it a little bit of shine and then some silkiness. You know what i'm saying: yes, just give it a little bit of shine and a little bit of silkness here. So this is all i wanted to show you guys today. So please please, please, please. If you enjoyed this video, please don't forget to give it a big thumbs up comment in the comment section down below. Like i always say, i reply to every comment, so please leave suggestions or questions for me in the comment section down below and i'll definitely respond to all of them. I'Ll see you guys in my next video i love you mwah bye, you

Comments
Ulrike Höckmyre: This is really amazing! I love the color too
michie jewel: This is so nice
Life with Efua: The model is so beautiful..hair on fire
Arivannia Inland: Wow I lovè that colour. Well knitted Albie.
Vanessa: Another bone straight
Asha Rashid: Stŕaight weaves never disappoint keep up
Day Light: This is beautiful are you selling it I will like to buy
Richard wuaku: