How To: Crochet Braids For Beginners! (Step By Step)
- Posted on 01 October, 2017
- Full Lace Wig
- By Anonymous
How To Start & Grow Your Online Hair Extensions Business Course!
CLICK HERE! http://www.MrsRutters.com/YTCOURSE
CROCHET BRAIDS BRAIDING HAIR AND SUPPLIES
3 packs of Ringlet Wand Curl JAMAICAN BOUNCE Crochet Hair (Color #T30) http://amzn.to/2yQuBqn
Rat Tail Comb http://amzn.to/2iJlL6o
Hair Cutting Shears http://amzn.to/2hVVg09
DooGro Hair Growth Formula http://amzn.to/2xPOWxy
Crochet Braids is one of the most classic protective hairstyle for women with natural hair! This braid hairstyle also works perfectly for transitioning hair and relaxed hair. If you never did this crochet braid hairstyle on your own hair before then this is the perfect hair tutorial for you! I will show you step by step exactly how to do your crochet braid pattern on your own hair and then I will show you how to crochet latch hook your curly hair onto your braid pattern. Crochet Box Braids are a little different from Crochet Braids because with box braid you have to crochet them onto your braid pattern base while traditional crochet braids done with loose hair is latched on your braid pattern instead. This style usually takes a couple of hours to do but if you are beginner, this is the style may take you a day just in case it takes you a lot longer to do. Subscribe to this YouTube channel and TURN ON BELL NOTIFICATIONS to watch more beginner friendly hair tutorials so that you can learn how to do your hair yourself! Comment down below your video requests so that Breanna can know which hair tutorials you want her to do next!
Below are some common questions Breanna gets asked about this hairstyle;
How long does it take to do Crochet Braids? It can take you a couple of hours or longer to install depending on your skill level.
Do Crochet Braids Hurt? Crochet braids do not hurt but if your braid pattern is too tight then it will hurt and cause you unnecessary hair loss and scalp irritation.
What hair is best for Crochet Braids? Using any hair from the FreeTress Braiding Hair line are great options to use but for a more kinky look, I suggest kanekalon or Marley braiding hair.
Do I need to have natural hair to do Crochet Braids? No, you can do this hairstyle with relaxed, transitioning or natural hair!
Will Crochet Braids work for short hair? Yes, as long as your hair is long enough to be cornrow braiding then you can achieve this crochet hairstyle.
How much hair do I need for Crochet Braids? You need about 2 to 4 packages of braiding or crochet hair. I used 2 1/2 packs of kinky curly hair that I ordered off Amazon.com. You can use as much hair as you like but remember that using over 2 bundles will cause your hair to look extremely full so it all depends on the desired look you want to achieve with your hair.
CHECK OUT MY NEW HAIR TUTORIALS YOU MAY HAVE MISSED!
BOX BRAIDS TO THE FLOOR! https://youtu.be/pnJNT_7n92E
Micro Braids FOR BEGINNERS! https://youtu.be/cigPnhSKwVc
TREE Braid Cornrows For Beginners! https://youtu.be/ZMi96-ikUAY
25 FACTS ABOUT ME TAG!!! https://www.youtube.com/watch?v=1-Nf-...
Senegalese Twists CORNROWS FOR BEGINNERS! https://youtu.be/4bcHBFBC4PM
Buy My Books, DVDs, and T-Shirts At
Website http://www.Howtoblackhair.com
Personal Instagram: http://www.instagram.com/BreannaRutter...
Facebook: http://www.Facebook.com/OfficialBrean...
Thanks For Watching!
DISCLAIMER: All suggestions, tips, prizes, techniques and advice given are for informational purposes only and should be used at your discretion and best judgment. I highly recommend conducting strand tests when trying or using new products, hair appliances and product mixes. I am not responsible or liable for adverse or undesirable effects including hair loss, hair breakage or other hair/scalp/skin/body damage as a direct or indirect result of the suggestions, tips, prizes, techniques and/or advice given.
FTC: I am not representing, being paid by, or endorsing any of the product brands in this video & I purchased everything with my own money - UNLESS OTHERWISE STATED in video/blog content. There are links to products that might be helpful based on the content of this video/blog. Each of your purchases via our Amazon affiliate links supports our cause at no additional cost to you.
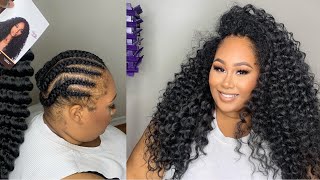
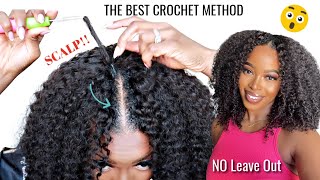
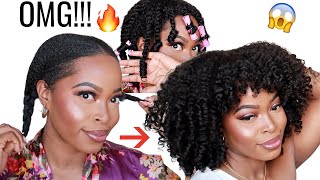
Hey everybody I just launched my brand new course called how to start and grow your online hair extension business check out the link below to get started. Hey, ladies, this is Brianna from howtoblackhair.com and in this tutorial I'm going to teach you how I achieved this gorgeous natural, beautiful look by doing the crochet hairstyle. So this, of course, is the original crochet style. Besides doing the braided crochet, but I'm gon na show you how to actually do this look on your own hair. You only need a few supplies to do this. Look and some of these supplies are optional, so make sure that you have your hair ready so that you can begin looping it onto your braids and I use three packs of pre crocheted hair now to begin. This is your braid pattern. You want to do to achieve this exact. Look, you want those two braids to cross and go all the way down to the back, and then you wants to begin braiding a way from those two braids making sure to add the tail. In into the very next break so that you can create a braid pattern that looks like this, so every time you braid make sure to grab the tail end of the previous braid and put it into that braid. So the tail in a brave one goes into two in the tail in a braid. Two goes into three and you keep doing the same thing until you reach the back to have one tail end of a Brady. What you want to do is bring your tail end of a braid up, because that's when you're going to begin stitching it down to your braid pattern, so cut up a little bit of weaving thread and then you're gon na take a curve or straight needle whichever You prefer you're gon na put your thread through the eye of the needle, bring those two pieces together and simply form a knot. It is so easy threading needles, but a lot of you asked me in a comment section: how to actually do it, so I'm showing you a demonstration of how simple and easy this is, and you only need one meal to stitch down that one braid you have In the bank, so you just cut off the little bit of thread at the top. You make sure to tighten your nuts and there you go. That'S simply how you thread a needle, so now we're going to begin stitching that braid and I'm gon na start. Why? I just pointed you want to put your needle through part of your braid, put it underneath the braid on your scalp and then begin doing the stitching technique to actually stitch down your braid. The switching technique that I like to do is I like to actually grab the thread, wrap it twice around the needle and then pull the needle through or you can wrap it twice around. Your fingers insert the needle and pull the needle through. The only thing you need to do is make sure, like I stated you just wrap it around twice, whether you do it around your fingers or the needle, and it's simply extremely easy to stitch it down. This is the same stitching technique. I do when I'm actually doing a Sully. So now, once you secure that last knot, you just cut off the remaining thread and at this point this is optional. But what I'm doing is I'm actually greasing my scalp or you may refer to this as oiling your scalp, so I'm using a hair growth oil to actually put on my part before I begin crocheting now this is the pre looped crochet hair that I've purchased on Amazon, so if you want to use this exact here, check out the description box below to a link so that you can purchase it for yourself, so what I'm going to do is show you how I prep it. So what I do is, I grab one of the coils and I actually make sure that I unravel it all the way out and then once I do that I gently separate it into two parts. So, as you can see here, this is one of the pieces that I just took from it, and I only divide it into two now. If you divide it any further, it will make your look more frizzy or afro like so it's up to you, the looking on Tucci, I already stitched it in one row and I'm going to show you an example of how you want to actually space each piece. So, as you can see here, it's about a finger with space in the very back when you're crocheting, the very back of your head, it's very important that you space it because it is to give very full very quickly. You want to make sure you're closer near the top with your pieces, you add, but further in the back and I'm gon na show you how to do that to pro shut. Your hair on you want to grab one of your locks and you want to roll it very tight at the point where you're going to crochet it. So you have no loose hairs that stick out and get tangled, and this is how tight you want to form it around your fingers. Now. What we're gon na do is make sure that we go two finger spaces at a time. At the very back of our hand, this is extremely important if you don't want your look to be too thick, but full enough. So now we're gon na insert the crochet latch and then we're gon na hook, the hair onto it and we're gon na close the latch and then pull it through the brain everytime. You insert your latch, make sure it's open when you pull it back through the brain, make sure it's closed and you just loop the tail end of your section once through its loop at the top, and that's how you want to actually tighten your hair in the Back once we get to the top, it's gon na be a little bit different, but this is how you're going to do it for the most part. So now, with the second section, we're doing the same thing and make sure that you're about two finger spaces away from your previous section. You can go underneath both of these braids, that you stitch loop, your hair on and then close the latch. And then, when you pull it through, all you do is insert your fingers inside of the loop to grab the two tail in pieces, and then you just pull it and tighten it by separating the two sections to make sure it's tight on your brace as you Can see we're already getting pretty full, but you want to continue to space and the look will come out just fine. So, as you can see here, you want to make sure you go about that distance as you're in the back until you get to the top. So this is how your hair should look so far. So now, at this point, I've already crocheted most of my hair and I'm just lifting it up to show you how it looks on the side as well as the back, because it's looking short, I am going to be wearing this down. But if you had a longer look with this technique, it you could wear it up into a ponytail if you so desire. So now that we're near the top, you still want to make sure that you coil the hair up tighter. So that way you can loop. It on, but the sections at the top will be a little bit smaller and it will be about a finger space width away from one another, so you loop, the hair on, as I previously showed you and every time you go back through the braid. You close. The latch insert your fingers through and then grab the two tail is and pull them together. Now you continue to actually tighten your not exactly like this for most of the part, but as soon as you get to the very top, we're gon na do a slightly different technique. So now I'm going to show you one more time since we're at the very top of this great and you're going to do the same technique, but you want to get as close to the top as possible for a very seamless look. So you just insert your hair through, and then you insert your fingers through the loop to grab the to tell in pieces to actually tighten it. Inform your knot. Make sure that when you're near the top, the spacing of your sections is about a finger width apart. But as you can see, it looks extremely close together because the hair is so voluminous because it has so much volume. It looks like I literally stitched this side-by-side, but in reality I did about a finger space width apart. So now, at the very back, you're gon na do the same thing because you're at the top of your head, it gives the illusion that your hair is not extremely thick at the top, but it's full enough to look very natural. The problem with a lot of crochet styles, that look unnatural, is that the chunks of hair are too big and also the chunks of hair are stitches too close together, as you near the top make sure that each of your pieces of hair that you're adding is Actually smaller in comparison, so the pieces of hair, then you add it in the back. So now we have our two breads left at our part in this. My friends is the most important part of the style, because it ties and look together perfectly when you loop, your hair through you, want to make sure that you only grab one toe and of your lap and when you pull it through, you create a knot while Leaving the other half outside of the night, this is exactly how you want to stitch your hair and your part, because this is how you do the invisible roots technique. So I'm going to continue to teach you exactly how to achieve this. Look because it's extremely easy! Now, when you loop your hands through make sure you do a slight turn so that it helps to enhance the tightness of the knot in your part, you don't have to do that throughout the rest of your style, but you definitely want to do it right here. At the top, now that most of it's done, we have a little section left and I'm going to demonstrate how you want to do it on the other side. Now, maybe just a little bit tricky depending on which hand is dominant for you. For me, it's my right hand, so when I loop it on the left side of my hand, it's just a little bit tricky. So what I do is, I do the same exact thing, but you may just go a little bit slower to make sure that you don't cause any tangling effect, because you want to make sure that you're always going underneath the braid near your part, so always come In going towards the part of your head, not away from the part, so that way, it helps your hair to lay perfectly for this side. So now on this last section here make sure to go as close to your hairline as possible, because this makes it look extremely seamless, because if you don't actually do this part, you will see some of your hair and look it's blending. So it's very important that you make sure to get as close to your hairline all the way you near the top of your park. So that way you can continue the invisible group technique tie in your lips. So, as you can see, this is how it looks once I finish doing that invisible root technique near my part as I've added all the hair. On to my style, I used about two and a half bundles of the pre crocheting hair. For this look so you're gon na need some haircutting scissors, or you can also use thinning shears if you want to actually thin out the hair. But I love the thickness of this look because it looks so beautiful and natural, so I'm just trimming up any frizzy or loose ends that doesn't quite tie in as well and I'm also slightly shaping it as I cut. So I'm not setting off any length. I'M just cleaning up the shape that it naturally has after trimming it up. I like to go ahead and fluff out the hair a little bit so that it looks more tied in together and I'm just checking the other side too, to make sure it's just right for my lips. Thank you so much for watching my crochet braids hairstyle. So, ladies, I want you to rock this look and wear all types of colors and curl patterns to see what you like this and if you enjoyed this video, make sure to give it a thumbs up and leave a comment down below. Also, by the way, I'm almost at 500,000 subscribers so make sure to subscribe and turn on bail notifications to see my next video, hey everybody I just launched. My brand new course called how to start and grow your online hair extension business check out the link below to get started.
Comments
Breanna Rutter: PSSST...READ ME You should join my course YouTube University so I can teach you how to succeed on YouTube. You can purchase it here while its still on sale! https://www.udemy.com/course/youtubeuniversity/
IAmEstellaHeart: I’ve watched 100s of videos and I think your is one of the most professional, comprehensive and well explained of them all. Great work
Rebecca (LadyPhenomenal): This video was awesome! I did my first crochet braiding by myself. It's a look I've been wanting to do for a while but didn't know it was so simple. I plan to try different hair types and color for my next look. Thank you!
Paulette dowdie: Thank you so much for those detailed instructions! I figured o would try it myself this time so I already had all the supplies, just finished braiding hair and found this video before I started ! I can’t wait to see my finished look!
Shamequa Obee: This is the most informative video I’ve ever watched on crocheting! I feel more confident going into my style tomorrow!
Niki Couch: Beautiful style Breanna! Thank you for doing your tutorials it is truly helpful!
LocStar Revolution: I loved this video! I can’t wait to try my first crochet style!
Chriscile Patterson: Thank you for being clear and concise! Very well explained and easy to follow! You LITERALLY saved my hair lol...Got my hair done and didn't notice some missing spots that needed to be filled. I was able to do it with ease on my own thanks to you! You now have a new follower Queen❤
Schuyler Buckler: You explained everything so well, literally the most detailed tutorial I’ve ever seen! New subscriber!!
Beverlee Tyler: Breanna your tutorials are excellent! Love it....keep doing what you do! Thanks for your simple instructions on crochet braids for beginners!
Abbigail: Thank you so much for the illustration, very easy braid pattern, Thank you for also sharing the tools and an easy example for crocheting. Everything was on point. Beautiful style, Beautiful personality, Just wonderful❤️
Sheila Clark: Thank you Thank you Thank you for CLEAR, Precise directions and leaving out all the nonsense!!!! EXCELLENT! and your hair looks Gorgeous
Kelly Cooper: This is an awesome tutorial. I really like your style of teaching. I feel totally ready to take this on now.
Shannon Weston-Jossie: This is such a great tutorial! Love your step by step process! THANK YOU SO MUCH!
MRS KELLY: Perfect technique, neat cornrows,great style teaching! Im impressed,now i can do thisvon my clients. Thanks for your videos,keep up the great styles!
Cassie E: Love this!! Hair on point, everything looks neat. Is pretty simple how you made it look. Thanks for sharing your stuff!!
Robin LaCharl: I’m going to be doing my friends hair tomorrow. I’ve watched your training video several times. I’ve taken notes and even drawn myself some pictures as reminders. Thanks for the easy instructions.
Dakota Rey: Thank you for such a detailed video. I have two left hands when it comes to braiding my hair. I want to learn everything to use crochets once in awhile and rock my hair. Your video is high quality and it makes sense to me what I need to do. Thank you girl!
Wontonita: Thank you SO much for showing me how to stitch my hair at 2:07! I've NEVER had a sew-in done before, and this will be my second time crocheting my hair, and the VERY FIRST TIME doing it myself. How confident and calm you are has got me brave enough to start! Happy 2020!
Dark Rose: You are my hero!!! I was almost in tears! This was my first time and I didn't know I what I was doing, but I wanted to do it myself. Thaaaaaaank you!!!!!
Soncherae W: This was an awesome step by step tutorial! I had no idea how to crochet and you did great with explaining!! Thank you
SanSan 601: I used your instructions and my crochet style turned out really good!! Thanks for sharing!!
yalllikeme1: I’m definitely going to try this for my daughters and myself! You are awesome and professional!!
Hip Hop Head: Thank you! Best tutorial that I've seen so far. You definitely were straight to the point and made it look simple
G J: THANK YOU FOR THE PERFECT TUTORIAL! I am a beginner and I have used your Tuts and I am very greatful for your ability to teach and share your perfection. You are very wonderful and I am so proud of you as well as your ability to get it all done to share.Gee
Ijay Alize: This has to be the best video I've watched so far you've made it look so easy. I'm definitely going to try and do my own hair. Thanks
Naturally Neka: New subbie here!!! You were absolutely precise on every detail. I believe I have it for myself. Thank you girl
Zahra Hyman: Nice ! Now I just have to figure out how to cornrow my own hair ! Thank you for doing this tutorial !
YourGirlSudanny: Love the finished results
SetApart RDB: Love this!!! Thanks for sharing, I was looking for this for awhile
Godd3ss_Gam3r: Baby you did this look!!! And you are an amazing instructor you explained things in detail perfectly! Thank you so much Queen
Flawlessenvy Beauty: You always do an amazing job of explaining your techniques!
Omo Emma: May God continue to increase you for this beautiful video. I bought crochet braids to make for my little princess without having any idea on how to make it. With this video and especially having a good idea on how to braid I must say I am good to go. Once again thank you very much!
Staylor1913: I love it. Very easy to follow! Thank you
Denise: Most simplistic hair crochet video on YT. Thank you so much for this easy to follow tutorial without all the ridiculous extras. I will definitely be coming back to your channel.
Morenah morenah: Você explica muito bem , meus parabéns!
Angeniene Mitchell: Thank you so much for that tutorial it was superb! I now know how to crochet and create a part!
Special K: Thanks for this! Trying it for the first time tonight with my homegirl and it is looking FABULOUS!!!
Denesha Simmonds: I was struggling for hours then came across your video! Thank you so much. I'm doing faux locks but in all the other videos nobody explains how not to get the needle snagged on the hair and you did! Thank u
celenechix81: Love it! Will be trying this style very soon!
Sunflower4ever: Thankyou ! I love how clear and simple your able to show how to do styles!
RoseGold Flower: Thank you so much for this easy tutorial and the tip for the invisible part. Looking forward to trying it out
Eileen Stokes: I love how you explain it step by step,just what we need.Thanks☺
Fred Mouling: Hi my name is fred and I want to thanks for your video on crochet I did my daughters hair and it is perfect thank you so much
Women DIY Home Improvement: Oh my goodness! this video is amazing. Thank you so much for this, I am going to try this hair style. Your a great teacher, In addition the hair you are using and the style is both so beautiful. Once again thanks a lot gorgeous queen.
Regina Sanders: Thank you!! I'm about to try and do it myself..this is a great tutorial and your great teacher!!❤❤
Adventurous Life Squad: Great tutorial video. The way you braided your own hair was very unique and so simple to do. I love it. The hair color is so lovely.
Anissa Otero: Thank you for this and you made it look so easy! You look amazing!
lbplease: This is an excellent tutorial, and you are beautiful!! Thank you for sharing your technique
Bare Essence: New sub... I have now started crocheting my own hair using your methods ... love your videos ... u make it easy... thank you!! ❤️
S8mone Perch: Omg.Believe me when I tell you, EXCELLENT tutorial.So well explained.Thank you so much
B D: White woman here- thanks for making these videos so I can learn about how you achieve this beautiful hairstyle without asking friends ignorant or annoying questions. I’m a teacher too and watching videos about different braiding techniques helps me understand all the work that some of my students and their families put into having beautiful hair.
Monique Gui: Hey Breanna, how long did that take you from braid to finish? I love your style and very simple and easy to do. Thank you for this.
1slandgirl Caribbean: Thank you for posting this. My friend was taking down her crochet braids, to get them redone. I didn't know how they were put in until I saw you video. Excellent job. Yours looked great!
Beatrice Bolger: The instructions are so easy love it
Trish R: Luv this! It looks super easy
Lucky Me: Thank you so much for this, it was my first time trying my own hair for the first time and it was perfect. Thank you!!!
Jacqueline Jones: Thank you for making it look so easy!!!
Judith Lolomari: Hi Rutter, I'm impressed by your step by step tutorial and I'm willing yo use my sister's hair to try. Infact I feel like a pro already. Can't wait to try. Thank you so much. This lockdown is bringing my inner creativity.
Kim Ersde: Good job! Thanks for the clear detailed instructions.
Carol Cook: I’m not a hair weave wearer yet, I know I’m late but after I watched this video I’ve become inspired to try doing some crochet braids on myself. I appreciate the inspiration, love your work.
eboneya1: Thank you for the step by step and the invisible part look. You’re awesome.
Nicole Andrews: Thank you so much for this video you're a great educator!! I'm feeling confident that I can do this. Usually I'm convinced DIY styles are only for professionals and I'm no where close when it comes to doing my own hair lol
Qkeen J: This is the best YouTube tutorial I have seen, and I watched several of them! Thank you for this.
Tori Kym: This is the most detailed video I've watched on doing crochet braids. Thank you!!
Mila Sanchi: You have such a pretty face, flawless skin and a great smile. Now I have to go out and buy some hair and see if I can come close to creating that style. I love it. And the hair color matches your complexion beautifully. It's always a pleasure watching your videos. Keep up the great work.
Lilley Smith: Brianna thank you so very much. I've braided my hair from age 16 and I'm 61 now still braiding my hair. I've always wondered how crocheting hair was done you may look so easy again Brianna thank you so very much for this video I did subscribe and I enjoyed it tremendously.
Marjorie Coleman: Best how to video for crochet! I just did a crochet style on my hair last night. I will try the technique for the front next time I crochet. Your crochet style came out very nice and you're beautiful!❤️
Jamie Bennett: This video and demonstration of this technique is so well done!!
Simply Shuntell: I will be trying this tomorrow and I hope comes out right. Thanks for teaching me how to crochet.
Cynthia McKnight: Wow! By the end of your video, I felt totally confident that I could do this! Your teaching style is great, instruction, demonstration and explanations...thank you...will come back to let you know ow how I did!
Constance C. Barton: Beautifully and Professionally done!
Jane D.: Amazing job!!! Love your hairstyle!
cawyjad: Thank you for these clear and comprehensive instructions. I’m going to try it!
Melissa Grimes: I really enjoyed this video! So informative and extremely detailed! You made it look so easy! I'm definitely gonna try this. Thanks so much for sharing!
KemZi: Amazing! This was very clear and encouraging. I also love your nails! Thank you!
Virgo World 08: Great video This really helped me out a lot!
Price CHERYl: You always makes things so easy to understand.Thanks
Dejah Vu: Fantastic professional tutorial, so good I saved it for when I use this hair. Thank you for sharing
Aline Santiago: Adorei! Vou fazer!!!
Andrea J: Very detailed and a great tutorial.
Rain: Thanks very much!! Explained and demonstrated so well!!
Bridget Steele: I have never subscribed to any channel but I had to subscribe to yours. You did a wonderful job. Plus the lighting and other production elements were great! Thanks for taking the time to make this and keep up the hard work.
Melissa Copeland: Just beautiful...Awesome job
AL: Thank you very easy to follow, not too much info just enough! Thanks great job!!
Van R: I love the braid pattern!
Rijan Enahoro: Very detailed and explicit video. Will definitely try take up your tips and get back to you on my, hopefully, success story! Congrats on the number of viewers you now have. Well deserved!
Momma Boss: Well said and Well Done. I'm coming out my weave. I learn through you the invisible part. Thanks!
Darlene Jones: Absolutely gorgeous. That color matches your roots so well, it looks very, very natural. Good job dearie
xxmamaxxable: Excellent! This is very helpful, thank you!
Tashay Corprew: I did something similar to this last year never knew there was another way to tie it been doing it wrong thanks for sharing this video now I know how to do the right way
qtbeddecor: Welcome!!!! You really detailed this method, and you nailed that "invisible part"!!!!!!! xoxoxoxoxoxo
Exotic1288: QUEEN YOU ALWAYS HAVE BEAUTIFUL AND INFORMATIVE VIDEOS. I WAS SEARCHING FOR A VIDEO ON THIS BOB CROCHET STYLE AND I LOVE IT. THIS IS EXACTLY WHAT I WAS LOOKING FOR. I ALWAYS LEARN NEW TECHNIQUES FROM YOU. SO GLAD I FOUND IT. ANYONE WHO DISLIKE ANY OF YOUR VIDEOS DON'T KNOW GREAT TALENT WHEN THEY SEE IT. KEEP EXPOSING YOUR GIFT SWEETIE AND STAY BEAUTIFUL!
kim Y: finally a step by step that gets to the point you make it so effortless think i will try this asap thank you
Patricia Clayton: Love it!!!Thank you very much it was very helpful!!
Machelle Masters: LOVELY!!!! love the color you've always done great work. I'll continue to follow you Bre. Keep them coming!!!
Ebony Lee: Very beautifully done ✅
Idonhadenuff: You are an amazing teacher. Thank you so much for hooking us up.
Blessed Beyond: You make it so easy! I love it
Candy Boayue: Thanks for sharing. This tutorial has been one of the most informational on YouTube !!