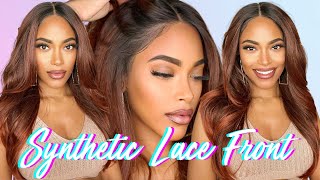
Curly Crochet Wig With Lace Part Tutorial | Jasmine Defined
- Posted on 07 May, 2018
- Full Lace Wig
- By Anonymous
Curly Crochet Wig with Lace Part Tutorial | Jasmine Defined
**Expand for more info!**
Products Used:
- Freetress Deep Wave Crochet Hair (2 Packs, Color 4): https://amzn.to/2I2vfFB
- Freetress Lace Part Crochet Wig Cap: https://amzn.to/2rrZw9J
- Crochet Hook: https://amzn.to/2wnjyru
- Ventilating Needle: https://amzn.to/2KIgqK7
- Canvas Mannequin Head: https://amzn.to/2IiMRAm
- Mannequin Head Stand: https://amzn.to/2I4OrT7
Subscribe!: http://goo.gl/W8NrwM
▬▬▬▬▬▬▬▬▬▬▬▬▬▬▬▬▬▬▬▬▬▬▬▬▬▬▬▬▬▬▬
Opening Music by Cheyenne - https://thmatc.co/?l=FDAC03C5
Featured Song: LAKEY INSPIRED - Island (Vlog No Copyright Music) Music provided by Vlog No Copyright Music. Video Link: https://youtu.be/MCZEEJJ1ZEQ
▬▬▬▬▬▬▬▬▬▬▬▬▬▬▬▬▬▬▬▬▬▬▬▬▬▬▬▬▬▬▬
Instagram: www.instagram.com/JasmineDefined
Snapchat: WhoIsJasmine1
Facebook: https://www.facebook.com/JasmineDefine...
Twitter: https://twitter.com/JasmineDefined
Contact me: [email protected]
▬▬▬▬▬▬▬▬▬▬▬▬▬▬▬▬▬▬▬▬▬▬▬▬▬▬▬▬▬▬▬
*Popular videos*
Crochet Faux Locs: https://youtu.be/weOsux_qlRI
Middle Part Bob Sew-in Tutorial: https://youtu.be/0pQ9LADHiXk
Curly Crochet Braids Tutorial: https://youtu.be/e4wp_w_hPV4
Box Braid Tutorial: https://youtu.be/K5eKgN7U2-w
Crochet Marley Twist Tutorial: https://youtu.be/l9BnLRxIq08
▬▬▬▬▬▬▬▬▬▬▬▬▬▬▬▬▬▬▬▬▬▬▬▬▬▬▬▬▬▬▬
#CrochetWig #CrochetLaceWig #CurlyCrochetWig
You know it is everybody. I am back once again with another hair tutorial today, I'm doing another crochet wig, but it's a little bit different, because this wig actually has a lace part. So we will be doing some ventilating today check it out. Alright, so we're using this hair today, this is the free trust, pre, looped roche, braid hair and it's the D twist and it's 16 inches long. This is the crochet way cap that I'll be using. It has a lace part this the side part. It also has combs in the cap. Of course you need your crochet needle, and this is the ventilation needle. I thought I would be using, but it actually turned out to be too big, believe it or not. So I went and got a smaller one and you need a size four needle. You can find a link to all these items in my description box below. So of course you need your mannequin head. This is the cap and I'm just gon na place it just how I would wear it on my own head. So you want to make sure that part is on the side, and you also want to make sure that you're lining the cap up along where your a hair line would be if your hair line were actually on this mannequin head and now we're going to get Into some crocheting, so, as you can see, we have the different pre loop pieces of hair. First, we're going to remove these rubber bands and I split each strand into about two to three separate pieces and, of course, you're gon na insert your hook, and so it's a hair close the latch, pull it through and use that loop to pull these two strands Through finally, because this hair is so soft and the curl is kind of loose, I'm going to take two strands from each side and tie a little knot just to hold it in place. There'S nice and secure, and I'm just going to continue this all the way around the head. Here'S a closer look! I can't answer it. The hook put the hair in this up and close the latch pull it through. Take that loop, you just armed and pull the two strands of hair through and tighten, and finally I'm going to take a small strand from each side and tie a knot and I'm just gon na speed this up. So you guys can see the whole process. One thing I don't show in this video is that it may help to have waken to kind of hold the cap in place, because I didn't have that ended up actually just pulling the wig cap a little further forward so that it wasn't sliding around. But again, every so often you want to pull the weight back to where your natural hairline would be just to get ideas exactly where the hair is falling. This hair gets pretty thick pretty quickly, so I try to keep it thick around the perimeter. You know four times when the wind is blowing and things like that, but, as you get kind of in the middle, I would space things out so that the hair is not too big. I love big hair, but you don't want it to be too thick and once I get up closer to the top and where the part is I'm gon na start putting the pieces closer together. So it's thicker in that area. Okay! So now we're up towards the top, and I'm just making sure that I put some strands as close as possible to that lace. I may be strands a little skinnier because I don't want the knots to be too visible and once we start ventilating the hair and the lace, it's gon na cover up all of this mess that you see here so now for the hard part. Okay, what you're gon na do is insert the hook into one of the holes. It'S just like crochet, it's just on a much much smaller level. You'Re gon na cook Ruby as many strands as you can, because a few of the strands are going to come out and then you're gon na twist, the hook or twist the strands to make sure they get a good grip on the hook. Then you're going to twist the hook as you pull it under and out of the hole now you're going to wrap the two strands around the hook and you're going to pull those two strands through the loop. You grab the strands and just pull it just to tighten it and that's it now. It sounds easy, but it's gon na take some practice. One thing I did do is: I ended up sticking a piece of paper under the lace part, because it's easier to see the hair and they're not against that stark white. Another issue is when you do the ventilation the curls are gon na get like super frizzy right around that part, but, as I started, trimming you're gon na see that I'm also getting rid of some of the frizzier pieces of hair. I'M like completely free handing this. If you can't tell so I'm just kind of like trying to frame my face, I'm cutting in a downward motion at an angle, and I just want to kind of shake the hair around my face. So it's not just this big blob of hair. Ultimately, I kind of cut a bit of a bang in the front, so there it wasn't so in my face and I'm yeah you guys can just watch and see what I did here all right guys. So, as I said, this is not the easiest thing to do, but I hope that you guys got the gist of how it works. I haven't seen anyone do a tutorial quite like this. I'Ve seen people use this cap, but they never actually like use the lace. So I figured, I would try my hand at it. Um right now actually have like a few shots of me with a new, a nude cap under this wig and, as you can tell this like really light and not the right color for me at all and right now I just have my hair under it, so It looks like really dark, and it's not that great. So if you could find a new cap that suits your skintone, that would be ideal. It will probably help if I could part my hair there and have my natural color there, but because my hair is so short, it's kind of hard to do that. Let me know what you guys think in the comments below thumbs up this video. If you found it helpful at all and make sure you subscribe for future videos, you


Comments
d33 xd33: Soooo, I'm officially going to use your tutorial to help me make this wig and achieve this look... you did such a great job!!
Dawn Davis: I love it thanks for taking the time to make it and share with us ❤️great job
tee bee: I had to subscribe after this tutorial Very well taught with such detailed step-by-step instruction! Dummy proof, for sure. I'm new to this whole DIY wig process. You have made it achievable and I know with practice, I can do this. Thank you so much for sharing your talent
Latrice Byrd: Ms. Jasmine You did well, I know that the more you do something the better at it. It looks great. Thank you for sharing.
susan johnson: I love it!!!
kiemarian Edwards: Best crochet tutorial so far!! U helped me out girrrl Fr! Thanks
Thematic: Love it!
Totally Random Merchandise LLC: You did that. I love it !
Latrice Byrd: Very pretty. ❤
Felecia Samuels: Love this!!
Angel Mcphaul: Love it beautiful ❤
Dana Simmons: Love love love it I am going to try it
Dolokaa: Woooooonderful !
Ms Belinda: ❤️ it
MsJae Jontelle: Im making one in the next couple of weeks. I'm lazy and hair is too short to braid so this was very helpful
jennanation: Yes! Love this!
Barbra: Can you do a video with ventilated side edges so I can be pulled back into a ponytail?
Jus Chrystylez: I love the video, I had to mention I’m writing a song to this instrumental!!! ❤️
ichliebeBill4leben94: wow thats amazing !! just use a foundation for your skin color
Gee Carter: You rock that
Loreta Ojefua: Does the hair last or it tangles
tashaune Batts: You did really good!! I dont have the patience when it comes to the part.. but you should have used concealer on the part.. the lace doesn’t match
Rosita Blanca: This is good to know to fix balding wigs
Mrs. Pete: It came out very nice .. imma try it lmao
Lay Lace: I like!
C Hoo: FANTSTIC tiutorial...How many times did you separate the hair before install?...i don't like BIG hair..i have a small head.. QUESTION...would bleaching the lace help with the shade or color? I have two upcoming projects..the crochet wig on this tutorial...and box braids with lace closure.. .i been seeing a lot about bleaching the lace....just a thought...
Tiffany Wallace: Use your foundation or eye show that matches your scalp color
K B: Would you consider selling this wig?
Ronni j: Cute..but so much easier to just crochet directly on your on hair
Syeitha Hardy: use an concealer for the part
Tiana Tyrell: Update on this wig?