From Blonde To Ginger Hair Tutorial | Wig Transformation
- Posted on 10 March, 2022
- Full Lace Wig
- By Anonymous
Hey Babes welcome back to my channel ❤️
Hair Products used
Kiss Colors Tentation 2 Bottles (Cinnamon )
Adore Semi permanent color 2 Bottles (Cajun Spice)
Adore Semi permanent (Baby Blue ) 1 bottle
Bold Hold lace glue
Hair. Info
▬▬▬▬▬▬▬▬▬♛Yolissa Hair♛▬▬▬▬▬▬▬▬●
*VIDEO WIG BUY 1 GET 1 FREE NOW*
Direct Hair Link:➤https://bit.ly/3HMldaq
Hair Info:#yolissa613wig Blonde Straight Hair 13x4 Lace Front Wig 24inches 180%density
❤ #yolissahair Official Website:➤https://bit.ly/34Bqmno
Trendy P4/613 Blonde Pre-Highlighted Wig:➤https://bit.ly/3MGhNbW
Perfect Vacation Wig #yolissawaterwave :➤https://bit.ly/3GMwZAh
Best Discount? Join in Our FB Group:➤https://bit.ly/3momOuu
--------------------------------------------------------------------------------------------------------------------------------------------------------------
Business Email [email protected]
Instagram @msroshposh
--------------------------------------------------------------------------------------------------------------------------------------------------------------
Camera Canon R5
Canon 50mm RF lens
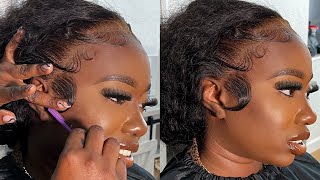
Hey everyone, it's rachelle and welcome back to my channel. I am back with another video for you guys. I know it's been a while, since i've done something colorful and honestly, i've been bored with black hair. So i want to do something bold and colorful, and we're going for ginger today and i'm going to take this 613 wig and transform it into this now i have done ginger before, but this is just a little bit different shade. So if you guys want to see how i achieve this color, then please keep on watching the wig that i'm wearing is from ulysses hair. I will put all the hair info in the description box down below. So, let's move on to the colors, i'm going to use kiss colors, cinnamon and adore cajun spice and yes, skye blue, i'm actually gon na mix all three together. So with the two orange shades, i'm gon na pour the entire bottle into this container. My mixing bowl and then for the blue shade. I actually only use two drops of the blue. That'S it. Maybe three drops not the whole bottle, and this is just gon na help. The orange shade to not be like super neon, color orange. It'S just gon na darken it up a bit now. I'M only doing this because the hair that i'm starting off with is a 613 color, which is like super blonde. I'Ve done these two shades before, but when i did it, it was with black hair that i bleached to blonde, but it wasn't like this light of a blonde. It was more like a color 27 blonde. So that's why i actually added the blue. That way. Don'T have this crazy neon orange and as for dyeing the hair, i'm going to be doing it the old-fashioned, you know hand method, i'm not going to do the watercolor method, because i don't always love that method, even though it's faster and it's easier. Sometimes i don't get the exact results that i want and when you add the dye to the water it gets diluted. So sometimes you don't really get what you want. So, that's why i decided to do with the hand method and, as for my roots, i'm using a comb as you can see, to go into the roots and for the roots. The color of the roots actually look a little bit darker because i added uh more dye onto the roots and then, as for the end, i kind of brush it out with my hands. So the color wasn't as pigmented throughout the hair, but very strong at the top of the hair. If that makes any sense, i am not a professional when it comes to coloring hair, doing hair, i'm just a girl on youtube playing with her wigs doing her. Wigs and hopefully i can teach you guys something because i'm learning as i am going along as well, i completely forgot to mention to you guys for the lace i actually protected it using a conditioner instead of my vaseline method, i find that this works a lot Better and it's a lot easier to wash out now, i'm going to let the hair dye sit for about an hour and then i'm going to wash it off off camera - and this is the end - result honey, i'm living for this color, i'm loving it and guys. I'Ve used the alyssa's hair before i've never had any issues with it. So i will say the only issue that i was having with this wig and it was literally annoying me. It was the way the wig fit on my head. It was actually a little bit too small and i've never had that issue because i do have a small head and most pre-made wigs are 21.5. My head is 21., so it was really hard to get this wig to fit like i was kind of struggling. You might not notice it hair, but i was really struggling guys. I was really struggling anyway, so i'm trying to pull this lace down so it fits properly and i'm going to go ahead and cut some sections that way, it's going to make it a lot easier for me to apply this wig on my head. So if you do end up purchasing any wigs from ulysses hair, i would recommend probably sizing up a bit because the wigs they do fit a bit small but make sure you always check out other reviews on these hair, because my videos are mainly on tutorials on How to color, how to style wigs, how to apply wigs now, as you can see, i'm going in with a scissor, because i'm trying to create that perfect hairline that works with my forehead. So i did cut off a bit of the lace and a bit of the hair as well, because i'm trying to bring it as close to the hairline as possible and i'm going to go in with my bold hold glue. I actually glued the hair on the front part of my forehead already, so i'm just doing the sides already the glue part of this video is not super detailed, because i do have very detailed videos on how i apply my wigs. So you want to make sure the glue is clear. I actually waited until it was clear before i put it down, you can't put it down when the glue is white or else it's going to look a hot mess, so wait for it to dry, clear and then, as you can see, i'm going back in with My scissors trying to cut away any extra lace and just cut away any excess lace, cutting it as close to the hairline as possible. This is a transparent lace and not hd, so i think the blend was actually pretty good and i had to go back in with the glue again like i said, i was kind of struggling with this wig because it was very small and very tight fitting to My head, the side was definitely the hardest part to stick down because it kept coming up again because i said the wig was just a tad bit too small for me and you guys normally. I would cut these scenes out of the video, but i was like you know what listen the process is not always easy or perfection. Sometimes i struggle to, and i went in with a melting spray that one is actually my own and we will talk about that. Sometime very very soon, but i'm just testing out products just to see how well they work, glues and all that stuff, because i do want to come out with my own line of products when it comes to my wigs anyways. Let'S move on so i'm going to go ahead and do the same thing on the other side as well apply a layer of glue. I'M going to do two layers, that's what i usually do. You can add a bit more. It depends on how long you plan on wearing your wig for and i'm going to go ahead and add just a teeny, tiny bit of baby hair, not too much not going to go overboard with it. So i'm gon na go in with my eyebrow razor and i'm just combing out some hair to add to the side, and you guys i am actually pretty impressed with how this wig looks as far as being melted down. It'S not even melted as yet. I have not even melted just apply the glue in the spray and it looks really really good so far and i'm impressed because it is transparent. It'S not hd. I'M gon na go in with my tiny little baby, hair um flat iron. Well, it's just a flat iron, it's very small, but it's good for baby hairs and i'm just gon na go ahead and flip it upwards child. I don't even know what i'm doing when it comes to baby hair. You guys already know this and i'm gon na go in with my edge brush and just you know, create a little soup. I feel like it was necessary with this wig. Again, it's transparent, it's not hd, so i do have to hide any kind of lace, even though it looks pretty melted and guys, i'm taking my eyebrow razor and i'm gon na cut some layers as well as using my scissors, but i find that the eyebrow eraser Does a really good job of cutting layers, but yeah the hair is pretty long. I'M not that tall, i'm about five five and a half so 24 inches looks super super long on me. You guys, like sometimes i 30 inches. I find it very intimidating because i feel like 24 is so long on me now. I'M gon na go in with my flat iron and i'm just going to straighten it and kind of curl it under because i created some layers in the front. So i wanted to have like that. You know that 90s vibe in the front of the hair, like those 90s layers, but i'm gon na, go ahead and just curl it a bit more under. So i can get that layered look and that's pretty much it for this video. This is the final look. I really hope you guys enjoyed this video. I hope you learned something from it and i'll see you guys in another video very very soon. I love you guys so much and thank you for watching bye.

Comments
Nishelle A: You look beautiful as always. The color is gorgeous. You have really helped me become comfortable with customizing my units and I have being saving so much money doing so during this pandemic. I used to so afraid and I really appreciate your help.❤❤
Cynthia Dominguez: Girl you’re so beautiful!! You’ve really helped me get into wigs and get comfortable applying them(: although, I’m not the best at it your videos inspire me to keep experimenting!(:
Safiya Lawrence: I'd love to see you do a deep hunter green color wig - I feel like that would look AMAZING on you
Created By Nori Elan: WOW, this colour looks amazing! You did an excellent job. I love your channel.
Emoretta Robinson: That is such a beautiful color. I like that you explained how the roots are darker. I wasn't sure if you had added some black or brown dye to the roots. You did a great job as always.❤
Miss Jasmina: It looks amazing sadly most of the wigs you can buy online have become so small
candy kendricks: Great job i love it!!! That is so pretty!!
M K: My perfect summer fantasy I want one just like this!!! Darker roots but same vibe.
Angie Boricua: The color looks gorgeous on you
Sam M: I did the same thing and it came out beautifully and the parts that didn't take the ginger color look like highlights ...I used the water color method with Adore 2 Cajun, 1 cinnamon, and afterwards I used the clear to coat it with silicone conditioner..
Mrs.Chanelle B: Gorgeous color on you! If the wig fits too small you can cut the frontal away from the cap on the sides to help it fit better. Hope that helps.
Sio’s World: I think I'll be rocking that color for summer. Going to Grenada in August I will most definately rock that wig.
Laniyca Fonseca: We need a video on how to remove wig properly plsss Gorgeous as always!
Cake Supply_Lady: That color is on you. Beautiful job.
Cake Supply_Lady: That color is on you. Beautiful job.
Ms. Shabria Gxo: Ooo, okay I’m definitely loving this
Ashlee Ramsey: love the ginger color so pretty more wig videos
lucas Van Canneyt: Love this color on you ! It enhances your eyes
G U: You’re so good at this
Chinasa: The color is pretty!
King D: Love this
Closed Ears: Nice as usual!!!
Xander Mateusz: talk about weird coincidence I am currently blond & going ginger. tWINNING!
Kersha Beaver: Beautiful
Sio’s World: I love it
letsdotheTIKIBUN: yasss come on msroshposh wig glue line!!
IMO: U should do pixie cut next :>
Tony Rosa: I love your videos ❤️
Amore Love: *Absolute*
Frazzled Haloz: Beautiful
Kim Amos: How do u measure your head for a new wig?
Yolissa Hair: Another Slayyyy!!! This color is so gorgeous!
d b: Wow
BMediaHQ: Queen of wigs
Catalina Castro-Abadia: is YT your full time job or do you do hair in the real world too?
Lisa Robinson: Do you sell any of your wigs?
Nikki J:
d a: it's giving jessica rabbit