Learn How To Make A Ventilating Wig Cap | Tools You Will Need
- Posted on 15 June, 2019
- Full Lace Wig
- By Anonymous
Learn how to make a ventilating wig cap LIVE on WigMaking101
Nekia will show you step by step how to make these ventilating wig caps for branding your custom wigs for clients.
ENROLL HERE:
www.wigmaking101.com/online-courses
Part One "How to Make a Wig Cap"
Sunday, June 16, 2019 at 2pm EST
www.wigmaking101.com/student-log-in
Part Two "How to Make a Wig Cap"
Sunday June 23, 2019 at 2pm EST
www.wigmaking101.com/student-log-in
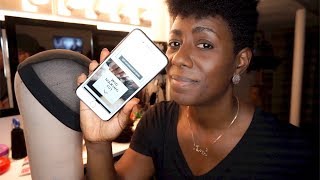
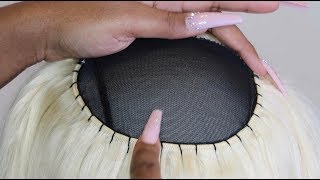
All right so welcome to week making 101. This is master course number eight, and this is done, live on YouTube because it's just the easiest way. I like teaching this way instead of recording and then having to sit and edit. It can get kind of time-consuming, and I do my best work when I'm just shooting straight from the hip, because I've done it already. So this is master course number eight and tomorrow is going to be the part. One live making custom wig caps, so there will already be videos on how to make a full lace. Wig cap that can be used with ventilating or with adding wefts and just ventilating. The front so those videos will be here on the site and then I'm going to show you guys what tools you will need for this particular cap. So let me show you the caps that you're actually going to be making and then I'm going to show you what tools you will need that are inexpensive, that you can use for right now. So I first want to make mention that you can find these type of wig caps on amazon.com, so I'll make sure I'll put a link down below for it. But these are the caps that you are going to be learning how to make I'm going to be doing them live, and these caps have the plastic like film on it and these caps we see most common when we go to a beauty, supply store or a Wig store and we purchased a wig, whether it's synthetic or half human hair, wig you'll notice that the inside of the wig there is no plastic there. There is no netting there. It'S just these elastic little strips lace, strips that are there that is holding the weft together. This is the type of cap that they use to construct those wigs. You are going to learn how to actually construct these type of caps, so they're, virtually the same. If you notice the only difference with these caps is that the side pieces this one has the getting on it, and this one does not. It only has the strips on there, but both have the plastic to keep these lines of the strips in place. They both have the lace top, which you can pick whatever type of fabric works best for you, if you're trying to brand this - and they also have the back pieces here which are called our nape cap, not nape cap, but our necks trip and we use those To create use the elastic bands to actually apply these onto there, so it can make the wig a little bit tighter and then both wigs have what we call ear tabs ear tabs can look quite different depending on the type of wig, but they usually have like This little metal piece that you can find at a fabric store that you would use for beading or making jury. You actually can find these kind of like things at a fabric store. So these are the ear tabs that are on both caps, but you're. Gon na learn how to make these caps and I'm going to show you the basic steps on you know creating them with the mesh, which you see the lace netting on the side and without so part one will be, I'm not sure which part which part one Will be but you'll see it will be doing both cats. So let me show you guys what tools you will need to do to actually make these caps, so I'm gon na turn my screen around sorry guys. I have to turn my screen this way there we go. So these are the tools that you're going to need for to make these types of caps, so I'm going to be using, which is called to lace. This is to lace that you can find at a fabric store. You can also go to a beauty supply store and if I find weave netting as well, so I picked black I'm going to use it for the top piece, as well as for the thigh piece that is happening on this particular type of cap. So you can choose to purchase lace fabric, you can choose to choose and you choose to pick a totally different fabric, different color, if you're trying to brand your caps. But I'm going to be using this just for the sake of learning how to actually make a fool. You know cap in this style and then you're going to need what we call elastic. This is braided elastic and it's at half an inch. So it's about 0.5 inches, so that's a half-inch braided elastic. This was about three dollars for this. You can get them in different packets, but you'll need a half-inch. That'S the whole point. You also will notice that it's one point two seven centimeters or what you guys see it, because I know some people read measurements different into you, as opposed to the US and in other countries. So just you just need to know that and then you will need some bias tape. So this is double fold. Bias tape there's four yards of it and it's a quarter of an inch, and you can also see that the measurements are shown a little bit different too so you'll know so making sure you guys can see that and then it's hard to find the bra strap Hooks, so if you can see this there's this little hook, it's clear that's inside of it, it's like a brush to are poke, but that's exactly what it's for, and it's made for, pulling like the movie called there for clothes for bras. When were you trying to do a sports to style, bra and you're, trying to close that in so you don't see the bra straps along the UM, the back size of your back? But this is what we mean. We need two of these and there's two in here, but they're attached to this one strap this one elastic straps. So I'll show you how we're going to use this and then, if you notice that this is actually like a polyurethane type paper, it's very its plastic and paper. At the same time, it's almost thinking that it's like a plastic bag. So I'm going to ask! Well, I'm gon na show you quite a few things that you can use that don't tear on you. This is cause. This is called tracing paper, so you can find tracing paper at a craft store or fabric store Hobby Lobby. I believe you can also find it at Walmart Target, but it's paper, so you can use this to moe to add to your caps so that you can be able to sew down, because you can actually sew on this. It'S pretty thick. It'S not like vellum paper. Vellum paper is a little bit thicker um. So if you find that you can use that, but this is just tracing paper, you can use that you can also use like a plastic bag. I prefer not a shopping plastic bag, but something of the sort that you have gotten something packaged in you can use. This will cut it up and use it to create this in order for it to lay everything flat. So you can use plastic and this is actually door installation kit that I got from a dollar store. So it's also that plastic that actual emotes from heat. But it's nice and thin enough to use to add this onto your caps so that when you go ahead and decide to sew your West one, it's pretty nice! I like this, it doesn't tear it doesn't stretch, but it's pretty nice too, when you get ready to add your weapon to your caps. This won't stretch on you still so on top of it and keep in mind with these caps, whenever you sew a so tracks on to it, the idea is to take this plastic off, so you'll notice on the inside. The plastic is being taken off, so you will learn how to make these locks. So you'll learn how to make these like, so so that you are aware this is going to be on zoom'. So you want to go into the website and you want to go into the student area and where it talks about the live on the date and the time. That'S what you want to click on and if you are stupid, you were able to get right on. In you get access, you'll, just click and join the live and you'll see me live. It will be on a zoom app and the reason why I'm using that app, because I want to be able to hear if you guys have questions and I can easily show you based off the questions that you asked me. I probably may not be able to see you as much because I will be doing it on my cell phone, so I'm kind of trying to introduce this and do this a little bit new, but it will be recorded so that everybody will be able to come Back to it, if you're unable to join the lives and also if you are in the lives - and you want to come back and reference the information, so these are the materials that you are going to need. If you need to remember or know everything that I just mentioned, just rewind this video and look at everything that I have as far as tools that we will be using and the part one we will be starting with the with these caps first, so you'll learn How to make the make piece, the ear tabs the top piece how to get this plastic? You know mold it to the cap to the wig heads correctly and then we'll talk about how you can add these straps on one. So that's what we will be doing. That'S what it may be a few videos, so keep that in mind as a part, one and there's a part two so, depending on how far we get within the hour. Keep that in mind. I'M gon na do as much as I possibly can, but you will learn how to make these on your own if you need them to be made wherever you are from so other than that make sure you are aware of all of the updates and everything to This site - and I will see you guys in the Xoom, live and I'll see you guys in class bye,


Comments
Tamiya Bowden: I've been trying to figure out how to use these ventilated caps forever now! Thank you for this informative video.
Jahlove Ebun: What happens to the water proof in the cap, do u remove it after sewing?
Asher: Yesssss queen love your content I had to subscribe thank you Love from London ✨✨✨❤️
Samantha Cutchin: Question where can I purchase these caps
Pat Alexander: lOVE YOUR INFO I CANT BELIEVE YOU DONT HAVE THAT MANY VIEWS. OUR PEOPLE, THANKS FOR THE INFO I WILL SHARE
Dirbet Rod: ❤️❤️❤️
jennifer Morgan: Most caps don’t fit my head My head is 24 and I have long thick neck and hair lune with lots of thick hair….. any suggestions? I am a student in your coarse.
Reesheda:
Jamie Lee Roche: I’m confused