How To Re Install Lace Frontal Wigs | *Very Detailed | For Beginners
- Posted on 16 May, 2022
- HD Lace Wig
- By Anonymous
Wig RE Install! Get into this FLAWLESS - NO BABY HAIR - lewk!
Sis! Stop throwing those wigs out! I wanted to show you all how I melted this USED lace front wig and got this scalp look!!
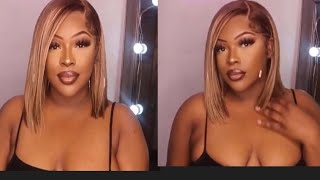
Custom Color by me!: Kiss Tintations (Rose Gold)
Layers for Bodyodyyyyyy
Curling iron size: 1.24"
****I DO NOT OWN COPYWRITES TO THIS MUSIC!****
FULL VIDEO OUT NOW!!!
Start ➡️Finish Wig Install Process. Tell me! WHERE IS THE LACE?!
Welcome back to my channel! Don’t forget to ✅like, ✅comment, ✅share, & ✅subscribe!
Turn on that notification bell Videos dropping 2x a week!
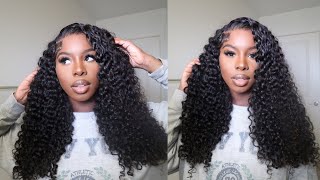
Client wearing 14" Deep Wave unit (Transparent lace front)
Vegas Baby
⬇️Catch me on the socials! ⬇️
www.instagram.com/shopstudio408
www.facebook.com/shopstudio408
https://www.tiktok.com/@studio408didi...
LACE TINT MOUSSE COMING SOON!
products used:
hold me down lace adhesive
bold hold skin protectant
got2be products
skin matching foundation
#wigreinstall #usedwiginstall #wiginstalltutorial #wigsforblackwomen #wigsforalopecia #hairtutorial #hairtransformation #whatlace #lacefrontwig #lace #lacewigs #wigreview #contentcreator #content #tutorialWig RE Install! Get into this FLAWLESS - NO BABY HAIR - lewk!
What'S good youtube, it's your girl, sarah, with an h back with another video, so today we're gon na get right into it. I'M doing a used, wig install! I wanted to show you guys how to do a used. Wig install because i know, including myself, i used to shy away from used wig installs, but once you get the hang of it and you know exactly what you're doing it's not that hard so right here, you just see me fitting the wig back onto her head. I'M matching up her sideburns on both sides and i'm having her hold those down. While i go ahead and tie the the straps in the back and sew it down once i'm done sewing it down. I am going to mark where her frontal lays for a funnel ends. I'M then going to clean the skin with sea breeze. I'M also going to use skin protectant again make sure you are cleaning the skin and using skin protectant. I'M going to try not to talk too long in this video, so i will be back in the next clip if y'all are liking. These videos make sure you like comment share and subscribe leave a comment down below. If you like this video leave me some hearts down below. Also leave me some comments. As far as what kind of videos you guys want to see what kind of content do you want to see from me? It'S not a game. Okay. So now i'm gon na go in with my glue when i use when i did her bald cap. This time i did not use glue. I used got to be freeze spray again. It is completely up to you, whatever floats your bow, so being that i didn't use glue to secure her cap, i'm going to secure her cap now with glue, i'm just going to go in with a small layer as you see in this video and then when I add her next three layers. Of course the sections will be bigger and i will show you if you continue to watch so now. This is where my glue section is bigger. Basically, i'm just bringing her glue down where i want her hairline to be, as you can see. As i said in the last video, i use this as an outline, but i don't always go all the way to the dots just because i like to say funny period. We'Re gon na do four layers. We came back and the four layers are dry, as you saw. It is completely clear: we're gon na go ahead and lay that lace. We'Re gon na use the back of our comb to push the lace into the glue and then we're gon na secure that lace down make sure to use a blow. Dryer forgot to use the blow dryer this time, even though i didn't have no issues. It can cause an issue if your glue is not dried, all the way so definitely use a blow dryer and then put on your bins uh. So since i did not bring her lace down this far or this low this time, i am gon na take away a lot of hair in the front, maybe not a lot of hair. It looks like a lot of hair, but trust me you're, not gon na miss it get rid of it. The wig is already two times too big, so whatever we got ta do to make it work, that's what we're gon na do. Thank you y'all. I put this in regular speed because i want you to be able to see exactly what i'm doing. Okay, maybe it's not regular speed, but it's not it's not as fast, because i want y'all to really be able to see what i'm doing. So. I'M sorry this video is a little bit longer. If you don't like the long videos, let me know if you do like the long videos. Let me know, let me know something go ahead and carve out her part we're going to set her apart with mousse wrap. It up with some wrap strips and put her up under the dryer for about 20 minutes and then we'll be back. So so it's not a game. So now we are back from up under the dryer, we're going to remove her wrap strips and we're going to just see how flat her hair is. This is actually one of my favorite parts of the install is laying that mousse and putting it up under the dryer. It really does help with flatness. It also helps me not have to use um as much wax stick or hairspray. I know a lot of people like the wax stick for fly aways, but i prefer a mousse and then put my goodness up under the blow dryer right here, we're just going to cut away that excess lace. Everything else is going to be pretty much self-explanatory. I will jump in if i feel like there's something that i need to explain, but other than that just go ahead and watch this video, if you have any questions, leave them down in the comment section below real quick. I do want to just say right here: you see me plucking that hair, so if you ever have to push a client's, hairline back and um like further than where it starts on the wig, typically, depending on how the wig is made you're going to have like Bigger knots, the further you go back, and that was the case with this wig, so i didn't want to start cutting and then cut into the knots, and then it just be just a not clean cut. So what i wanted to do was pluck it ball. That section right there first and then go ahead and cut so that my cut was nice and crisp and clean so and again, i'm going in regular speed. Just because i want you guys to see how long it takes me to cut the lace in normal time. I want you guys to understand that this is not a process that has to take five minutes. If you have a client that is rushing you, i would suggest to not take that client. You want your hairline to look like this okay and it can't look like that if people are brushing and not taking any time so so i'm just going to curl it, i'm using, i think, a size 34. What is that, like a inch and a quarter? That is the size barrel that i'm using today by the way, this is a custom color for this client. My goodness see who's gon na, be leaving me so soon, but we do have more videos coming out for you guys, so i'm gon na be missing her, but y'all won't. So again, this is a custom color at first we had some dark roots, which is a tone blonde. I did remove some of the roots, just because i didn't want it to be too dark, and then we went on top of it with the rose gold pink and this color came out so good. It looks so nice on her and i do like to pin my curls as you can see. I did also cut layers into this hair so that the hair just felt like i wanted her to fog. It was somebody addy. We didn't want it curly, but we just wanted her to have some bounce and i think that's exactly what we did with this look now that we're all curled up we're going to go ahead and take some pictures, as you can see, take those pins out and You guys will see the finished look make sure again. You guys like comment share and subscribe. I'Ve been getting a lot of questions about classes, and i think that this is a good way to give back wow all right guys. This is the end of this video you're. Just going to watch me call these curls out and then we're going to take some pictures and videos of the final look again. If you guys have any questions or comments, leave them down in the comment section below make sure you like share and subscribe, and i will see you guys in the next video. It'S thanks for watching.
Comments
Xavierra McCut: wow you are so talented it looks so natural and beautiful
Serena: Favorite look
Kelly Terrell: Perfection ❤️❤️❤️ you’re the G. O. A. T. PERIAAAHD!!!