Beginner Friendly Easy Install 5X5 Closure Wig | Waterwave Wig Ft Yolissa Hair
- Posted on 19 May, 2022
- HD Lace Wig
- By Anonymous
PLEASE WATCH IN HD!(1080P)
HAIR DETAILS:
●▬▬▬▬▬▬▬▬▬♛Yolissa Hair♛▬▬▬▬▬▬▬▬●
*BUY ONE GET ONE FREE* Shop Now➤https://bit.ly/3xuJWO4
Hair Info:#yolissawaterwave 5x5 HD Lace Closure Wig 28inches 200%density
❤ #yolissahair Official Website:➤https://bit.ly/3rryoY0
Classic #yolissabodywave :➤https://bit.ly/37m6OEW
Best #yolissa613wigs :➤https://bit.ly/3uIt58D
Best Discount? Join in Our FB Group:➤https://bit.ly/3momOuu
Follow Yolissa Hair On Social Media
Instagram: https://www.instagram.com/yolissa_hair...
Facebook: https://www.facebook.com/yolissa_hair/...
✔Wholesale Contact +86 15803834514
◦ F O L L O W M Y S O C I A L S ◦
◦ Instagram: https://www.instagram.com/beautybybemi...
◦ Twitter: https://twitter.com/beautybybemi
◦ BUSINESS: [email protected]
______________________________________________________________________
♡ F A Q ♡
◦ AGE: 24
◦ I'M NIGERIAN
◦ CAMERA: Canon EOSM50
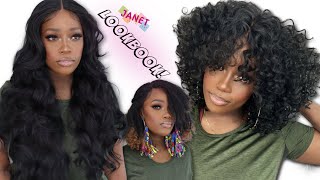
Hi guys welcome back to my channel, so i'm back with another hair video today and today's wig is from yo lisa here. So today, i'm working with their 5x5 hd lace, closure wig, and this is their water wave, hair texture. So this is a 28 inch wig and the density of this wig is 200. So this is a lot of hair that i'm working with the wig is so full, but i'm so in love with the wave pattern guys. So today, i'm going to be showing you how to bleach how to customize, how to install and also how to style and tame your wig. So if you guys want to see how i got this wig to look like this, then make sure you stay tuned and carry on watching hi, guys, okay. So this is the wig from yoni star hair, and this is the water wave hair texture. This hair feels so soft and you guys can see the set is really really long. So today, i'm working with that 28 inch. Water, wave lace, closure wig. So this is what the construction of the wig looks like and it's a 5x5 hd lace. Closure wig! As you guys can see, so the lace is really really good and it comes with a lot of parting space as well as you can see, because that's what's going to help your um wig to look more natural, the more part and space you have basically so Yeah, so i'm just going to pop this on my mannequin head, but what i'm going to do is i'm going to use my wax stick and i'm just going to use that to kind of slick all the hair going. You know in one direction. This is just so when you bleach the knots. You know you don't end up bleaching the hair itself. So now i'm going to grab my bleach powder and some peroxide and i'm going to be using a 40 volume developer. This is literally all you need, because you're only bleaching a closure. So if this was a frontal, then you might need just a bit more than this, but you're only working with a closure. So you don't need that much powder and now i'm going to go ahead and apply some peroxide into the bleach and you only want to apply a small amount. You want this to be a thick consistency. Okay, so this is the type of consistency you need. Literally. Almost like the same consistency of um, a toothpaste, but maybe just not as thick as that. If anything. So now i'm going to go ahead and apply this on the lace, but i'm literally applying no pressure, because you want to make sure you don't press this into the lace because you're just going to end up bleaching the hair itself. And you don't want that say. Like this is literally so easy something you can do yourself, you don't need to go. Pay no hairstylist to install a closure with v. So this is what your closure should look like once you're done, applying the bleach all over it. So i'm going to leave the bleach on the closure for like a good 30 to 40 minutes, and then you know, i'm gon na go ahead and wash it off and then i'll be back okay, so i've washed the hair - and this is what it looks like Now you can see the wave pattern looks different to how it looks initially, and this wig is so long. It'S 28 inches. So i literally can't wait to put this on my head and see what it's going to look like. So so, when it comes to the lace you can see, it looks so much better looks more natural now that i've bleached the knots - and this just looks really good, looks amazing. So now i'm going to go ahead and install the wig. You can say the first thing i'm going to do. Is i'm going to take off the comb at the back of the wig, because sometimes that gets in the way of me adjusting the straps and stuff like that, so i'm gon na take this off now. Okay, so i've taken off the comb at the back and now i'm just gon na adjust the straps to fit my head. So this is a medium cap size and it is slightly big for me, so i'm just gon na. So i'm just gon na pop this into one of the hooks at the back like so so just to get this to match my skin tone perfectly. I'M gon na apply some of my contour powder on the lace, so i'm just using what i've got left on the brush and i'm literally just applying that to the front of the lace. I don't really care about the back as long as the lace itself, like the front section matches my skin tone, i'm good and you can actually see the difference at the top so because the wig is a closure, not frontal. The construction is definitely very different, so so this is a five by five lace closure. So if this was a frontal like a thirteen by four or a thirteen by six, it would be from air to air. So now, because this is a closure you can see, the lace is only in the center of the wig and then the rest of the wig is just literally the construction. So what i do is i just pop that over my ears, so it sits uncomfortably if you try and put this behind your ear it just for me, i feel like it's just not comfortable like that is just not comfortable for me, because it's just literally folding, My ear down, so i don't know - i just prefer to just put that over my ears, so so now, i'm just gon na go ahead and install the wig. Also because this is a closure wig, you really don't have to glue it down. You just have to adjust the straps at the back of the wig just to make sure you know it's fully snug and it fits your head properly, but just for demonstration purpose. I'M gon na install the wig today, so you can see how i do it and today i'm gon na use the ebbin wonderlace bond spray. So i've heard so much about this spray, but i've never really used it. So we're going to try it out today and see so you don't have to use this spray. Specifically, you can use the bed hairspray or you can use the got to be spray if that's what you have at home. So so i'm just spreading this around and now i'm going to wait for it to get tacky and then pop the lid on also when it comes to the placement of your wig. That'S really down to you it's down to your preference, but one thing i always make sure i do is i make sure the hairline of the wig is right in front of my hairline, so i'm not gluing it down on top of my hairline, because obviously you Want to save your edges and stuff like that, so you know this is nearly there. This gets really tacky, apparently, so i'm just gon na wait and see wow so okay, so i like to cut down the middle first and i take my time with um. This part of the process by the way, because you don't want to rush it like you, want to take your time and make sure you're cutting it properly. So you basically just want to make sure you're cutting really close to the hairline, but not too close where you can't see the like the pre-plopped or the natural hairline. Should i say so and then the last thing you want to make sure you do. I just like to just do this and then you guys can see that parts of the laces obviously lifts in so i'm just going to go ahead and apply some more of the spray. So i'm going to apply my wax stick. So when it comes to hot combing, you just want to keep hot comb in the top of the wig until it's as flat, as you know, as flat as possible, basically and there's two ways to hot comb: the wigs, depending on what style or what look you're Going for so, you can either hot comb the front of the wig to come like this. So this is the easier and um quicker way to install your wig. Basically, so you can just hop in the front of the wig and just have it come down your face like this, and then you can obviously just go ahead and style the wig and define the curls and stuff like that and you're good to go um. So this is just like a basic closure. Wig install you know, so if you want to take it to the next step and add some baby hairs, so you can have it looking. You know real cute and everything, then what you want to do. You want to hot comb the hair going this way and i'm going to do the same thing and guys the spray i used today that spray is really really strong, because, like this is, i am pulling and it's not moving like literally so now. The next thing you're going to do is you're going to take out some hair on the sides. It'S really up to you like you, can just take out some hair for baby hairs. Basically, so it's up to you, where you want to place the baby hairs and how fluffy or how thick you want them to be. Basically so so now doing the baby hairs is also going to cover um this side of the wig. So you know that way. You can't see it and now i'm just going to go ahead and cut my baby hairs, so i'm just going to go ahead and use my grip gel to just slip my bake to slip. My baby hairs yeah, i'm going to use a spoolie to sweep my baby hairs. I find it easier to use a spoonie than an actual edge brush because i feel like i have more control with this. So i'm just going to apply a tiny amount of the grip gel onto the um spoonie. At this point, if it's too long, you can always go, you can always go, go in and cut some. I wish i could show you guys how long this hair is. So now i'm going to go ahead and style, the wig. So that's the thing as well like, although this is a closure, you don't have to wear it as a middle part and you can wear it as a side parting. You can do like a flip over. You can literally do whatever you want to do basically, but i think i'm going to stick to having this as let me define today, okay. So this is what the hair looks like when it's wet guys. This hair is so pang, so obviously this wig is um 200 density, which means it's really really full like guys. This is a lot of hair and you guys know how like wave your curly hair once it gets dry. Sometimes it gets big. It gets puffy. It gets frizzy so to tame the hair. What i'm going to use this is literally what i use all the time anytime. I have any wavy or curly hair, so i'm going to apply some candy coating cream. This is so so good. So i'm just going to apply that much on each side, so there you go and then now i'm just going to grab a paddle brush and just use that to look at how good this looks so good. This is what the wig looks like when it's wet. I'M going to come back and show you guys what it looks like when it's dried and then you can see, and you decide which one you prefer um when it comes to curly and wavy hair. I don't really like the wet look. I feel like it doesn't suit me. I don't know this looks nice, but i kind of prefer um my wavy hair when it's dried and it's just it's like a has a nice puff to it, but it's not wet. I don't know if you guys get what i mean so anyway to finish off, i'm just gon na go in with my concealer okay. So this is what the hair looks like when it's dried and guys listen, this wig this hair and i feel like i'm, not really a curly hair type of person, but i definitely like water wave and deep waves. Like i said this, one is from yolisa hair and this is the water wave 5x5 hd lace closure wig guys. This is a lot of hair because one is 28 inches, which means it's really really long and it's 200 density like that is a lot of hair, especially for wavy hair, and you guys know, obviously with wavy hair curly hair um. It gets bigger. The more you touch it, the more you play with it, it gets bigger, so imagine how big this could get, but obviously because i've tamed it. This would last like you know the whole day. Basically, and then you know the next day, i would literally just spray the hair again and just brush it with my paddle brush. I didn't have to apply any more hair products because there's already products in the hair, so you adding water, is going to reactivate the products, that's already in the hair, so yeah, but yeah guys. I really really like this hair and i feel like this hair is definitely perfect for, like summer spring, it's giving island it's giving island girl vibes. So i'm going to make sure to list all the links that you guys need in the description box below. So please make sure you check below for anything you'd like to know and i'll see you guys in my next one bye,
Comments
Darkskinss: You are one of the most underrated YouTube dolls. You consistently push forth content, both easy and more challenging, for many of us to learn from. Thank you. This hair is lovely.
Chanda Williams: Great teaching skills. You are the reason why I use a spooley on my natural hair for baby hairs as well as for my units. I do have the Bed Head as well as the Ebin spray in red, black and yellow. Although I prefer the glue-less method, I do sometimes use the sprays, still trying to master the cutting of the lace (ear to ear) to fit the frame of my face. Stay blessed and happy
Keke1980s: Preddy gurl! You always demolish these wigs
Peta-Gaye Williams: I just bought this same exact wig from yolissa in 5x5 28inches 200% waterwave and my wig is not this long and not this full and it does not reach 28 inches when stretch it's more 180% density. They send youtubers the best hair and send paying customers whatever they feel like. I'm so pissed off as I had to pay more for the length and density and didnt end up getting what I paid for smh
Favorable Mortal: You look so beautiful. Wig or no wig. I love your channel.
Dee Luther: Love Your Video Very Beautiful thumbnail tho Beyond Gorgeous you are Ur Makeup always on Point EnJoy your Wonderful Day Too Happy Fabulous Weekend ahead Stay Bless n Be safe always
peace joseph: Only 1 Bemi...so Beautiful ✨ ❤
Peta-Gaye Williams: I will be contacting yolissa about this cause this is not right that we who are spending our money dont get this type of quality but they send them to Youtubers... I will be returning my wig asap!
Achan Loki: so you didn’t pay for this personally?