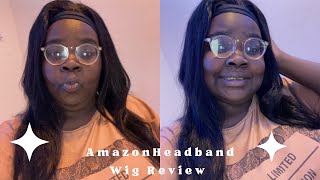
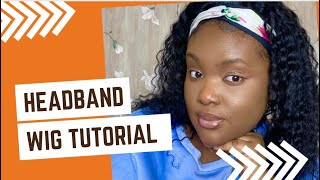
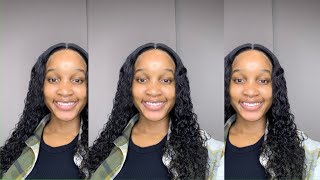
Headband Wig Making Tutorial Within 1 Hour Using Hot Glue Gun
- Posted on 17 November, 2020
- Headband Wig
- By Anonymous
Hello loves,
I hope you guys enjoy my wig making experience. My first time making a headband wig using a gluegun. I will be doing this again because it takes less time and it’s simple and straightforward. You should try it! I hope you like the video.
#hotgluegunwigmaking #headbandwigs #headbandwig
Thank you so much for watching!!❤️❤️❤️
PLEASE SUBSCRIBE TO MY CHANNEL HERE ⬇️⬇️
http://www.youtube.com/c/JustpamK14
For Business
Email: [email protected]
Let’s Be Friends ⬇️⬇️⬇️
Instagram ~ https://instagram.com/justpamk?igshid=...
Pinterest ~ justpamk
Twitter ~ justpamk
Tiktok~ https://vm.tiktok.com/Jj5WAqv/
Blog~ https://findingmiself.wordpress.com/
SUBSCRIBE | SHARE | COMMENT | LIKE
Hi guys welcome back to my youtube channel, it's your girl, pam and in this video i'm gon na be sharing with you guys how i made this gorgeous headband wig. I have seen them all over the place, so i was like you know what i can do that i can actually do that. So yes, i got it done and i was so excited, so i wanted to share with you guys. So, let's just get straight into the video. Oh, i used um that plastic bag just to cover camellia, but anyways i'll talk about that later. So i'm showing you the wig cap that i am gon na use. I got this off amazon and it has like two combs in the front and just has lay like the adjustable strap in the back, so i am using this pair of socks. This was like my lay my old pair of tights, so what i did was just place it like on top of the wig cap and started gluing it down, and i forgot to mention this whole wig making is gon na, be i'm gon na use like a Wii a glue gun, so this this is what is happening here like i'm, using a glue gun to just uh glue down that thing that headband that we're gon na use just to glue that with the wig cap, so that we can, you know, get into making Our headband wig, so before gluing everything down you have to make sure that you adjusted everything like you can see. I have some pins over there. Those pins are helping me to stay like accurate, with where i am gluing, i'm putting the headband. So just make sure you measure as well your head and so that you have the right measurements, but this um um, this headband thingy, is elastic. So you wouldn't want to worry about that anyway. So, to show you guys, the hair that i'm using is the hair that i got from my local beauty supply store and it's the forever new seven. This pack has seven pieces and i have a 16 inch, 18 inch and 20 inch, plus a mini closure, which i didn't use in this video and the color is one so out of the packaging. This is how the hair looks. It is called the french wave and i loved it because i felt like it wasn't gon na tangle as much as the other hair that i have used in the past. So it says you can actually comb it out and the curls pop back out back where they were, and you know all that good stuff. So i first started like adjusting the weave first like um. I wanted to start like on top of the wig, so that i i don't like um uh. I don't know how to explain this, but i wanted to start like on the middle of the head, like from corner to corner like of my ear so that um, you know the hair looks even after i, you know just glue it all down. So that's just gon na help you like to have the right um measurement like when you have uh your hair done. It should be like the same size and length if that makes sense. So i just you know, continued gluing and, as you can see, that headband is like moved forward so that i can have enough space to glue down the rest of the hair and yeah. That'S just let's just watch just keep watching and the video keep explaining. Just keep watching you know what i mean and while you're at it subscribe, so what you want to do is just continue. Gluing down the weave, like this glue, gun instantly sticks like it instantly sticks. I have had this glue gun for the longest time and i didn't know that i can actually do this and i was like, oh my god, like girl. You should have done this a long time ago. You know what i mean, so you just keep gluing that down until, like you have enough hair in your on the on the on the wig cap, but i'm just gon na continue and explain where i want you guys to understand what i am doing. But you guys this is the fastest like it actually took me. I think less than an hour, if i add up all the time, because i could stop attend to the kids and then get back to it. But i'm thinking it took me less than an hour because it was like straight like straightforward, straightforward anyone can do this, i'm encouraging you! If you don't have time like to sit down and just you know, get your weeds done. Just do this get it done. You can even do it by yourself, you just need you know a glue gun. Even you can sew it down, but i didn't have time to sew it down. So this is like the perfect and easiest way to get your headband wig or your actual wig like, even if you want the full wig. This is like the best part about this glue, gun wig making so so far. This is how the hair is looking. I used, i think, almost like the six pieces of hair that came along in the pack and i already loved the fullness, and i was like, i think, for it to look more natural. I have to just stop over here and i'm just gon na show you guys how i styled the way the wig, so i left a little bit of adjustable straps on my um headband, so that i can be able to tie it down the way i want And i think i have seen people use like those um sticky things that you can stick, but i didn't have that. So i thought, having the extra length of the headband is just going to help me to adjust to the right amount that i want for me. Not to have headaches and whatever you know, all those things, so i'm just laying it down making sure that it's where i want it to be, and i'm gon na go ahead and apply some gel on my baby hairs and style. The way i actually want this to look so i use my eco styler gel just to lay down my mini edges, which my hair is growing back. You guys, i cannot wait, but i just you know, use my olive oil, eco styler gel just to lay down those edges the way i want them, i'm not the best. Like i always say this, but people are like no, you actually do it right. So i think the only way that i do it right is just by laying them down and then applying a silk material so that it stays like it's. It helps lay down the edges if that makes sense, so i just use a brush oil comb. Just to know you know just lay down the edges, lame lay them down. So after fixing my makeup, i'm gon na take this headband that today is gon na go with my green sweater that i am wearing and i thought like that was actually a good idea. Like girl, you know what you're doing so. I'M just gon na apply that, like on top of the black headband that comes with the actual wig, and you know just look cute fix it up, look cute and yeah. This is just finally it. This is just what i wanted to share. I hope you guys enjoyed the video if you try this method that i did with the glue gun. Let me know - and i hope you liked the video make sure you comment, share and i'll see you guys in my next video and thank you for watching bye. You


Comments
NOMSO'S WORLD: This looks amazing and I love how the process was detailed. Lovely content here,I will sure go look it.
Stacey's Vlog: I'm gonna need one of these. Love the finished look - makeup and hair. The headband is perfect to match your blouse
Lorraine English: I love the finish look . I really love how you explain each steps it's easy to follow mn1
haddieempire: You made the wig look so easy and it's beautifully made I love the hairband as well well done MH1
Stacey's Vlog: This is so beautiful you did a wonderful job with this wig
Divergent Paki: Love the way you lay down your edges and this demo is very clear and easy
Bridget Oladipo: The finished hair looks so natural and beautiful. i love the colour of the headband,the hair looks so lush. M1
Keeping up with Divine: I love the wig! It looks really good on you
Keeping up with Divine: ‘I can do that’ I love your energy Pam ♥️
Daisy Girazi: So proper & looks so easy
Rola Inspires: Well done girl, this is beautiful. well detailed video.
Thokozile: Omghaaad , exactly! this is absolutely gorgeous and the hair looks so lush
Ms Shan Noel: Omg this is soo good! and creative loved it
The Zoe Platform: Awwww the head band looks really amazing sis and I think I need this too.
JOY: It’s so gorgeous. I really need this headband wig.
Florence Amaraegbu: This is beautiful, and well explained. Am new here
Aember's Play TV: The outcome is beautiful.
Nicola yardstyle cooking & more: This is so neat great job sis
Tymiria: That Headband is perfect with your sweater. Looks great!
Nasubila N: Head band wigs really suit you Pam ❤❤❤❤ this looks great
Nafe's Creations: Your tutorials really help me out
Mwanida Sampa: This was just wow, you are creative and you look amazing. Mn1
Nicola yardstyle cooking & more: Love it you did well dear great tutorial mn1 thanks for sharing
LIE JAY: So gorgeous babes where did you get the glue applicator? That hair came out so perfectly. And the headband looks beautiful
Mercy Chikozho: Very beautiful Sis, I like it m1
Fatimat Momoh: This is gorge and the head band is a game changer. Mn1
Gloria kitty: Very nice i will try the glue gun. Thank you for showing how to do a wig
Moppy Head: I don't have hair bit this tutorial I shall share with my sister....this is lovely
ABIGAIL IFEOMA: You make it look so easy and the hair look really nice, whats the products.
Madah Khauya: so beautiful
Aretha P: Beautiful sis ❤
fabulous charity: Very nice . I will try your method
Hope Disrobed: You are ridiculously cute. I love it.
Brenda Nalwadda: This saves a lot of money are you did it all well
Tracy Tracy: Do the tracks come off after sometime??
Money and I: Amazing! Mn1
Life with Efua: Nice wigs
Mama Yets: Wow gonna try this out MHV1
NEKESA WANGILI: I have a glue gun and sticks. I should try this some day.mn1
NEKESA WANGILI: This is awesome.mn1
Lin Cues Day: It doesn’t look like a wig at all
Jenea Monae: ♥️