I Made My Own Human Hair Headband Wigs!! Deep Wave & Kinky Straight - Detailed Tutorial
- Posted on 07 September, 2020
- Headband Wig
- By Anonymous
Hey Everybody,
Check out this coin saving DIY on how I made my own human hair headband wig! I made a deep wave headband wig and a kinky straight headband wig using bundles purchased from Amazon linked below.
Hope you enjoy the video!!
**I do not own the rights to this music**
Earrings worn in video: www.monetdiorcouture.com
Human Hair Wigs Playlist:
https://www.youtube.com/playlist?list=...
Kinky Textured Wigs Playlist:
https://www.youtube.com/playlist?list=...
Budget Friendly Friday Wigs Playlist:
https://www.youtube.com/playlist?list=...
Binge Watch My 2020 Playlist:
https://www.youtube.com/playlist?list=...
Video Schedule:
Mondays – Human Hair Slay
Wednesday – Synthetic Wig Reviews
Fridays – Budget Friendly Fridays (Wig Reviews under $25)
HAIR/PRODUCT INFORMATION:
Brazilian Kinky Straight Hair 3 Bundles Yaki Human Hair Bundles 100% Virgin Kinky Straight Human Hair Extensions Natural Black (14 16 18)
https://www.amazon.com/gp/product/B086...
VRVOGUE Brazilian Deep Wave 3 Bundles 100% Human Hair 7A Unprocessed Natural Color Brazilian Virgin Hair Extensions (16 18 20)
https://www.amazon.com/gp/product/B071...
TIMESTAMP
0:00 – Intro Video
0:25 – Intro/Welcome
1:51 – Unpacking of deep wave bundles
2:17 – Items used to make the wig
3:23 – Sew on the headband
4:02 – Making the wig
6:15 – Off camera additions
6:30 – Wearing & styling the wig
7:16 – My thoughts on the wig
8:50 – Price of deep wave bundles
9:32 – Comparison to other wigs
11:19 – 360 of deep wave wig
12:24 – Unpackaging of kinky straight bundles
12:38 – Price of kinky straight bundles
12:51 – My thoughts on 2nd wig
13:51 – Styling kinky straight wig
14:01 – Styling with no edges
15:07 – Benefits of half wigs
15:37 – Cost savings of making your own
17:56 – Closing
18:24 – 360 View of wig & additional style
18:37 – Bye Shug Muffins!
Follow me on social media!:
Instagram: https://www.instagram.com/msebonyvee/
Facebook: https://www.facebook.com/msebonyvee
Snapchat: @Ebonyvl
Twitter: @vee_ebony
TikTok: @msebonyvee
Email: [email protected]
Please be sure to Subscribe and Thumbs Up this video!
**FTC Disclosure: This video is NOT sponsored.**
Music: “Better Place” (Instrumental) Spring Gang
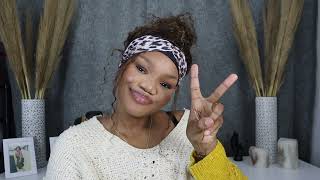
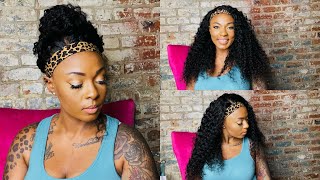
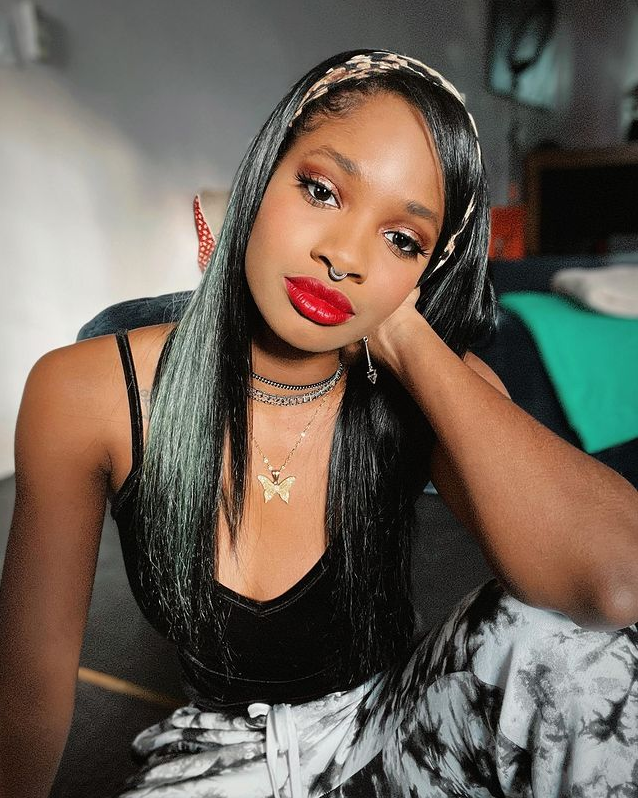
Hey: what's up everybody, it's me miss ebony v, welcome back or to my channel. If you are new here. Thank you so much for joining me today. I truly hope that you consider hitting that subscribe button, as well as that notification bell, so you don't miss any upcoming videos if you're returning, hey muffin, all right y'all. So this is a special kind of video. I know most of you have been hearing about the rant and rave of these headband wigs. There are a ton of them out right now i mean a slew of them, so when they first came out your girl here, the frugal chick wasn't feeling the price. I was like almost 300 for a headband week - human hair, of course, but still wasn't feeling it y'all wasn't feeling it and not that i can't afford it. I just ain't trying to spend that kind of money on it, and so you know i was like. Let me pull out these creative juices and make my own at a fraction of the cost. So that's what this video is going to be about today, i'm going to actually include the tutorial on how i made this one and then um i'll show you the results of a kinky straight unit. I also made, but i won't show you the tutorial, because one is enough: i made them exactly the same, so let's go right ahead and dive into this video. All right, y'all. So here is the unpackaging of the hair. I used for this first deep wave wig that i made they included some of these goodies, some needle and thread eyelashes along with a wig cap, and, as you can see, it is in deep wave, i have 16 inches 18 inches and 20 inches. This is what the hair looks like now to make this wig. I use the hot glue gun method, as you can see here and i like to use the black glue sticks with making my wigs, because the hair is black. I also used a kids spandex dome cap because my head is kind of small and because it's going to be a half wig, i needed it to fit as secure as possible. This is a headband that i got from my local beauty supply. It came in a two pack with a black one and a white one. I have placed my dome cap on my mannequin head and marked where my ear tabs are as well as where i am going to cut the headband to add the velcro portion that you or that i saw in some of the headband wig videos. So now i'm just placing the headband on the spandex dome cap so that i can begin sewing it to the dome cap. I'M going to be sewing the middle portion of the headband to the very edge of the spandex dome cap. So now, i'm just beginning to sew the headband to the spandex foam cap all the way around. Until i get to that mark, i made past my ear tabs kind of behind my ear, which is where i'll stop, so that i can um cut the headband in the very middle of the back and then add the velcro portion later on. So this is where i ended up stopping this is where i made that marking and i'm going to finish this - i'm going to do the same thing on the other side and find that stopping place and then i'll add that velcro portion later so now that it's Time to make the wig i'm adding this black plastic bag, any plastic bag will do, and this is just to protect my mannequin head from the hot glue gun so that the hair is not stuck to my mannequin head and, as you can see, i am using This hot glue gun - and you have to be very careful with this, because that hot glue can get very, very hot, so i like to use my um popsicle sticks um to just kind of press the hair in place. As i go along very simple, this is a very easy process. I have probably done this maybe about five times like i'm, not a pro at it, but you know i just had to jump out there and try and that's what i did and i don't think it's very hard or difficult at all. As you can see, i'm using the flip over method, so i don't have to cut the track in order to reduce as much shedding as possible. You just kind of add the hot glue um in like a curved motion and just flip over the hair. Pretty much. I hope i'm explaining that right, um, so i'm just continuing on at the top of the hair and then you'll see me. Do this flip over method again, because i'm going to add that glue in like a little curved motion to be able to just flip the hair over and continue gluing it down. So now i've reached the end of gluing all the hair down, and this is what it looks like all the way around and i'm able to flip that headband up over that track area so that it's unseen, which works out perfectly. So i let it sit for about two hours to dry completely, and then i removed that inside plastic bag from the cap and washed and deep conditioned it off camera. I also sewed on the velcro part off camera and i use one of my wig grips because you know i have a ton of those laying around and then i also sewed in some hair combs, two in the front and one in the back for more security. So now i'm just going to liven up these curls a little bit by adding some water and then following that up with some garnier fructis sleek and shine intensely smooth leave-in conditioning cream, all right y'all. So i took you through how i actually made this wig um and, as you can see, it's really not a difficult process at all, even if you have never made a wig before ever as long as you can kind of get a needle through um, a headband And a cap and then just use you know i was trying to shortcut this thing for beginners. Specifically, i know most people have a hot glue gun already most people. If you don't you, you might have some hair glue. I don't know you can choose, but i figured this was probably the simplest way to make a headband wig at a fraction of the cost human hair. That is so. There are some synthetic options. As i know you have probably seen. I actually have a video of my own on some synthetic options that you'll see this coming friday, so make sure you check that out. There are a ton of different options, but there are people that specifically want human hair. So i wanted to make sure i gave a human hair option that you can actually make and save you some coins honey all right. So all of the hair that i use for both of the wigs they come from amazon y'all already know i'm an amazon junkie and you can find some of the best deals on amazon. I'M telling you don't sleep on amazon, so this particular hair that i use to make this wig comes from vr vogue and it's their brazilian deep wave. Human hair, 7a bundles and i use 16 inches, 18 inches and 20 inches, as you saw in the clip and the cost of those three bundles was 59.99. You can't beat that and then you can easily get a super inexpensive headband from your local beauty supply store. I think i paid like 1.99 for mine, if that it might have just. I had two a two pack, so it was 1.99. I think, but like you can get these things for a dollar just get you a regular black headband, and then you can just dress it up with a cute headband like i did here and like most people are doing anyway. Now the cost of you know some of these bigger names like my first wigs and i don't know the exact price, i'm just kind of um rounding from what i remember. I know it was almost like three hundred dollars and then some companies was like okay. Well, let me compete with that and come a little lower. Then it was like 260 280 and then i saw a company come down to like 2-4. I mean to me. I just can't, like that's 200 over 200 for a human hair, half wig with a headband. I was just like: no, i can't do it and they look so good. They really look so good, so i first saw brittany, aka the hearts and cake 90 reviewed this halfway. She was the very first person i saw reviewed. This had been wig and then it just was like non-stop videos of headband wigs, but you know, i guess maybe i just haven't found that company with the the cost efficient human hair headband wigs, so i wanted to just show that there are much more affordable options. If you just take the time to make one yourself, if you are not afraid of being creative and just jumping out there doing your little diy, this is for you for sure, save your coins. But if you got it and you want to splurge nothing against that either hey to each's own, i am not monitoring anybody pockets, i'm just giving options here. That'S all because i'm frugal and i didn't want to do it. So that's all. I personally feel like this unit was super easy to make um and i feel like any beginner can do it. So let me go ahead and show you this hair, i'm gon na do a little 360 for you real, quick and then i'm gon na transition into the kiki straight wig that i also made. So let's look at this one. All the way around this is the hair, like options are endless and like the headband wig itself is like. I don't know where we've been because half wigs have been out for like ever and all you had to do was throw a little headband on it and you would have been good to go. But but now they just put all this high cost on these wigs and i'm just not here, for it i'm not wet cost efficient. Let'S do it all right, so, let's dive into the other one, okay, so here's the un-packaging of this hair. It is from adoif fair on amazon, it is their brazilian kinky straight yaki, human hair, bundles in 14, 16 and 18 inches. The cost of these bundles is 58.99. This is what the hair looks like, which is absolutely beautiful, all right y'all. So this is the second wig that i made using kinky straight yaki human hair. I'M telling you when i tell you, i am a fan of a four double yeah. You got ta make the wig with the bundles, but if you're not afraid of that, this is definitely catered to you go ahead out. There take a chance and if you've never done it before first time for everything right, you got ta. Try at some point in your life right, especially if you love wigs and if that's just not your thing, i totally get that too. I totally get that too, if you rather just have the convenience, because i am a convenience chick as well. Have the convenience of just purchasing the wig as it comes, and you don't mind: spending 200 on a headband wig a great option for you as well all right! So let me dress this one up with another headband and it's kind of like the same type of headband, just a different color, all right. So i don't know if you noticed um. I kind of put this wig on a little different than the first one, because i wanted to showcase that you could put this wig if you make it or buy it all the way up to the top of your hairline. So you don't have to have any edges showing whatsoever. You can definitely do that. That is always an option in case you have alopecia or no edges whatsoever, that's an option. So it's for everybody. I feel like this is such a convenient style. This headband wig is excellent. I used to be so heavy into wearing half wigs more so when i was relaxed um i would just get a halfway leave my relax leave out out in the front and let it blend like that was my jam. So it's like these headband wigs are just like bringing back memories. It'S just like dang. I could've just been throwing a headband back on back in the day and now that i didn't, because i did yeah, i wore some headbands back in the day, but it's so cute. I feel like this is such a cute, go-to, quick and easy. All you got to do is slick your hair back and my hair is just slick back in a ponytail. That'S it. I did. This do some little swoop soups. I don't have a whole ton of edges. I really don't um because i just have super fine hair. I just i just ain't at it like that, but you know i did a few little swoop. Swoops you can or cannot. This is just an easy and convenient style and again to be able to make your own just makes it that much more cost efficient, sixty dollars for the hair, headband, no more than two dollars like versus like 260 and up for and again, if that's in your Budget, i am go for it and it's not that it's not in my budget, i'm just pro. I just i choose differently on what i want to spend my money on. That'S it, everybody chooses different. That'S it! No shade, no judgment on what you want to spend. Your money on we are, we all make our good earn money and we are able to spend it on whatever we choose. However, we choose - and i'm definitely here for that because i know i do 58.99 y'all, that's it and again i made it the exact same way as i did with the other one. The only difference the first wig because um you know most of the headband wigs - had the little velcro on the headband that you can just attach. With this wig i didn't do the velcro i just i left the whole headband attached. I didn't cut it and add velcro. That was much easier y'all. I don't know why i put myself through all that extra work. If you do decide to make this wig don't cut the headband when you sew it onto the cap. Leave it closed. It was so much easier this way that velcros, that's just extra steps for nothing. To be honest, but, like i love this, this could definitely give off the impression of my natural hair. Like this kinky straight, i love it y'all, it's not like super thick density. It'S like perfect y'all. I just think this is so cute y'all such a cute option, so i'm just gon na push this back again, like i had the first one and show you how it looks with my actual edges out and hair out more hair out. They they did something with these headband wigs. They have done something so many have jumped on this bandwagon, including myself, but i just decided to make my own. That'S the only difference but they're so cute and convenient. Oh, my goodness. It'S like perfect all right y'all! Well, that's going to conclude this video. Thank you all so much for watching. I do hope you found it helpful um with the making the wig tutorial. If you have any questions, feel free to just reach out and ask i am an open book. Okay, i'll be trying to hold no secrets. I'M an open book, please be sure to thumbs up this video hit that subscribe button. If you have not - and i will catch you guys in the next video bye y'all, you

Comments
More Keta: I'm all about saving my coins This tutorial was very detailed and I love how easy you showed the headbands wigs are to make. Let me pull out my hot glue gun and stop playing and make me one!! Love this!!!❤
Nyla Allure: Girl this was a lit tutorial, you really care through and I’m gonna have to catch up with you and ms Deanna on these headband wigs
Camelia’s Lane: Class is in the session! Amazing tutorial sis. I use love headband wigs when I had a perm. I’ve always wanted to make my own wig but I never got into it but with this tutorial I just may
KidzRRelevant2: Love love love this video. I'm a full alopecia victim and I want to thank you so much for what you have added to my ability to make my own headband wigs. I pray your channel grows and for great success on this platform. Ms. Tina
Danielle S.: Really great tutorial I’ve been watching a lot of these and I feel like you have the best of both worlds and I am all about quick and easy so the glue gun method for less expensive hair is right on the money for me☺️! ✌❤️
Adriana DosSantos: That’s so amazing!! You really perfected your craft and made a cute and creative and CONVENIENT wig I love that idea
Lotti Dotti63: Enjoyed the tutorial sis, you did an excellent job, looks great!❤️❤️❤️
As told by Bree: I just bought a headband wig off amazon. I wish I would have seen this first. Creative juices for the win . They both came out good. I’ve never been good with making my own wigs. I definitely want to try now. Your tutorial was very informative and easy to follow. I think my favorite is body wave one. I’m amazon junkie too. That was a good deal on the bundles.
April Newly Me: I love it! I honestly looks SO natural girl. You did that frfr. I want one now lol. I’m not even a wig girl but I would really rock this. Ps your make & ear rings are perfect sis. Overall so pretty.
Kay's Ways: Loved the curl pattern on the first but the kinky straight looks so natural like its straight out the root ♀️ So dope, I have been too lazy to create wigs, it’s been years at this point but I may have to grab me some bundles.
Shauna_Loves B.: Yes this is everything you make me wanna make another headband wig but with curly human hair. This is definitely a creative way and cute as well
drugqueens: I am really into DIYs and this one is the bomb! the end result is super satisfying. ☺️ I would definitely try the latter DIY headband ☺️ Thanks for the step by step tutorial ☺️
Krissie Christian: Love it sis. You slayed them bundles
BJ Jackson: You did a great job!! And so considerate of us sisters without edges ❤️. I am intrigued girl!! Love to spend my coins wisely. And I was thinking I would not cut the headband if it fit well girls we are on the same page . And I love the earrings
Fee-Bee Rome: Ok sis here watching and you know that I love a good DIY. Looks beautiful of course you are so creative and talented i love this. I am sure many ppl will enjoy this video like myself
Saving Mamasita: This was very interesting to watch! I am truly fascinated at your talent! I can see how a person could save a lot of money making their own headband wigs. $200 for a wig is insane!
DeAnna Monet TV: You are so creative Ebony this turned out really really nice and I love the headband you chose ❤️
Silky Saks: This was good. It looks really good and if you have the patience this is a great way to create the human headband wig. Love the hair
Raveen Cierrea: I love it! Very creative and you made it look so easy
Nizzy Mac: So creative!! Imma have to make me one I got bundles just laying around! Those earrings are super cute too!
Love Yourself: You did dat I really love the deep wave hair. They both are really pretty Great Tutorial. Very Awesome Job Blessings and Love
Krystal Mayfield: Great video sis!! I am making me a couple next week!!! My edges are thin and I love the idea of wearing the headband closer to my hairline. Im a Amazon junkie too sis...especially for hair!!! Did you use all 3 bundles for the units? Just Subbed
Do It With Rina: This was such a creative tutorial from where did you get the idea??? Using headbands to make a wig. I think this is so pocket friendly too because nowadays wigs are so expensive!!
Denise Michaels: You did a fantastic job and the wig looks great!
Dini J: Beautiful job and the best tutorial I've seen on making your own headband wig. I just subscribed!
DeeDee Hair: You are just so talented yesss loved them both
Ifa K Slays: Wow sis you are so talented boo!!! They came out beautifully!!!!
Queball0321: It looks great and the process looks like even I could do it.
My LovelyBeauties: Sidenote thumps up to the red background. Secondly, I found myself immersed in the tutorial. Need to get on Amazon and find me a glue gun first :). Need a couple more wigs in my collection and homemade seems like the cheapest option right now.
Karen DeVa: I will most definitely make one for myself. Thanks for sharing.
hillianthe bendt: Saved and subscribed. Thank you for being so detailed about it
Tacha's Society: That one thing i REFFFUUUSEEEE!!!! to buy is these headband wigs .. I said the same thing u can make these wigs ... You did a good job sis.. i been doing headband wigss for yearssss
Uniquely Vickie: Great minds think similarly. I have a DIY headband video coming later today! Congrats on your win on Trendy Kay's channel!
Fantisha Sherifa: Yes yes yes! I loved this video! U slayed the heaven outta this.
Tacha's Society: i am a fan of affordable sis i am here with ya! yess half wigs and my bandanna scarf babyyyy that was meee
Tracey Boyland: up a thousand times You did that. The Amazon hair deal is a steal. ♀️ to get mine now
Natasha Jones: Love the wigs was wondering did you use all the bundles? Thanks
Rina Mendez: First of all is that a paper background u get from amazon which yoi have used in the video? I love plain backgrounds and secondly, this is such a wonderful idea of making a wig youre really talented and u have explained so well about it
Ladyofvirtue247: Black glue sticks....I never thought about that! I was getting ready to see my life away...tfs!
B Cruisé: Omg I loove those earrings and the headbands are so cute
Ms. Andrea: Great job!
april G: Happy Monday I love this alternative on the headband unit because I will not spend that much if I can do it myself I really appreciate this video
Tasha Brown: Good job i also made my own headband wig but i used synthetic hair just to try it out but now i know how to do it im gonna get human hair thanks for tha infor on Amazon hair definitely will buy from them.God bless
anjanette cleggs: Good option for the frugal. Does the hot glue hold well?
Magikalblackness: Yes headband wig DIY